Tutorials

Misc-, Tutorials

Paper making tutorial

Sorry for the lack of posts recently, school is wrapping up so I've been busy with random papers, projects, etc. Hopefully soon I can start to post on a regular schedule rather than so randomly. Anyway, I finally had a little time to craft, so I decided to make paper. Exciting! Here are some pictures of my journey:

I took our paper scraps out of the shredder so I didn't have to rip up each piece of paper. I also soaked them for a few days... I meant to just soak them for 24 hours, but I got busy and I couldn't make paper for a while, so I had no choice but to let it sit there.

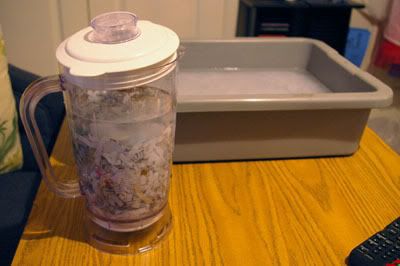
Fill the blender about halfway up with the paper mixture and then fill it up with warm water a little bit more than the paper. Blend. Pour into a tub that is already halfway filled with water.
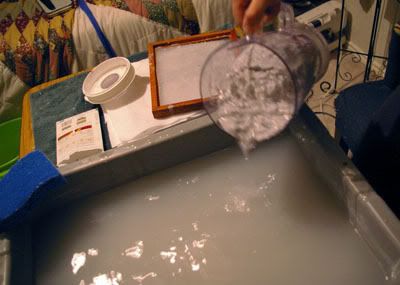
Mmm, yummy!

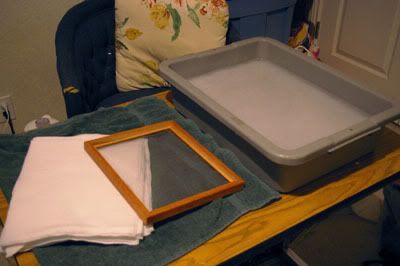
Here's what you need now.. your tub of paper-water, a few pieces of felt, a sponge, a screen and a piece of plastic that fits in the screen. I just made my screen with an old frame and metal window screen.

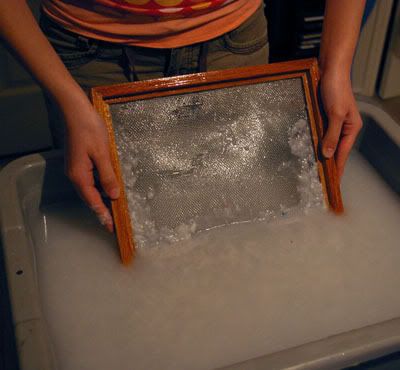
Put the screen in at an angle.. kind of like you're going to scoop up the paper-water mixture.
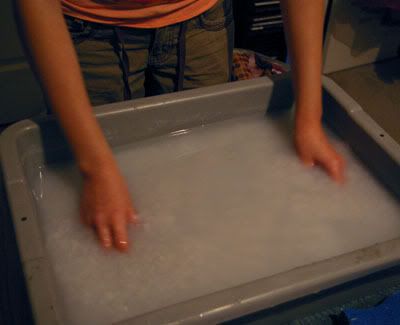
Straighten out.

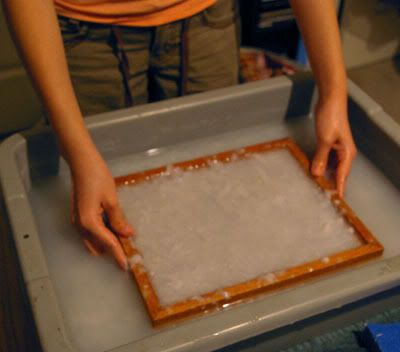
Pull the frame up slowly and as even as possible. Let the excess water drip out and put your plastic on top of the screen.

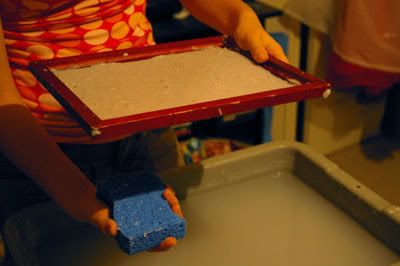
This part you would need two people.. You would really have someone holding the frame, and the second person putting one hand on top of the screen and pushing the sponge against it from the bottom to push the water out. Every few pushes you'll have to wring the sponge out.

Peel the plastic away from the paper. If it sticks at all then the paper has too much water in it still and you'll need to keep pushing it out. If it doesn't stick, and you get the plastic off the paper, flip it out onto one of the pieces of felt.

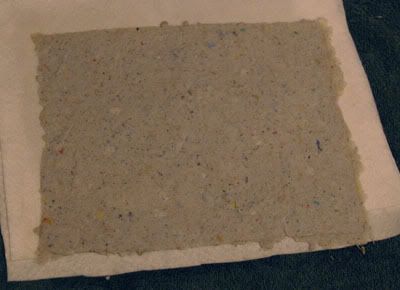
Like so. Put another piece of felt over this one.

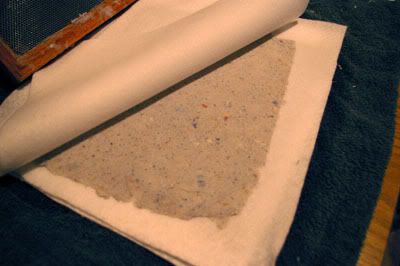
Repeat and repeat and repeat until you're all out of paper pulp! I believe I got about 20 sheets from this batch. I put pressure on the stack of paper to get the extra moisture out. A lot of places recommend hanging up each piece with clothes pins at this point.. but I didn't only because I don't have any clothes pins :(

A stack of paper! ..wow, this picture is kinda green.

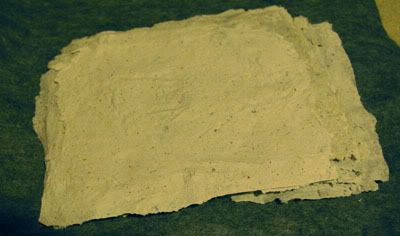
I'm planning on making a book out of some of these pieces of paper.. They just take forever to dry if you can't hang them! Making paper is pretty fun, you can experiment with different colors of paper, different consistencies, etc. Mine has a few random flecks of color and text dispersed throughout the paper, but I didn't really mean for it to happen.. I figured that after soaking for forever the paper would be broken down enough that it would be mostly gray. I'm happy with the result though.. it was a happy accident. :)

Purse/Bag, Tutorials

Cassette tape tutorial

A few days ago I posted about my cassette tape wallet and how it's held up over the past 10 months, and I promised a tutorial. Well here it is!

First you need to get your hands on a cassette tape. For my first wallet I already had those at my house, but for this one I ordered them from American Science and Surplus. These ones were screwed together, so it was super easy to take them apart. My first one was glued together, so I had to carefully pry the pieces apart with a flat head screw driver. If you have to separate your tape like this, be very careful. I cracked one in half because I was trying to rush it :( Some are glued up pretty good.

Here are the pieces together. The zipper is 9 inches and I just placed the two pieces of the tape over the inside fabric to see how big it had to be. Like so:

But you still might have to cut it down a little more than that, so it fits snug inside. I actually ended up using a piece of red felt for the inside rather than this hot pink jersey material. The felt was thicker and I like how the thicker fabric looked better than the thinner jersey.

Take some pliers and go to town on the little pieces that stick up on the inside. Be careful as you get to the pieces close to the edge, you might end up taking a whole chunk of the outside of the tape as well. I almost did a couple of times! You could use a Dremel tool to do this part.. It's what I used for my first cassette tape wallet, but I wouldn't recommend going that route, because it resulted in many tiny burns all over my arms and whatnot from molten globs of plastic that shot at me from the Dremel.

Now here's the fun part.

Take your zipper and slowly start to glue it to the inside of the tape. I use the glue E6000. I'm pretty much in love with that glue, it works so well. Some people have recommended using hot glue because it doesn't take as long, but I don't think it'd hold as long as the E6000 has.

Anyway, as you glue it in, only apply glue to about an inch and attach the zipper, and hold it for a few minutes. Make sure the zipper foot has enough room to easily zip and unzip. Rinse and repeat until you've made it all the way around. If you don't hold it down and wait for those few minutes, the zipper and tape will come apart and result in much frustration and glue-fingers. As you see here, I have quite a bit of zipper left over, so I just ended up making it go a little further onto the bottom of the tape. On my original tape the zipper ended up fitting perfectly, I don't know what the deal is with this one! You should do this step with the zipper unzipped or else you'll end up having to really carefully unzip the stupid thing when the glue hasn't cured all the way.

Here it is unzipped. Glue on the other side of the zipper to the other cassette tape half.

Here are the two sides all glued in.

Slather your glue of choice all over the inside of the tape and apply the inside fabric. Press it down with some pressure and hold for a minute or two, and that should be fine.

Now, I recommend not to touch this thing until at least 24 hours have past. If you don't you'll regret it because if you don't give it at least 24 hours for the glue to cure, it will probably fall apart a lot faster.

Here's the finished product. I painted it with enamel paints :)

I ended up giving this one to my little sister. She's had a good birthday weekend. If anyone has any questions about this tutorial, please feel free to ask!

Purse/Bag, Tutorials

Oldie but goldie: Towel pool bag

Summer is approaching, so I thought I'd share a project I did a while back which would be used at the pool or beach. Basically it's a beach bag, but it's also a towel! It folds up into itself (much like a quillow) but it has handles that make it into a bag. You can throw in your sunscreen, flip flops and other goodies you'd bring to the beach and/or pool. Here's mine:

Like any cat owner knows, if you spread out something on the floor and then try to take pictures of it, they come and lay all over it. That's my cat, Ewok.

Here it is folded into itself.

Here's the other side.

Tutorial!!

You need a beach towel, and another towel. I don't think I had a regular towel.. I grabbed a towel that wasn't as large as a normal towel, but it was bigger than a washcloth. If anyone knows what it's called, please educate me! :)

Here's where you cut it up. I believe the strips 2 and three were about an inch and a half to two inches.

After everything is cut, stick the biggest piece, number 1 on top of the beach towel, with equal distances on each sides, and sew up the three sides that have the red zig zags on. Also, you may want to hem the two handle pieces at this point.

Attach the two handles wherever it's comfortable, and sew them up!

And your towel bag should be complete! to fold it into itself the "correct" way, flip it over so you can't see the other, smaller towel, fold up the two sides towards the center, and then fold up about the same size of the smaller towel from the bottom. When you get to the top, flip it inside out. (like a Popple, haha)

Sorry if my folding instructions aren't that great.. it's kind of hard to explain. You could just stuff it in without all the neat folding.. which is what I usually end up doing.

Now, you may say, "Hey, but after I get out of the water and towel myself off, my towel will be all wet! What about transporting my stuff back home?" Well, if you think about it, almost everything that you carry in your bag gets wet, from sunscreen to sunglasses, so as I see it, it doesn't matter if you throw those things into a wet bag. As long as you take everything out, unfold it and let it dry when you get home, it should be fine. :) For those of you who take magazines or anything else that would not fair well under moist circumstances, then I'm sorry, this craft may not be for you unfortunately :( But you can still make them for friends! :)

Purse/Bag, Tutorials

My first post and new travel set.

This is my first official post since this blog was created, and I'm oh so excited. I hope you guys like it! I decided to make a travel set the other day after being inspired to make a straightener cozy by gatheringtwigs over on Craftster.

Here's everything together:

Forgive me for the dirty mirror, I was too excited to take pictures that I didn't think to clean it up first!

Here's my straightener cozy, I made it with an oven mitt that should have been thrown away years ago:

Here's a progress shot that shows the poor worn out oven mitt.(I seam-ripped around it, it wasn't in that bad of shape, it was just burned a little.)

Here's the finished product with the straightener tucked inside.

After I made that I decided I needed a new makeup bag, and I had plenty of the outside fabric left over. I remember seeing a tutorial somewhere on Craftster about the same kind of style of makeup bag that I was going for, but I don't remember where it is so I had to kind of wing this one. I'll probably write up and post a small tutorial in a few days. For now, here's some pictures.

Here it is, all zipped up with stray threads hanging out everywhere. I promise I cut those off after I took these pictures! :)

Here it is, opened.

After I finished the bag, I decided I wanted to make one last thing to make it a complete set. I ended up using a cubicle mirror I had gotten from a mystery box I purchased at American Science and Surplus. (Great store, you should check them out) I cut a piece of fabric to size, sewed up the sides , fit the mirror in and glued it in place. I wish I had taken more pictures of the progress of the mirror, but I wasn't even sure if it was going to work at all! Perhaps I'll draw it out and post a tutorial for it along with the makeup bag.