tutorial

For the Home, Other, Tutorials

DIY Faux Plant Desk Decor

This week I'll be showing you how to make some cute faux plant desk decorations. I decided to make these because my sister got her first internship and she needs decorations for desk at work! First I'll start off with the grass. I thought it could make a pretty neat looking pen/pencil holder. I wanted it to be long, so I'm going to cut the grass chunk in half.

-fake plants -scissors -sand -styrofoam -hot glue gun -pots -balsa wood -xacto knife -saw -paints/finish -ModPodge

First I'll start off with the grass. I thought it could make a pretty neat looking pen/pencil holder. I wanted it to be long, so I'm going to cut the grass chunk in half.

Now onto the succulent plants. I decided to make a little trio.

And now they're done!


Nails, Tutorials

DIY Nail Decals

This week I'll be showing you all how to make your own custom nail decals. I know this isn't a super unique tutorial, but I figured I'd still make it because it's something that I enjoy doing, and maybe someone will learn something new from my tutorial. You never know, someone might stumble upon this post and it's the first time they've seen this technique! Or they could be like me and before doing a specific technique, they research the crap out of it, looking at multiple tutorials so they can pick and choose which techniques to use to fit their needs. The list of supplies for this project


Step 1I eyeballed the size and shape of my nails and drew them out onto a piece of paper. If you do the same, you can draw your design inside of the nail like I did for two of these nails.

I wanted to paint a floral pattern on the rest of them, so on the right you can see some little  sketches I did to use as a reference. You could totally just pull up a reference from online, or a book, etc.


Step 2Cut the paper so it can fit inside of the bag and stick it inside.


Here are the steps I did for this specific floral design.


Step 4Once the design was dry, I coated each one with some top coat.


Here are some more examples of different decals you can make.


Step 5Remove the decals with your tweezers and, if needed, trim them to size. With mine I painted over the lines I sketched out so I had to trim quite a bit to fit them to my nails.


Step 6Paint your nails with your base coat, and then one coat of your background color, if you're using one. Let those dry completely, and then apply a layer of top coat, or as in my case, another layer of the background color.


Step 7Let it dry for about a minute or until it's tacky and then stick the decal on.


Step 8Gently pat/smooth it down. Repeat for all of your nails.


Step 9Finally apply another coat of topcoat, making sure to hit all the edges to seal them up.


Finished!And here they are all finished!


I hope you enjoyed this weeks tutorial! Stay tuned next week for more~


Art, For the Home, Tutorials

DIY Paper-cut Light Box

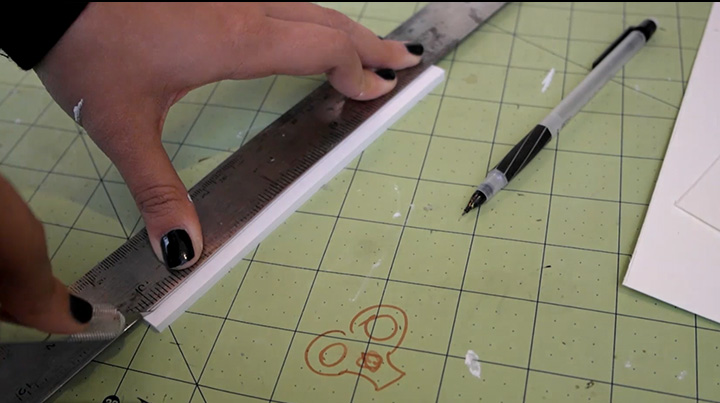
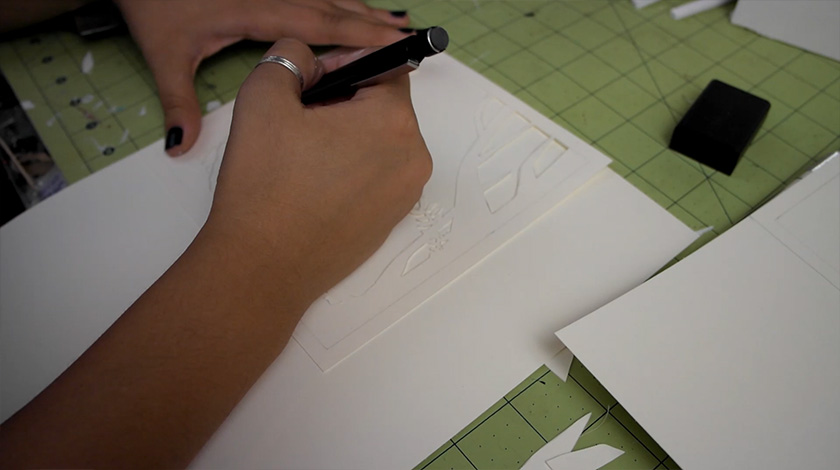
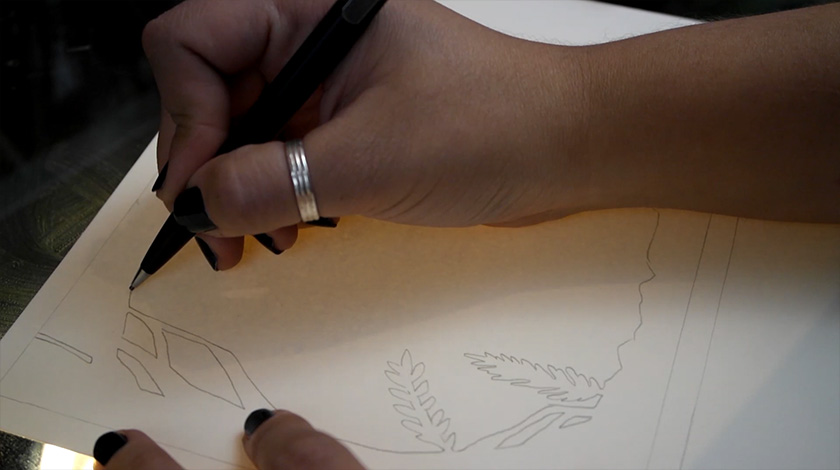
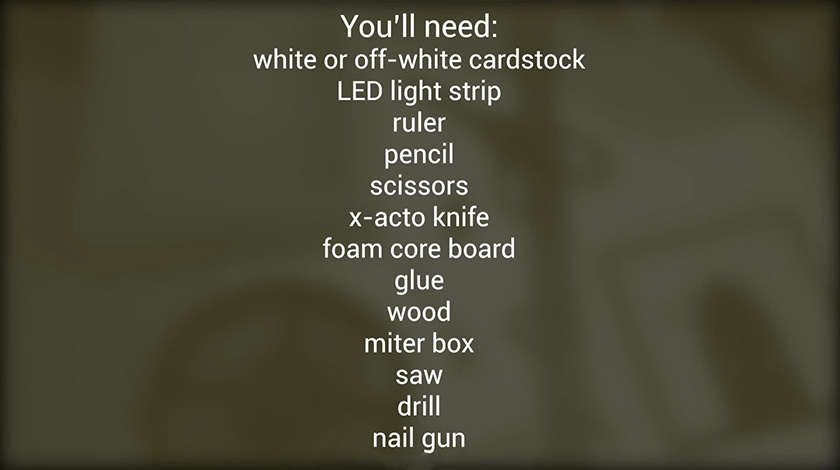
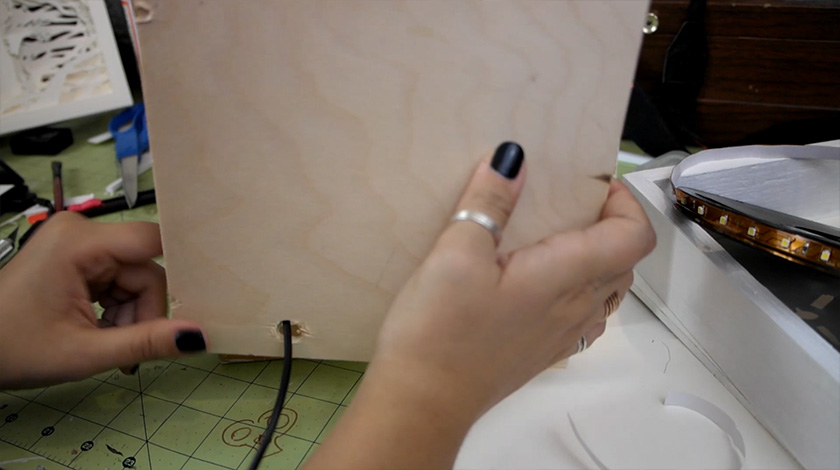
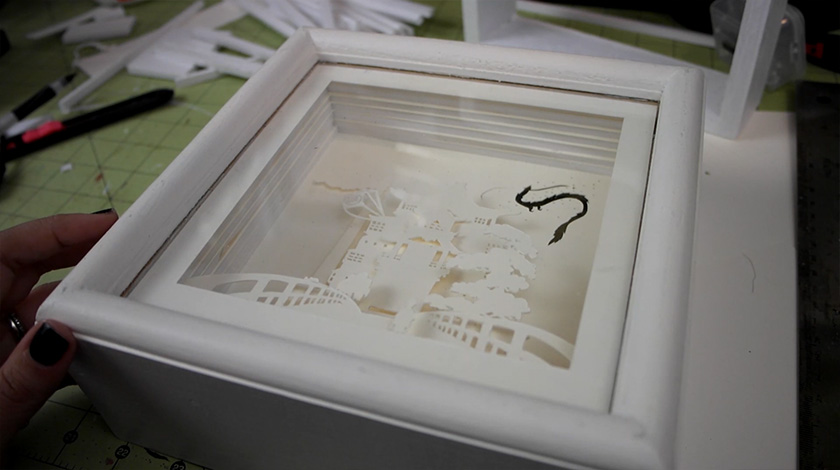
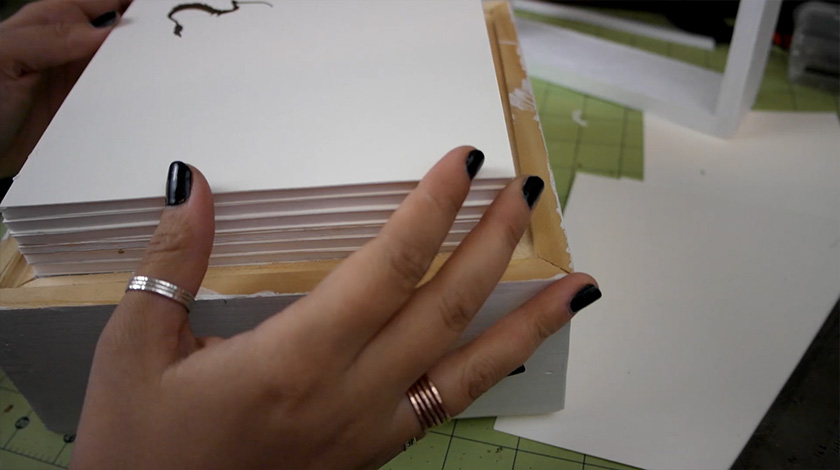
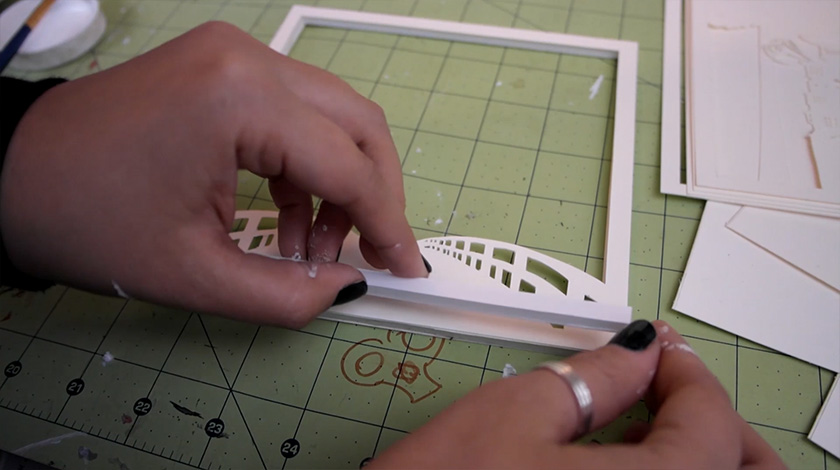
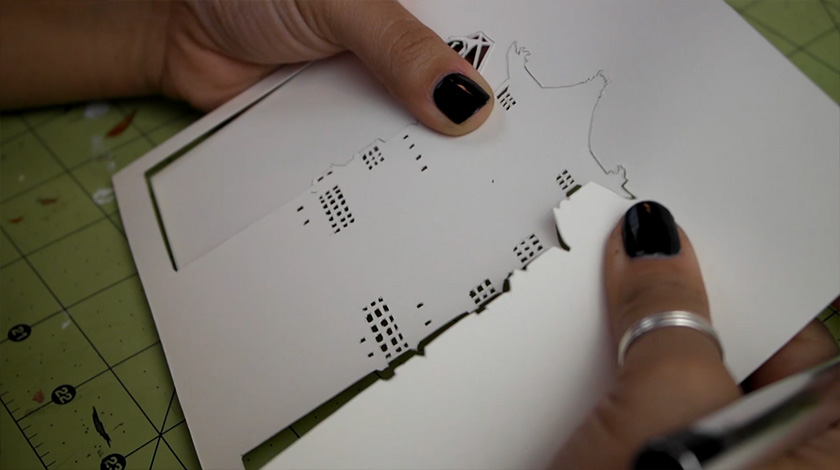
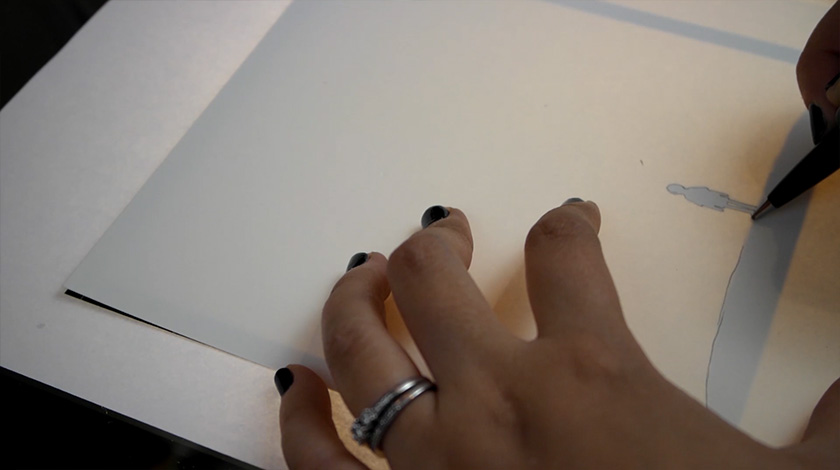
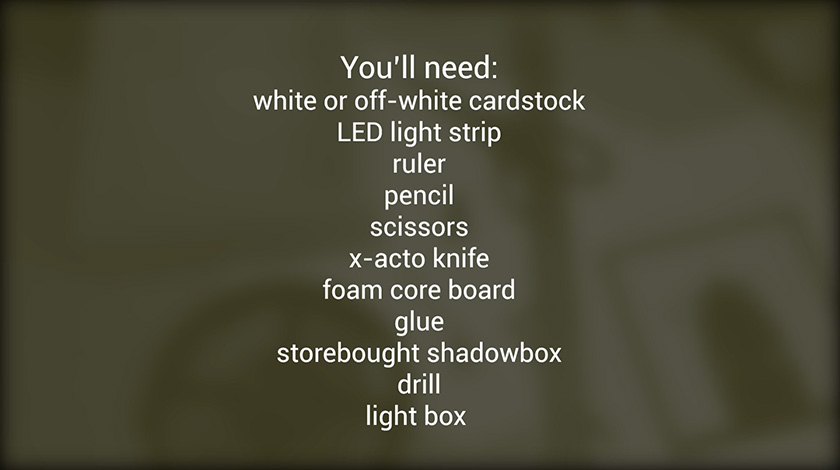
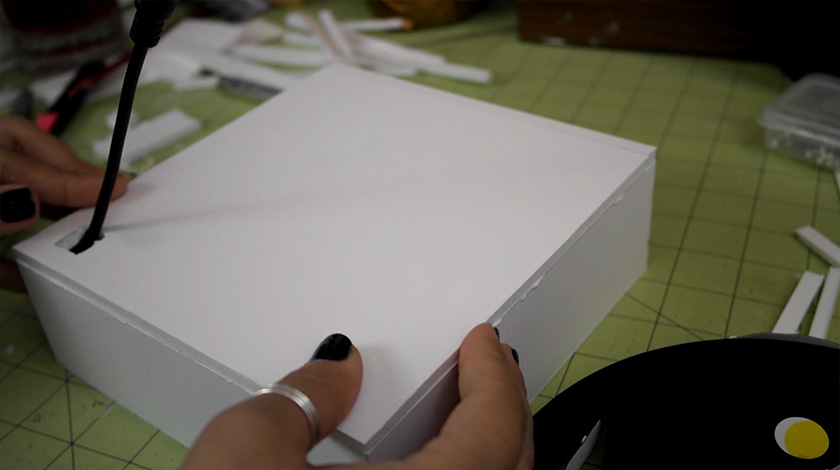
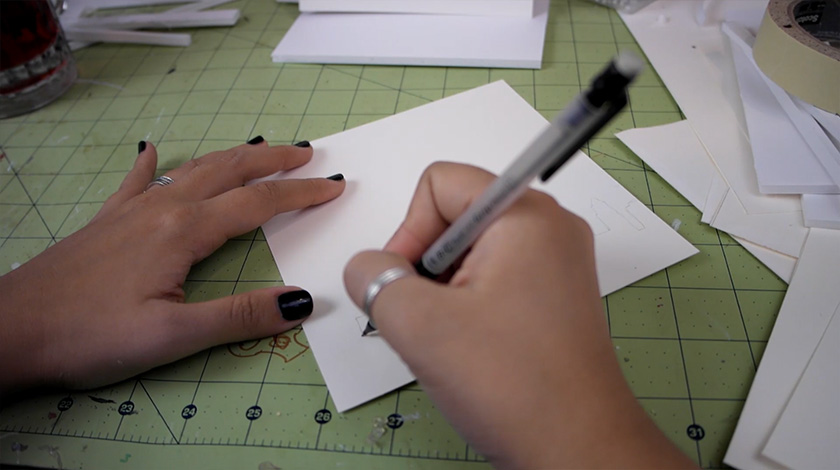
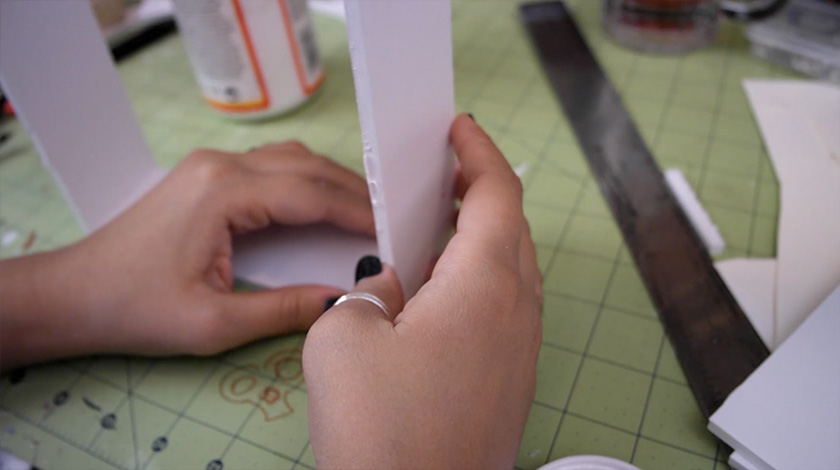
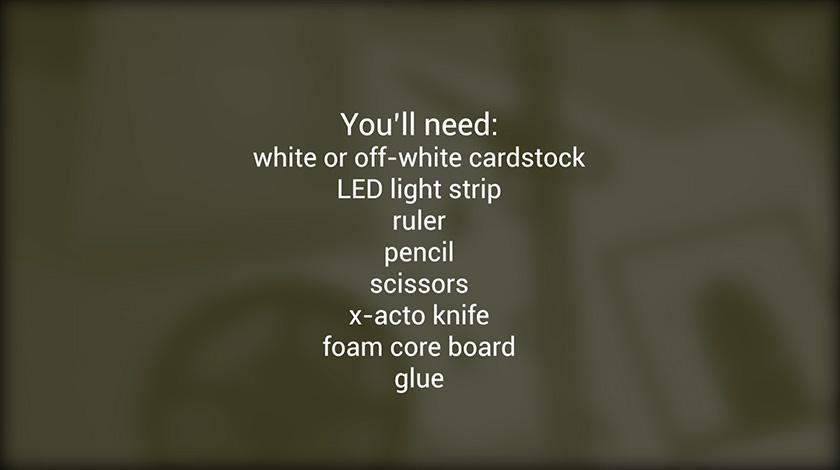
I recently saw some awesome artwork by these artists Hari and Deepti and I was very inspired to create some of my own. I threw together three tutorials; one is advanced, one is intermediate and one is easy. Check out the video below, or continue on after the "read more" tag, to figure out how to make your own!

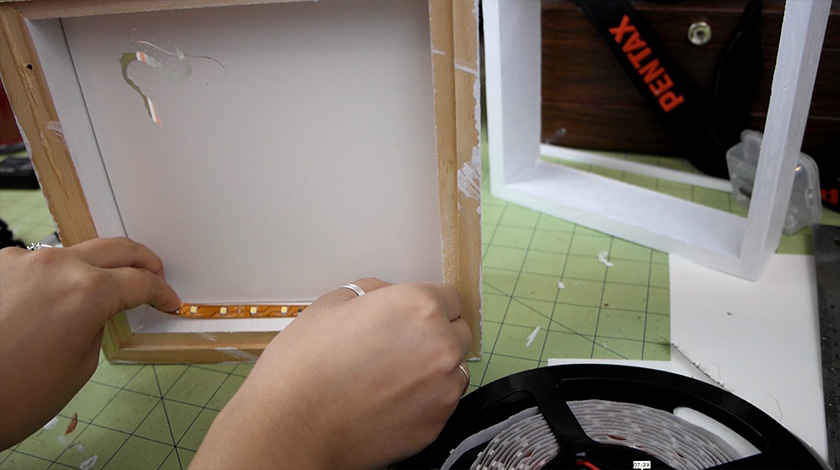
A quick note about the lights I used in these light boxes. These things are great; you can cut them to size and they're self adhesive. Perfect for any project requiring a little bit of lighting. If you want to buy some for your own projects here are some affiliate links for the lights, extra connector things and power cords. If you don't feel like buying these things you can probably just use some Christmas lights, but the downside to those is that you'd only have a tiny bit of the lights inside the box, and then you'd have a long tail of lights hanging out of it. Unless you build a big box to accommodate a whole string of lights. Which would be awesome.

Advanced:

Advanced!


Mouse over or click on the images for instructions:

Intermediate:

Intermediate!


Click here to download the template for this one.

Mouse over or click on the images for instructions:

Easy:

Easy

Mouse over or click on the images for instructions:

Finished!

So there we go! Three different light boxes, three different levels of difficulty. I hope you all enjoyed these things, I'm pretty happy with how they turned out, and I'm already planning a few more to make!

Holidays, Tutorials

Sea Urchin Ornaments Part Deux

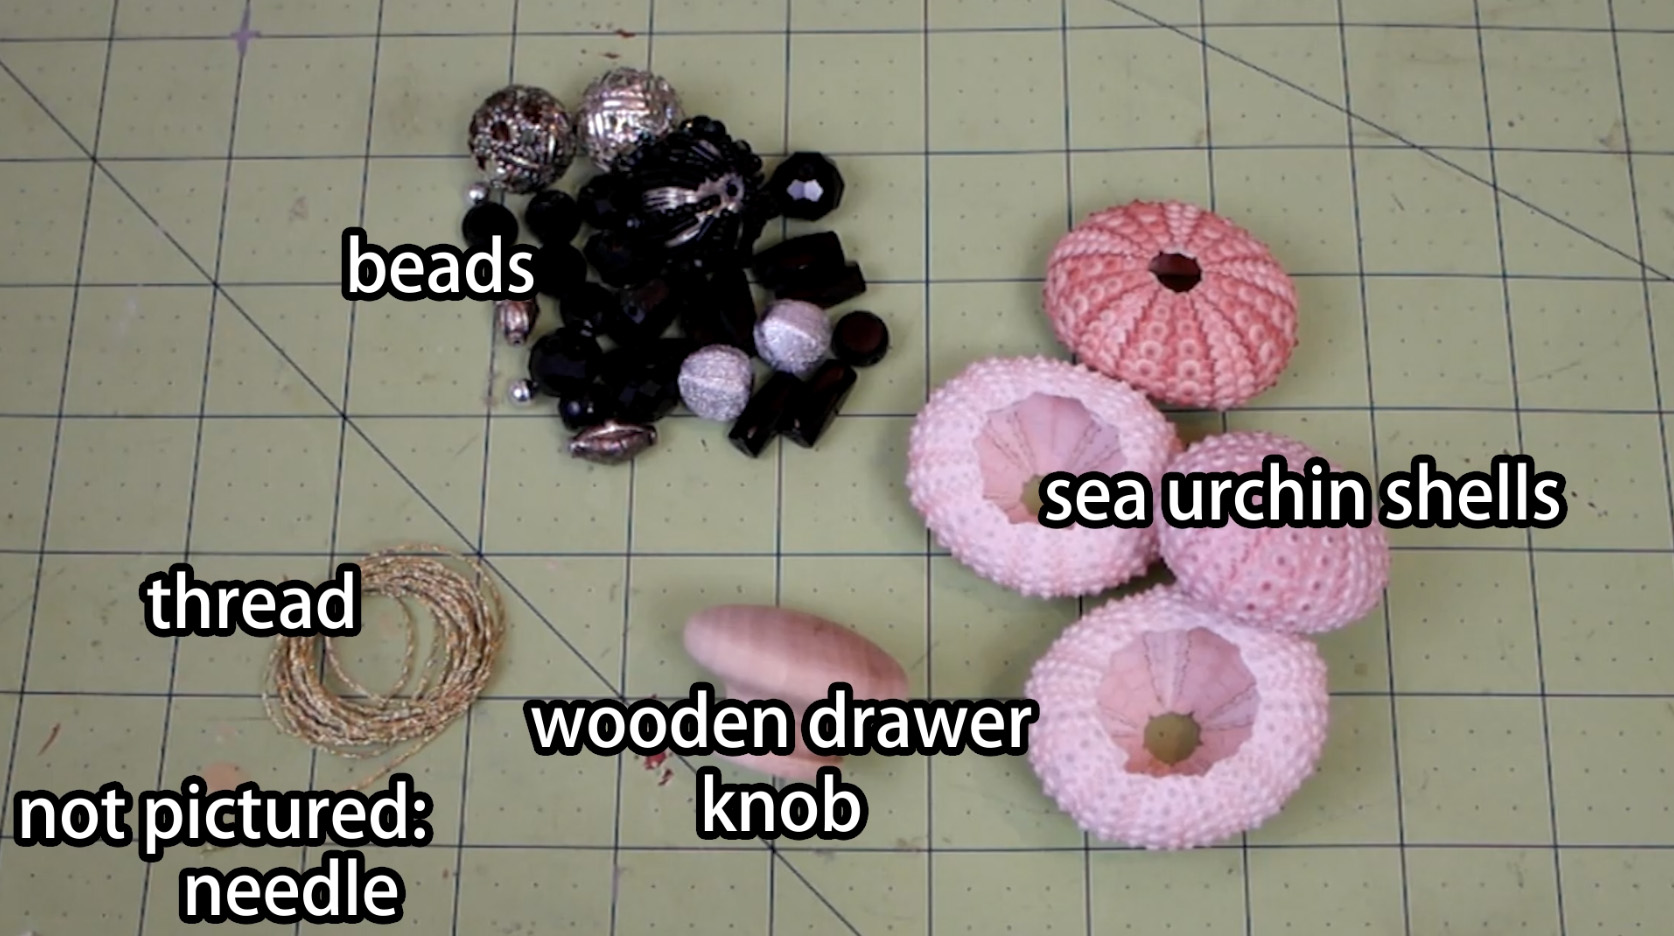
Yesterday I posted a video of me making an ornament with a sea urchin using a lathe to turn the parts for it. I realize not everyone has access to a lathe, so I decided to put together some sea urchin ornaments using materials that a lot of crafters would have but also would be easy to find at your local craft store. A little video summary will follow!

I will be doing a giveaway for the wood turned ornament from yesterday, so if you're interested in that, click here for more information.

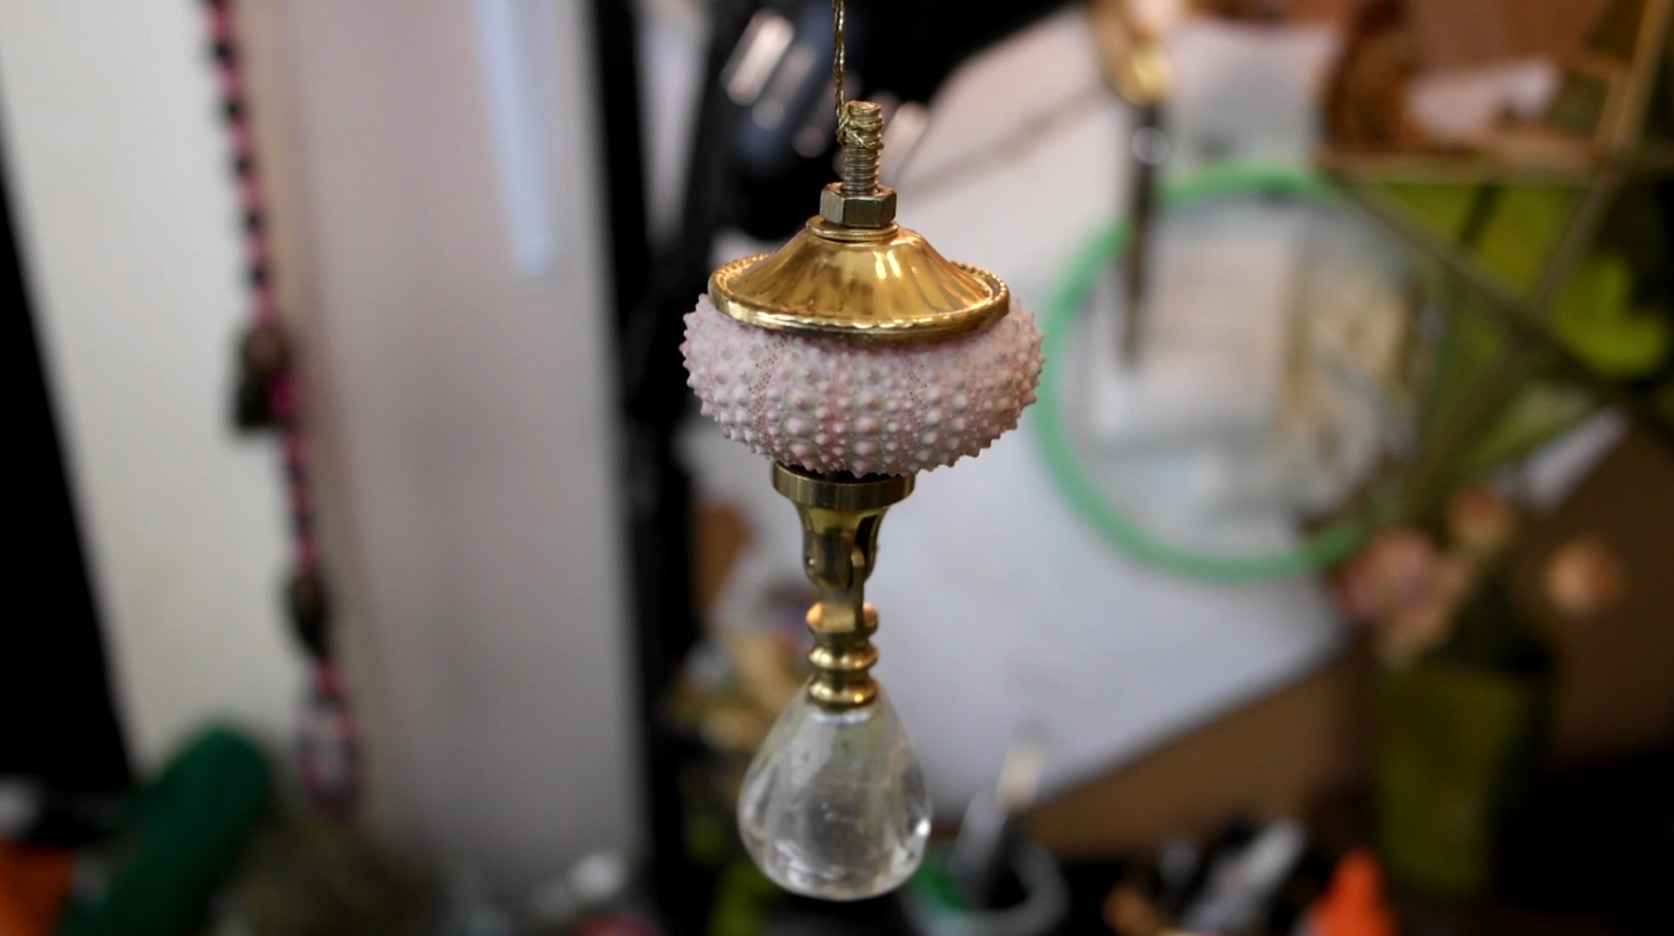
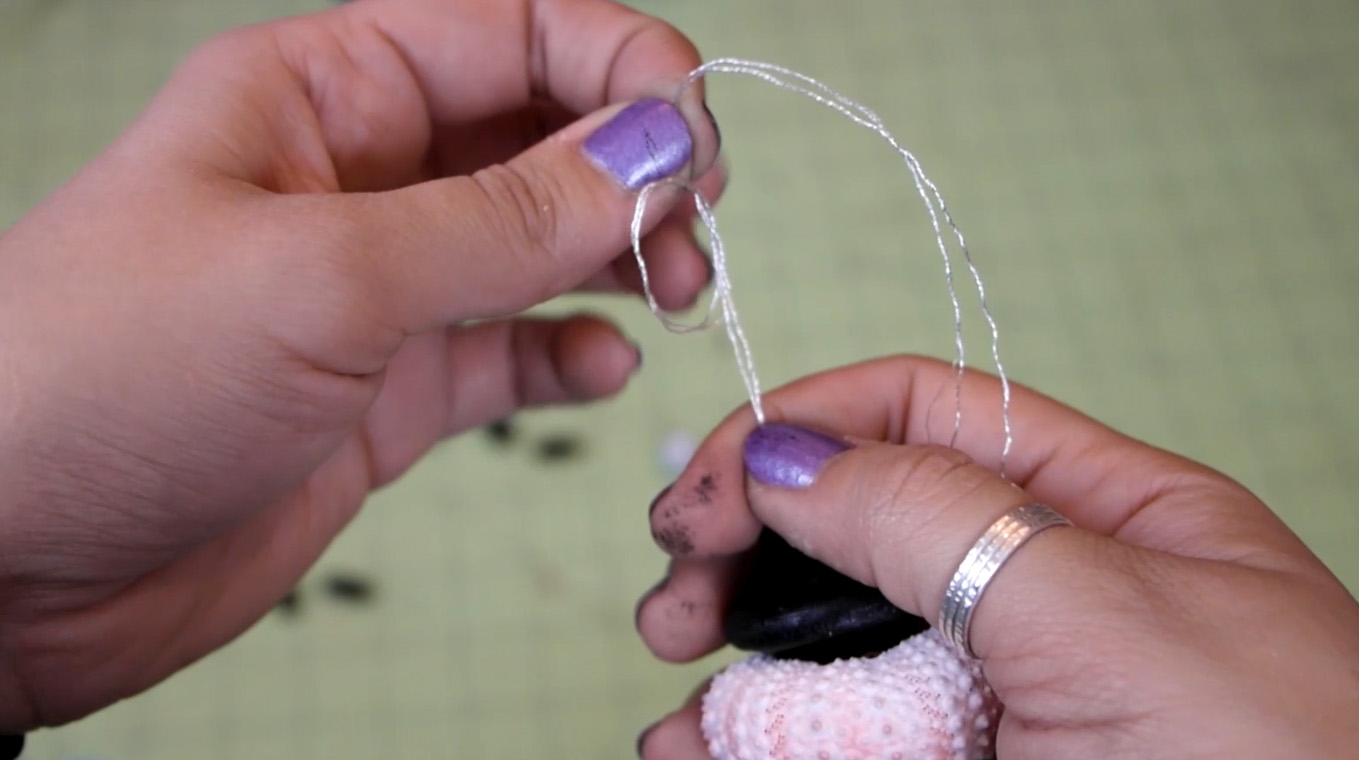
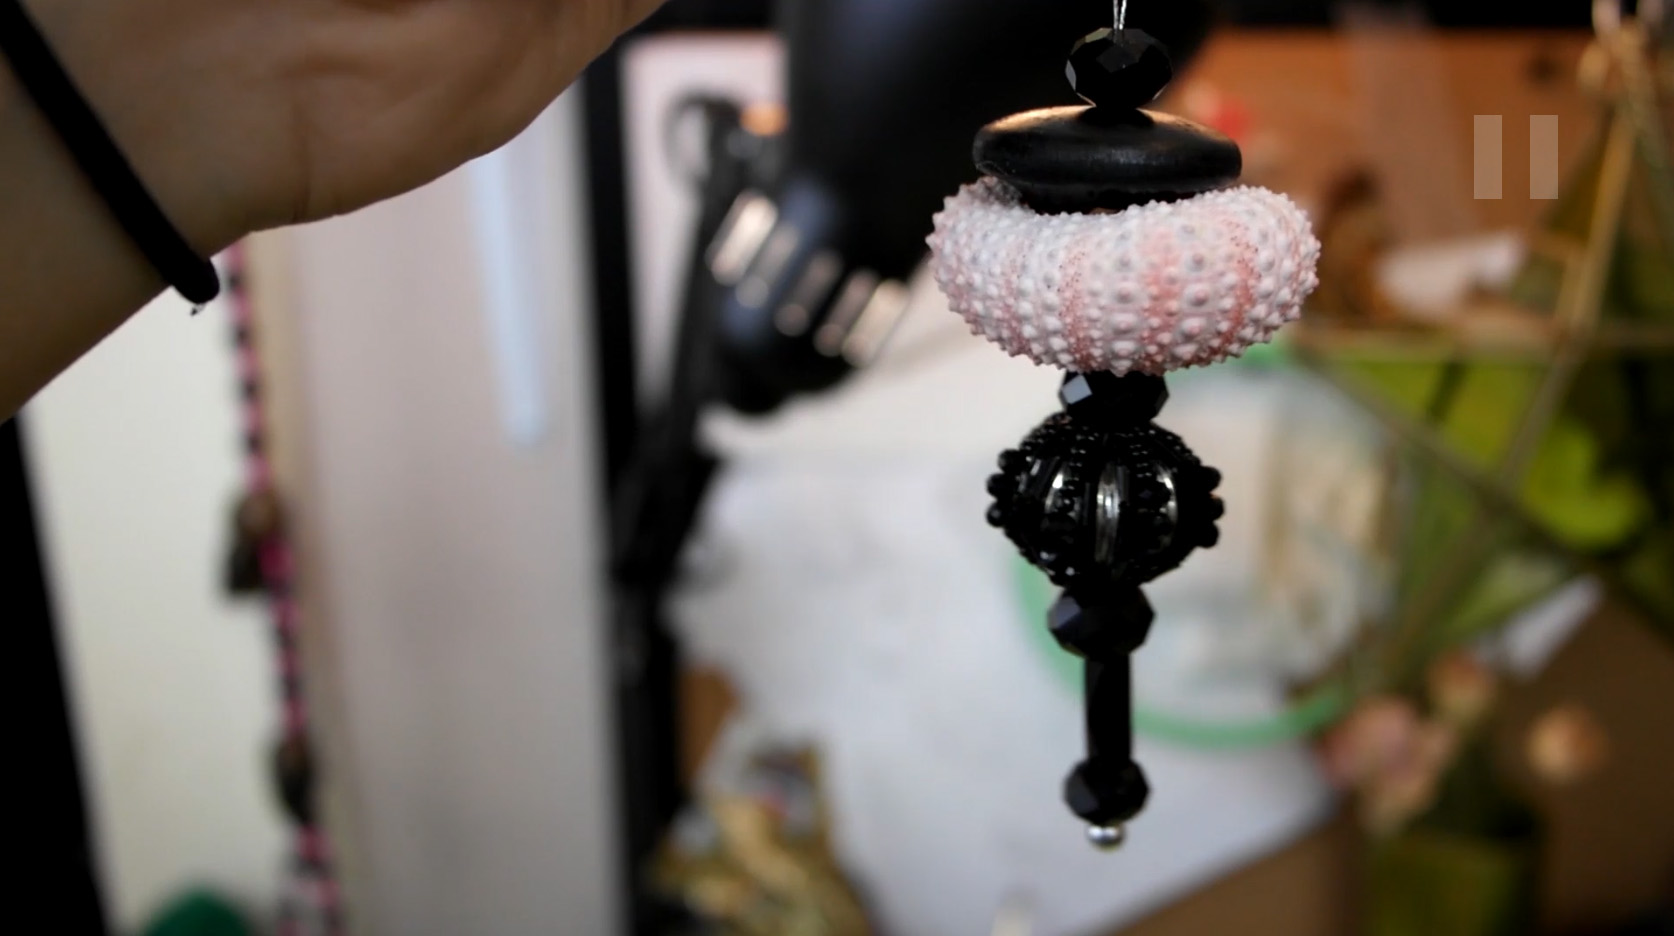
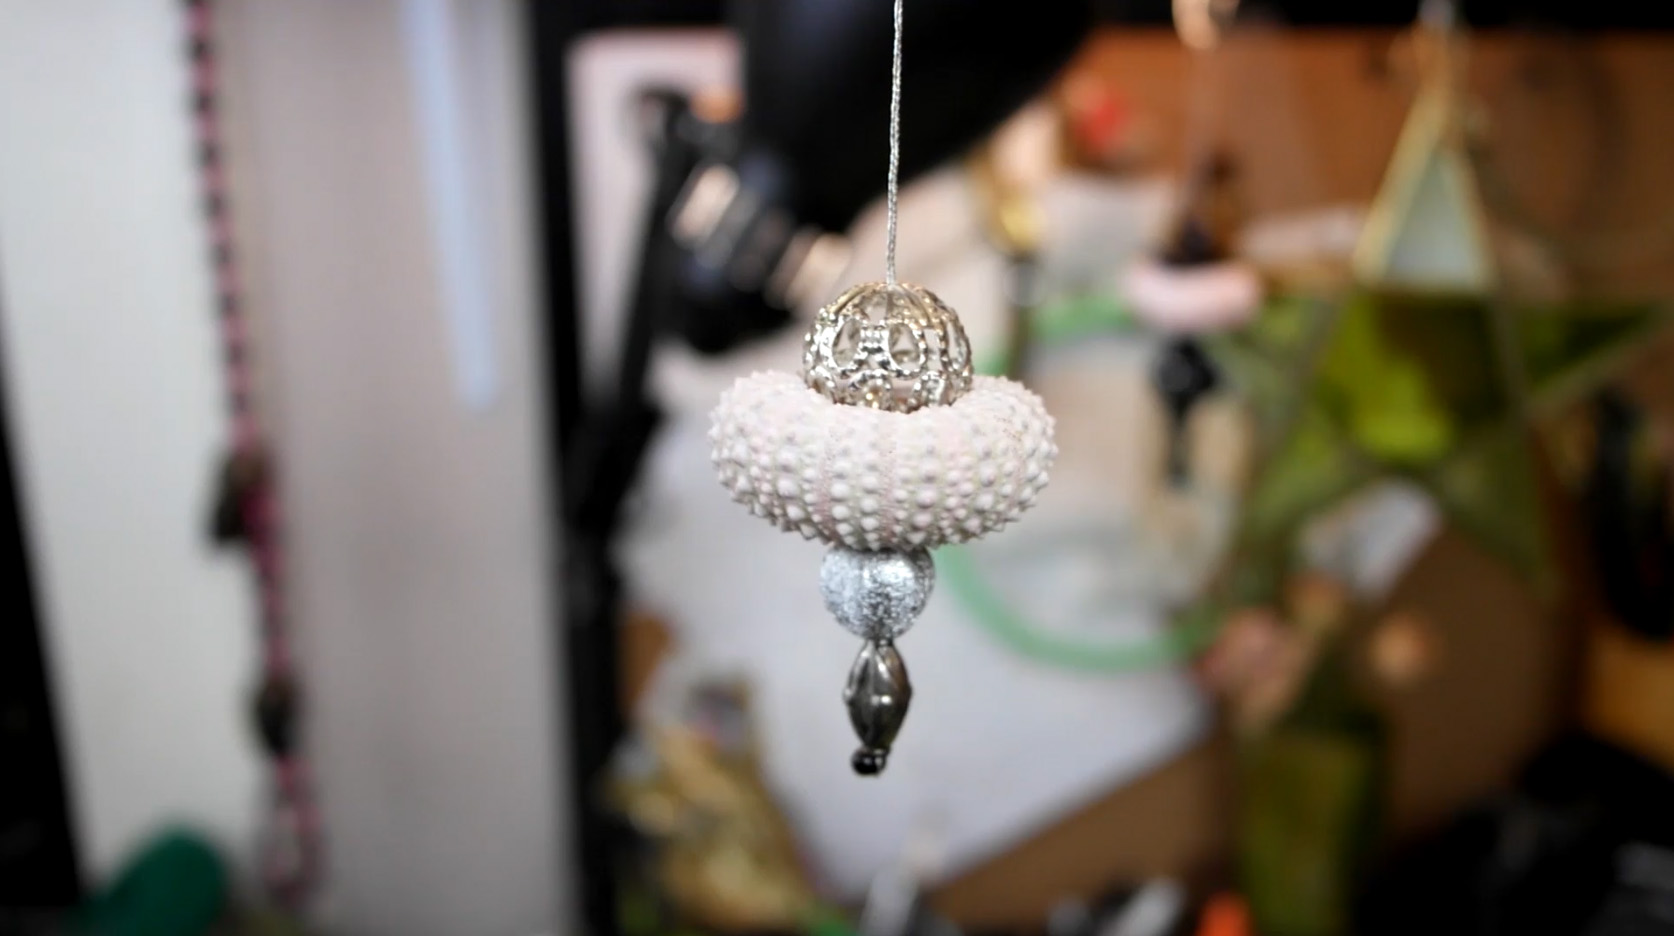
I made two different kinds of ornaments.  One using a drawer pull I bought at my local craft store, and one using beads.

Drawer pull ornament:

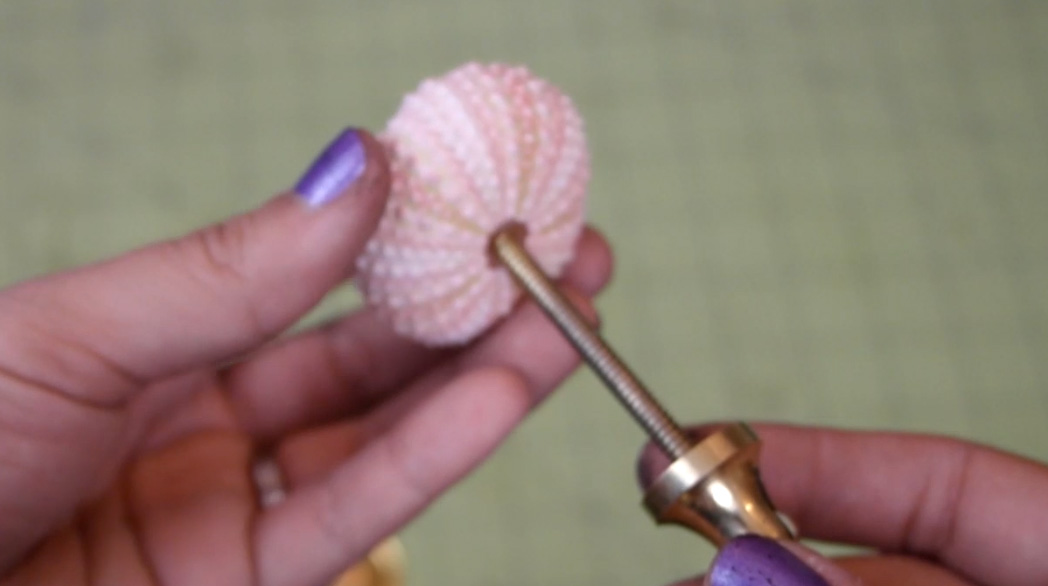
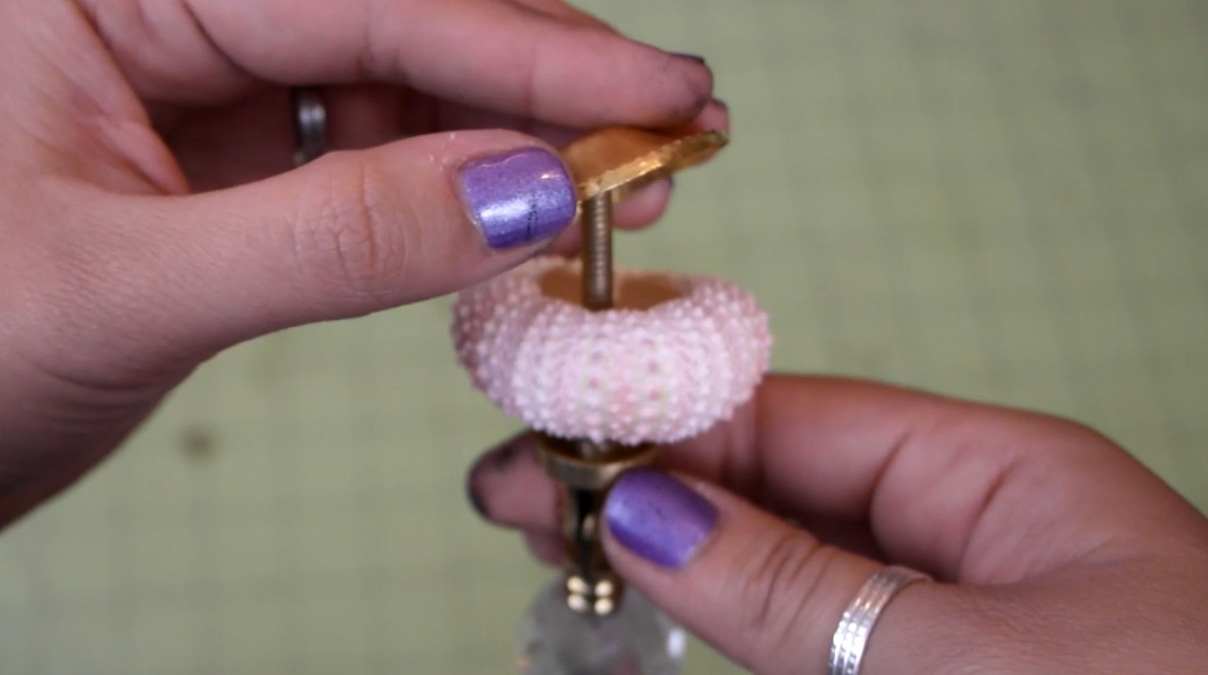
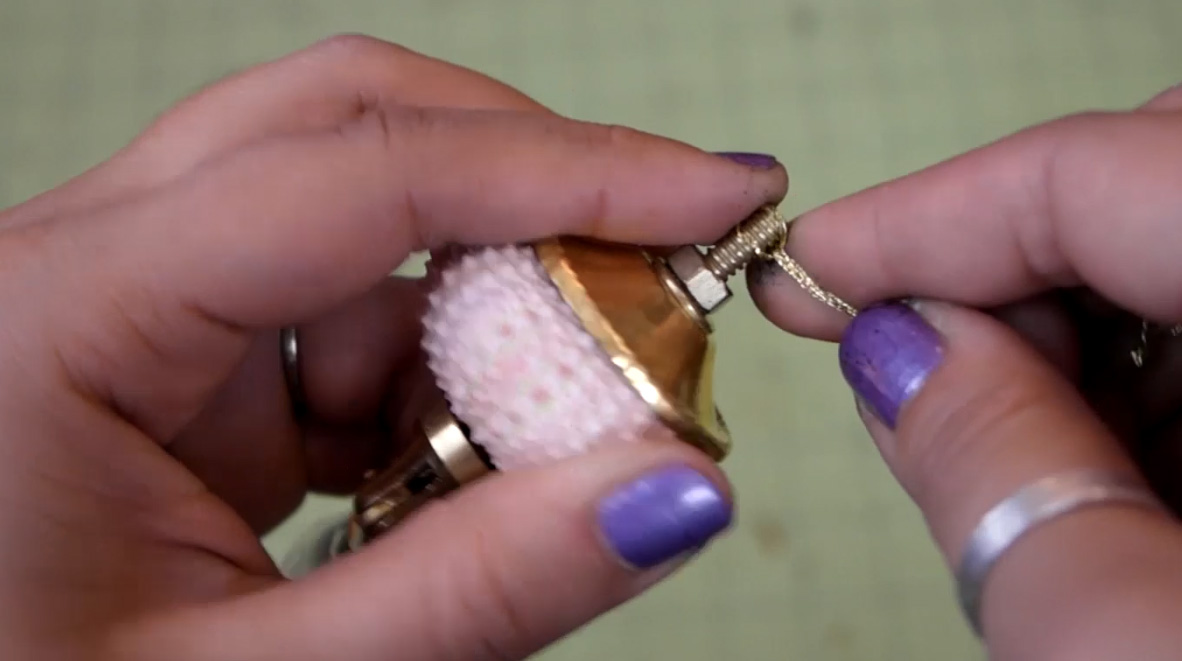
This is by far the easiest method. You're basically just screwing the drawer pull together around the urchin.

Hover over or click on the photos for instructions.

Bead ornament:

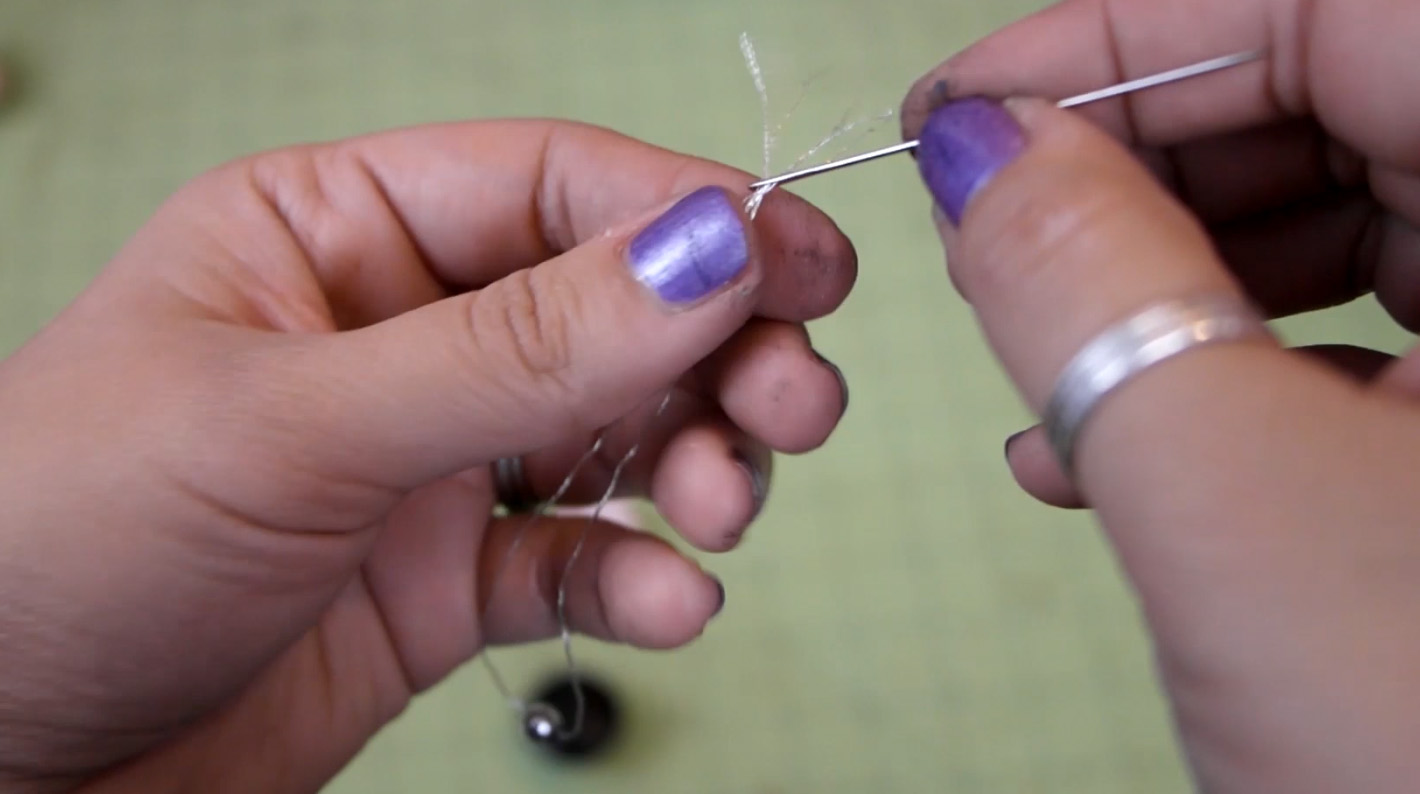
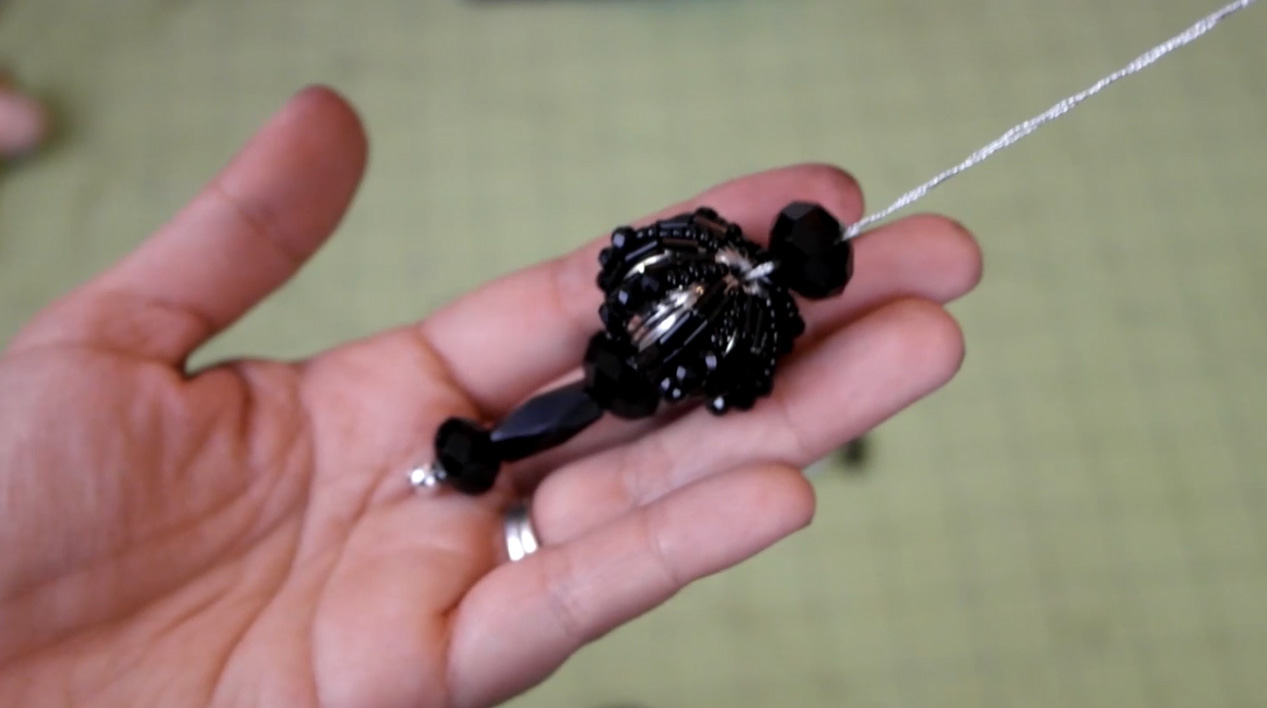
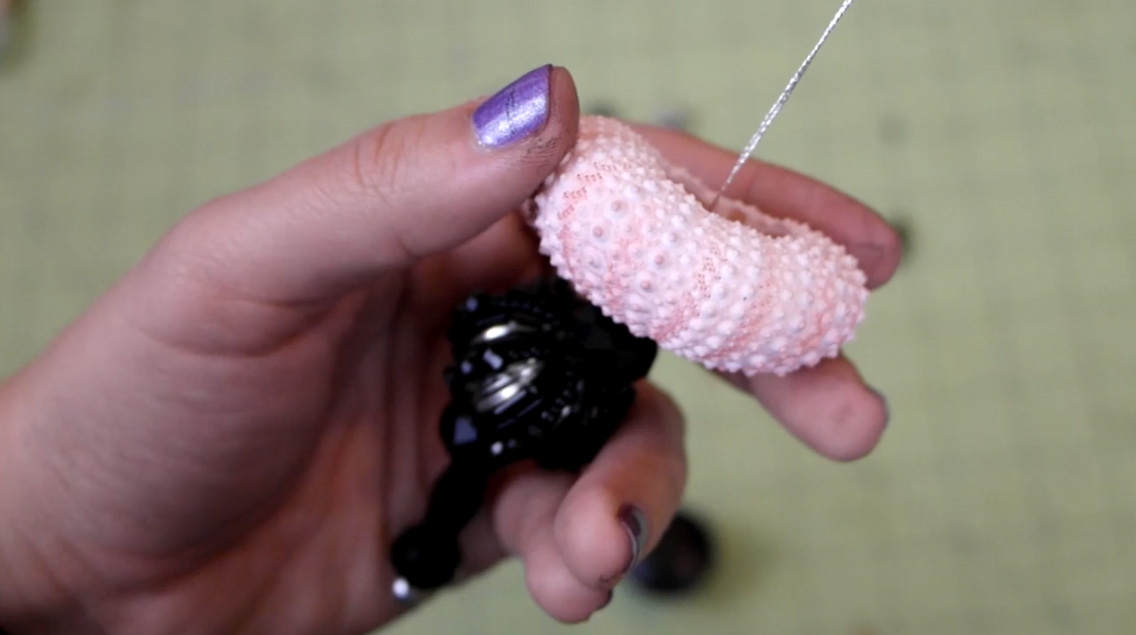
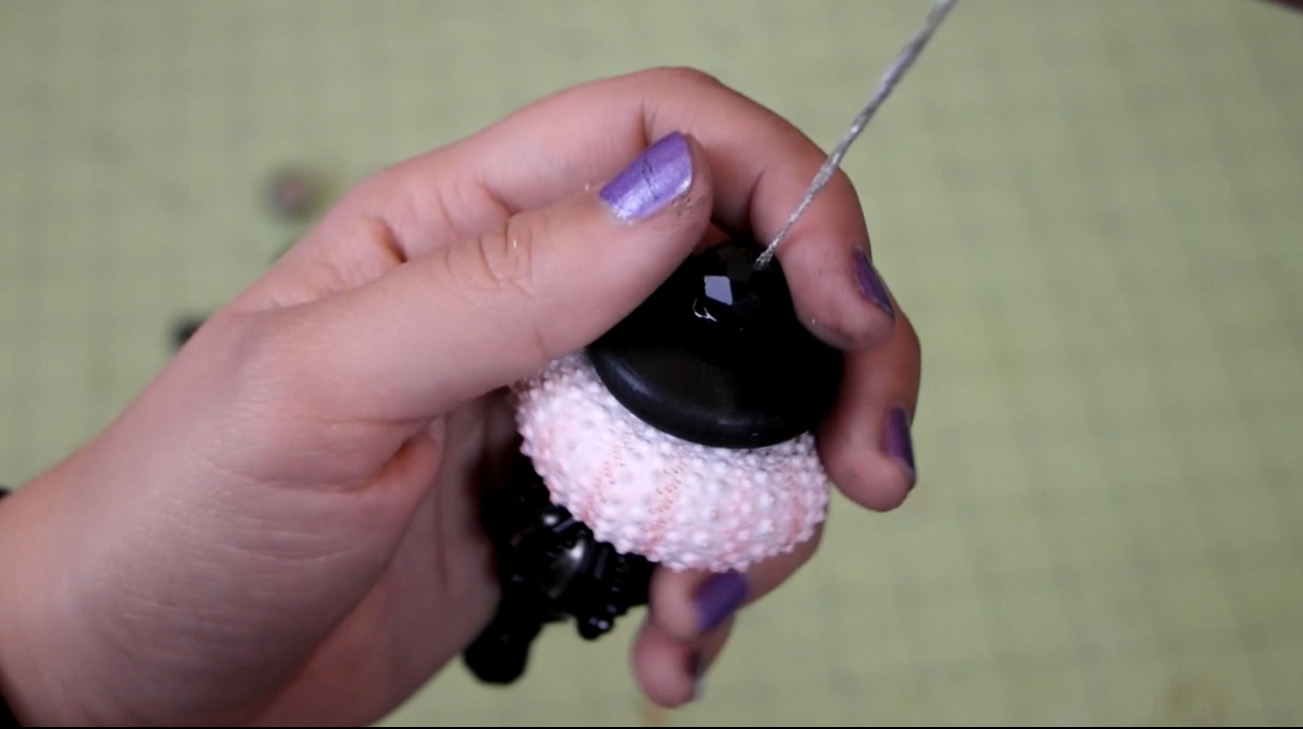
Hover over or click on the photos for instructions.


I hope you all enjoyed! If you have any comments or suggestions for future projects, please let me know!

GIVEAWAY IS NOW CLOSED. Winner will be announced 1/1/15~

And don't forget to enter for your chance to win a wood turned sea urchin ornament made by me!

Kitchen, Tutorials

5 Thanksgiving Leftover Recipes

Happy Thanksgiving everyone! I hope the day is going splendidly and your bellies are stuffed. Since the upload day for my videos and blog fall on this particular holiday it would be kind of silly for me to do a recipe for Thanksgiving, but since most of you will be seeing this post after Thanksgiving I thought it would be a good idea to shoot a video/write up a post with a few recipes for your leftovers! I want to point out that since I made this video before Thanksgiving, instead of using a turkey I cooked a  while chicken instead. The recipes are still the same, just pretend I'm using turkey meat/bones instead of chicken! I didn't cook a turkey for two reasons: I couldn't find any whole ones at the grocery store when I was going to make this video and because these meals were made for just me and my husband, so even if I could find a turkey, I didn't want to cook all of that meat and then have it go bad since we couldn't possibly eat it all by ourselves.

Keep reading for the full ingredients and recipes!

01

  • 1 cupcranberry sauce
  • 1 red jalapeno finely diced
  • 1 red bellpepper finely diced
  • 1 tsp lemon juice

Throw the jalapeno, red bellpepper and lemon juice into a pot and heat over medium heat until they start to just soften. Stir in the cranberry sauce. Crank the heat to high and bring to a boil. Lower the heat to med-low and simmer for about 10 minutes or until thickened.*

*My cranberry sauce was quite loose, so I simmered mine for a little bit longer. And some people who have thicker sauce may need less time, but 10 minutes is a good general time.


02

  • 1 cup leftover mashed potato
  • 1 1/4 cup flour
  • 1 egg beaten
  • 1/2 teaspoon salt

Dump salt and 1 cup of flour onto a cutting board and make a well in the middle. Dump your leftover mashed potatoes on top and make a well with them also. Pour the beaten egg into the well and using a scraper start bringing in the sides of the flour and mashed potato into the middle to mix with the egg until it comes together like a dough. You could just mix everything together in a bowl, but it's more fun this way! Also, depending on your mashed potatoes you may need to add the additional flour. Just add a little bit at a time and knead it in until you have a dough that doesn't stick to your hands. Divide the dough into quarters and roll into long snakes and cut into 1 inch pieces. Gnocchi have lines in them that are typically created with a special paddle, but if you're a more casual gnocchi maker, you can get away with just using the back of a fork. What you want to do is place a piece of dough on the back of a fork, towards the base of the tines and using your thumb, roll the dough down. An alternate method is to just poke them in the middle to create a little dent. Place your finished gnocchi on a lightly floured baking sheet until you're ready to use them! If you're not going to use them that day, you could freeze them for later use.* To cook, bring a large pot of salted water to a boil and dump them in. Since they're fresh they won't take very long to cook, usually they take about 2 to 5 minutes. They'll float to the top of the pot when they're done. Use a slotted spoon to fish out the cooked gnocchi and place directly into your sauce. If you like a little bit of crispiness, you could also take them out of the water and put them into a saucepan with a bit of oil and saute until lightly golden. Then top with your sauce. Or you could also use them as the "noodles" in soup like I'll show you later in this post.

*To freeze, place in a single layer, try not to have them touching, and throw the whole sheet pan into the freezer. Once they're frozen you can throw them into a ziplock bag in order to save valuble freezer space. Once ready to use, let them defrost a bit on a baking sheet in a single layer and then cook like normal.

03

  • turkey bones
  • 1 onion
  • 2 large carrots
  • 2 or 3 celery stalks
  • 4 garlic cloves
  • 3 bay leaves
  • a few sprigs of rosemary
  • a few sprigs of thyme
  • water
  • salt to taste

After you've picked all of the meat off of the bones throw it into a pot. Fill with water. You'll want to use enough to cover the bones. Crank the heat to high. Roughly chop your veggies and chuck them into the pot. Toss in the herbs as well. Bring to a boil and then lower the heat to med/low and simmer for 6 to 8 hours. Place a collander over a bowl and pour the contents of your pot in. Discard the bones and veg and herbs. Add salt to taste.

04

  • bread
  • turkey meat
  • cranberry pepper jelly
  • lettuce
  • turkey jus or gravy

Build your sandwich! Spread a bit of the jus onto the bread. Alternatively you could skip this and just dip the whole sandwich in the jus while you eat it. Place the lettuce and spread the cranberry pepper jelly onto the other half of the bread. Throw the turkey on top of the lettuce, close the sandwich and there you go!

05

  • 1/4 cup olive oil*
  • 1 onion diced
  • 4 garlic cloves minced
  • 1/4 cup flour
  • 4 cups turkey broth
  • 1 large carrot diced
  • 1 celery stalk diced
  • 1 cup turkey chopped or shreaded
  • 1lb gnocchi (conveniently my homemade recipe makes roughly this much)
  • 1 can coconut milk
  • 1 sprig thyme
  • 1 teaspoon dried parsley
*1/4 cup might seem like a lot of olive oil, but you need it because we're going to be making a roux!

Heat olive oil in a large pot over medium/high heat. Throw in the onions and garlic and cook until the onions are translucent. Stir in the flour. Stir constantly for about 5 minutes. Stir in the turkey stock. Dump in the carrots, celery, turkey and herbs. Lower heat to med/low and simmer for about 20 minutes. Pour in the coconut milk and let simmer for 5 minutes. Fish out the bay leaf and any other herbs. Season the soup with salt and pepper to taste. Throw in the gnocchi and cook for about 5 minutes, or until the gnocchi starts to float to the top. Ladle into a bowl and enjoy!


I hope you all liked these recipes!

Tutorials

Geometric Turkey Candles

Thanksgiving is a week away and now is the perfect time to start getting your table decor together. Especially if you're like me and plan on DIYing most, if not all of it. Recently I've seen some tutorials on how to make geometric candles and I really liked that look, so I decided to create my own design for a geometric turkey that you could display by itself (along with the food of course) or you could pair it with the other geometric type of candles for an interesting tablescape.

Keep reading for a quick video summary!

01Supplies! You can find the pattern HERE. I recommend printing onto cardstock since it's more rigid, but printer paper will still work. It just won't look as sharp as one with a cardstock mold.

02Use scissors and/or an xacto knife to cut out the pattern.

03Flip your blade over and, using the blunt side, trace over the dotted lines to crease, or score, the lines. This will help you to cleanly fold them.

04Fold along the lines using this guide.

05Apply glue to a tab.

06And glue to the corresponding number. You want to glue the tabs to the outside of the pattern. Since we're filling them up with wax, if you glue the tabs inside, you'll get an indentation from the tab in your candle.

After you finish gluing the whole thing up take your glue and  dab some on to the corners to close up any holes.

07Take some acrylic paint and paint a thick layer all over the turkey. Repeat 2 o r 3 times. This is to ensure there will be no leaks. I did 2 layers on this one and had no leaks. Let dry.

08Take the tube shape and glue the tabs onto the matching triangle tabs on the chest of the turkey like so. After I did this I noticed a few iffy spots on my turkey so I just dabbed on a bit more glue to those areas. Theoretically you could have just done a few layers of glue rather than paint initially, but with paint you can easily see if you have missed any areas.

09Mark a hole on the back of the turkey and poke a hole.

10Stick your wick in and pull through so an inch or two is sticking out of the top and bottom.

11Apply some water soluble glue(Elmers) around the base of the wick. You want to make sure it's water soluble so that if, after you removed the mold, there is glue still on the wick, you can just easily clean it off under running water.

12Melt your wax in a double boiler. I'm using an old coffee can that's sitting in about an inch or so of simmering water. I'm also using crayons to color the wax. For this specific candle I attempted an ombre and totally failed at it. I explain it more in the video, but that is why the candle ended up having some weird horizontal stripes in it.

13Pour your hot wax in the mold and let cool slowly. I had another mishap at this stage. Since I was trying to do the ombre effect and I'm impatient, I threw the mold with the hot wax into the freezer between layers in an attempt to speed things up. My resulting candle has cracks all in it and I believe that the freezer step is what caused that. The two prototypes I made before this one were both cooled on the counter overnight and didn't have any cracks like this one did.

14After you let the wax harden, cut the excess wick off the bottom and then remove the mold. If you made a cardstock mold you will probably have to use your xacto knife to get it started.

15When removing the mold from around the wick just pull up carefully. Like I mentioned earlier, if there is still some glue attached to the wick just clean it off under running water. Trim the wick down to about half an inch to an inch.

16And here it is with my first two prototypes! (The new guy is in the back) You can see the cracks in the new one. The smaller prototype has a line halfway through it because I didn't melt enough wax initially so it had started to harden by the time the second batch of wax melted.

17Here they are all lit up! You can see the slight design chance I did in the tail between the first two prototypes and the newest turkey.

Aside from the ombre fail and the unfortunate cracks in this last turkey, I really do love how they turned out and I'm definitely going to throw these guys on my Thanksgiving table this year!


For the Home, Other

Cat Shelves

It's no secret I like to spoil my cat. A while ago I made him a cat tree to give him a space to get away from our (at the time) new puppy. Well now that puppy is a decently big dog and he can reach Gremlin's little cat tree sanctuary, and while Grem normally doesn't mind too much(Hobbes is like a annoying little brother) I still wanted to give him his own space to get away when he wants to. I also wanted to put Grem's food and water bowl up a little higher because Hobbes love that stuff and can still get to it when it's on my dresser. So I made one shelf with recessed food and water bowls and two more simple carpeted shelves. A quick video summary will be below!

01Supplies. And how to cut your wood.

03I did miter joints, so I cut the wood at an angle for the corners.

04Figure out the placement for your food and water bowls on one of the shelves. Measure the size of the lip of the bowl (mine was 1/4 inch) and use that measurement to draw out another, smaller circle in the middle. You want to cut the wood out on that circle so the body of the bowl fits, but the lip doesn't, so the bowl rests nicely inside.

05Cut the circle out.

06Time to assemble! Use wood glue to stick the wood together and use the stapler to tack the wood in place with brads or finishing nails. You're going to attach the 32inch long piece to the 32inch side of the large piece of wood and then a 10inch length of wood on each side. Leave one side bare since it will be resting against the wall.

07Finish the wood according to instructions. I used a dark stain.

08Cut a piece of carpet out that's 32in by 10in. This is leftover remnant carpet I got for the cat tree. I still have so much left over...

09Attach the carpet. I put down some wood glue first before laying the carpet down. I honestly don't know if that even did anything because I followed up with about a million staples, but it made me feel better so I did it. So after you lay the carpet down use your stapler to staple the carpet down. I made sure to use a lot because I figured Gremlin was going to use these things as horizontal scratching posts and I didn't want him to be able to rip the carpet off.

10Here are the finished shelves! You can see the recessed bowls. I'm so happy with how they turned out!

11Now hang up on your designated wall! I really wish we had splurged on nicer looking brackets, but oh well. They're up already so I just gotta deal with it. I can always change them later!

12And here he is enjoying his new cat shelves!

I'm so happy these turned out pretty much exactly like how I pictured them in my head (beside the ugly brackets).

I hope you all enjoy, and I hope my instructions were clear enough! I didn't realize how hard it would be to explain wood working stuff.,. hah!


Misc-, Tutorials

Redo Wind-up Key

Six years ago I posted a Halloween costume I made that featured a working wind up key. Four years ago I posted a tutorial on how to make said key and around Halloween it's almost always my top visited post. My husband has been wanting me to make some tutorials in video format, so I thought what better tutorial than this! So lo and behold, here's the video!

Here's a quick little photo recap of the video:

01Supplies. Not pictured are some pliers and a screwdriver that I used to take the toy apart.

02The sacrifice. Poor guy didn't see it coming.

03This toy was nice because it was held together by just two screws. After unscrewing I just pulled the mechanism out. This is all we need from him!

In the original tutorial I used pliers to break off the wind up toy grip but this time my dowel(aka the piece of bamboo I had lying around) already had a hole in it and it was the perfect size with the grip still attached, so I just kept it on.

04Mark the center point of the belt, cut a teeny tiny hole and stick the wind up mechanism through. You want to tack it down with a small dab of hot glue, taking care not to glue the moving parts.

Oh yes, the belt. That's how we will be securing the key to our bodies! I had this black elastic belt that I never wore anymore so I just used that.

05To hide the white boxy mechanism cut a piece of matching fabric (I used fleece) and attach it on the belt. You can either sew it on or hot glue it.

06Making the key pattern out of form core board. I traced a glass and then free handed the rest of it.

08So in the previous tutorial I said to use a strong glue, namely a two part epoxy, since people will be cranking that thing all night. However, I have since tested it out and using a high temperature hot glue gun works just as well. You can still use a stronger glue of course, but hot glue does work.

09For painting I did two coats of black as a base and then finished with a single coat of an antique copper.

Do not use spray paint! If you've made your key out of foam core board the chemicals in spray paint will react with the foam and eat it away. Craft paint is the way to go here.

10Almost done!

11You'll just want to put a bit of hot glue into the hole of the dowel. I had a pre-existing hole, but normally you would have had to CAREFULLY drill a small hole on the end of the key.

12And here it is on the back of my costume!

hobbeswindupAnd in motion!

So I hope you guys enjoyed the video. Is that something I should do more often? Let me know! It's pretty weird to sit there and talk to the camera, but it turned out alright I think.

Clothes, Tutorials

Oh my god, shoes.

I'm not even going to try to come up with excuses as to why I haven't posted in forever... I'll just get to the good stuff. My little sister had some shoes she didn't really care for anymore, and asked if I could re-cover them for her.  I had seen an article in Craft Magazine where they had done this so I knew it could be done.

Here are the shoes in question:

So following the instructions in that magazine, I whip out my exacto knife and start cutting.

Basically you cut all of the fabric off.. All of it!  Also, not pictured is me ripping out the inside of the shoe.  The bottom cushioned part.. thing.  Be careful when you do this though, because you'll need them later.

The remains of the shoes.  As you can see, I kind of rushed ripping out the bottom parts.

Next, I took the fabric she chose and used the old shoe fabric to make a pattern.  You might not want to use markers here to draw it out... I just usually end up grabbing the closest thing to me when I'm doing this sort of thing.

I also drew out and cut the pattern out with the inside fabric, shown here.  These are the tongues of the shoes. (I also cut them with the houndstooth fabric as well)

Sew those puppies up.  I used the old fabric from the shoe as a guide for the decorative sewing.

Sorry, bad picture.. Me grommeting the holes for the laces.

A crappy, blurry picture of the new pieces with the old pieces.  As you can see, I added a little more on the bottom of the tongue because I wanted to make sure I had enough.  I ended up cutting off some when I put it in, but I figured that was better then not having enough!

More unpictured steps are where I glued in the fabric.  I glued in at least 1/4 inch of the fabric all around the bottom edge of the shoes, glued the tongue in and finally the bottom cushioned part back in place.  If done right, the fabric for the main part of the shoe should be sandwiched between the sole of the shoe and the cushioned part that was glued in last.

I waited for the glue to cure and whatnot before I laced them up because I didn't want to accidentally rip out the fabric.

What I did though, was put the shoes on (unlaced) to put some weight on the shoes so it would be stuck real good!

Ta da!  All laced up and ready to go!

I'm hoping to take some better pictures of the shoes soon.  When I do I'll make sure to post them up!

Food, Tutorials

Adventures in Bread Making.

I love to bake and cook, but I've never tried to make bread before.. that is, until a few days ago.  Unfortunately my first loaf turned out wierd and half unbaked, but I've since then redeemed myself.  The kind of bread I chose for my first ever to bake is challah.  When it came to the egg wash and the topping I changed the recipe slightly.  I'll elaborate on that when I get there though.. for now, I'll talk you through the journey!


Ingredients:

2 teaspoons yeast

1/4 warm water

3 1/2 cups flour sifted

4 eggs (only three go in to the dough, the last is for the egg wash)

1/4 honey

1/4 oil

1 1/2 teaspoons salt


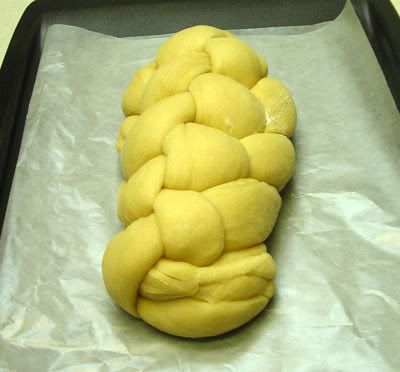
Mix the yeast with 1/4 cup of the flour and the warm water and let it sit for at least 20 minutes.  While you're waiting, mix together the three eggs, honey, oil and salt.  When the yeast mixture is all good and bubbly mix your honey mixture into that.  Then dump in the rest of the flour (3 1/4 cups should be left) and mix it all up by hand.  When it starts to come together, dump it out onto a floured surface and knead it.  The recipe I used said to need for 5 minutes maximum.  I averaged about 3 minutes.  After you're done kneading take your little dough ball and put it in a bowl, cover it with a damp cloth and put it somewhere warm.  When I do this, I usually set the oven at a low temp. while I'm making the dough, and then when I put it in I turn it off.  Anyway, after that is the fun part!  The braiding.  I searched around youtube for a good instructional video on how to braid challah, and I chose to do the 6 strand braid.  Here's how it looked after braiding:

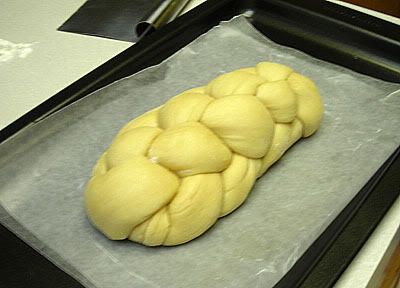
Pretty nice... except for that little area at the bottom, but whatever.  I figured I'd eat that end first.  So after you braid it all up, you get to have more fun waiting.  Another two hours.  Oh yes.  Cover it with a towel or plastic wrap and stick it back in that warm spot.  After two hours it should have doubled in size... but for me on my first attempt this did not happen.  It didn't even double in size after the first two hour wait.  Stupid yeast ended up being too old.  Oh well.  I'll show what it looked like when it didn't work and when it did, so you guys can kind of tell if you decide to try to make this.  Here's the stupid after the second two hour wait.. and how barely grew:

Stupid thing...


Anyway, I still tried to bake this thing.  Set your oven to 325 and get out that egg to prepare the egg wash.  Crack it in a bowl and mix it up and you've got your egg wash.  Brush it on carefully.. you don't want to push out any precious air.  Some places I've read that you're not supposed to put that much, but some places say to use a lot, so I'd just say go with what looks good to you!  That's what I do.  After the egg wash you top it.  Traditionally it's topped with sesame seeds, and sometimes raisins... but I wanted mine to be sweeter, so I topped it with cinnamon sugar... yeah, I cheated.. but it's delicious.   


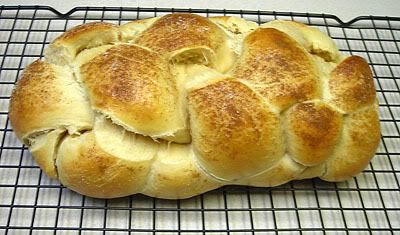
Now throw it into the oven!!  Bake at 325 degrees for 35 to 40 minutes.  The recipe I used said to stick a pie pan full of ice cubes in there with the bread to keep the conditions humid inside the oven, but to take it out for the last 5 minutes of baking, to let the crust really get brown and harden.  Here's what I pulled out of the oven after 35 minutes...

Eww.  It looks wierd.  It ended up being so dense because it didn't rise.. that the inside was still dough.  It was pretty gross.  I still ate the butt ends though.  Yum.


On to the second try!


I got newer yeast and tried again the next day.  I meant to take a picture right after I braided it and before I let it rise for a good comparison shot, but unfortunately I forgot... I have a good shot of it after rising though!

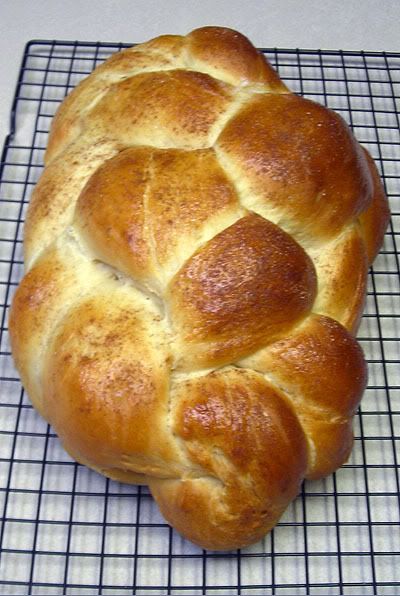
This is with the egg wash and the cinnamon sugar.  My mom said it reminded her of chicken.  My braiding is pretty shotty for this loaf... this is a picture of the pretty side.. the other side is wierd and uneven.  I was preoccupied with the season finale of Lost.  You can compare the last loaf with this one... I used the exact same sheet pan to cook the bread, and you can see just how much bigger this one got.


But of course, something had to go wrong(actually, it's not too bad, it just makes it not as pretty as I hoped it'd turn out).. the oven decided to bake unevenly so the pretty side of the challah is a lot lighter than the ugly side.  The ugly side got as dark as challah's supposed to, so I didn't want to keep it in longer.  Well, that and because I'm impatient and I wanted to eat some.  Here it is:

There we go.. Looks MUCH better! 

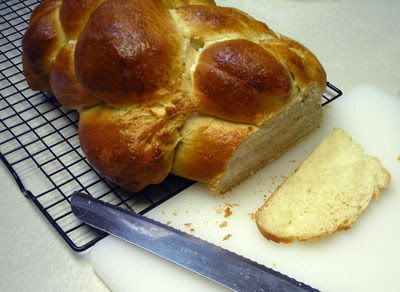
Here is a picture of its insides:

Mm, so yummy.


I've heard that this bread is great for making french toast with because it's already sort of sweet because of the honey.  I'm totally going to make some sometime.  It's also good just by itself. Mmmmm.

Purse/Bag, Tutorials

Cassette tape tutorial

A few days ago I posted about my cassette tape wallet and how it's held up over the past 10 months, and I promised a tutorial. Well here it is!

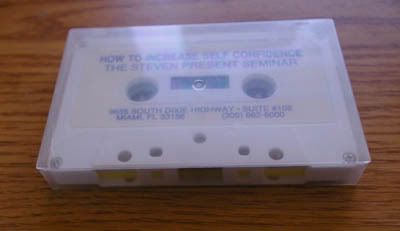
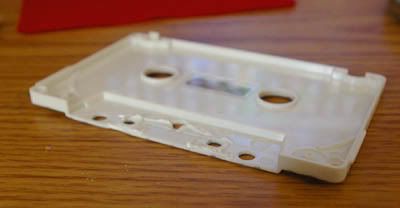
First you need to get your hands on a cassette tape. For my first wallet I already had those at my house, but for this one I ordered them from American Science and Surplus. These ones were screwed together, so it was super easy to take them apart. My first one was glued together, so I had to carefully pry the pieces apart with a flat head screw driver. If you have to separate your tape like this, be very careful. I cracked one in half because I was trying to rush it :( Some are glued up pretty good.

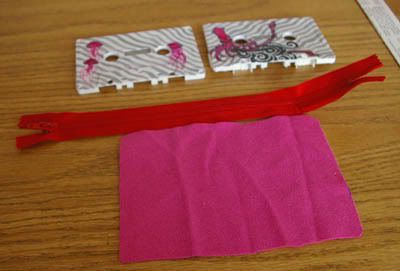
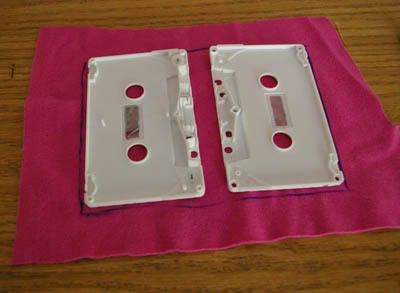
Here are the pieces together. The zipper is 9 inches and I just placed the two pieces of the tape over the inside fabric to see how big it had to be. Like so:

But you still might have to cut it down a little more than that, so it fits snug inside. I actually ended up using a piece of red felt for the inside rather than this hot pink jersey material. The felt was thicker and I like how the thicker fabric looked better than the thinner jersey.

Take some pliers and go to town on the little pieces that stick up on the inside. Be careful as you get to the pieces close to the edge, you might end up taking a whole chunk of the outside of the tape as well. I almost did a couple of times! You could use a Dremel tool to do this part.. It's what I used for my first cassette tape wallet, but I wouldn't recommend going that route, because it resulted in many tiny burns all over my arms and whatnot from molten globs of plastic that shot at me from the Dremel.

Now here's the fun part.

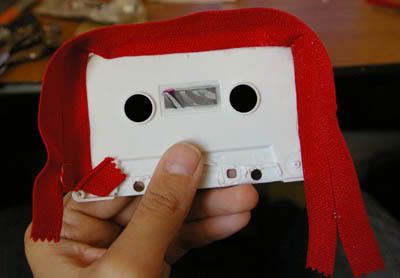
Take your zipper and slowly start to glue it to the inside of the tape. I use the glue E6000. I'm pretty much in love with that glue, it works so well. Some people have recommended using hot glue because it doesn't take as long, but I don't think it'd hold as long as the E6000 has.

Anyway, as you glue it in, only apply glue to about an inch and attach the zipper, and hold it for a few minutes. Make sure the zipper foot has enough room to easily zip and unzip. Rinse and repeat until you've made it all the way around. If you don't hold it down and wait for those few minutes, the zipper and tape will come apart and result in much frustration and glue-fingers. As you see here, I have quite a bit of zipper left over, so I just ended up making it go a little further onto the bottom of the tape. On my original tape the zipper ended up fitting perfectly, I don't know what the deal is with this one! You should do this step with the zipper unzipped or else you'll end up having to really carefully unzip the stupid thing when the glue hasn't cured all the way.

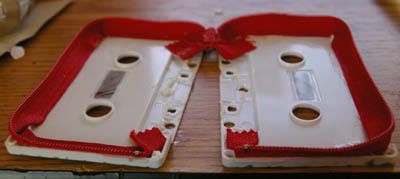
Here it is unzipped. Glue on the other side of the zipper to the other cassette tape half.

Here are the two sides all glued in.

Slather your glue of choice all over the inside of the tape and apply the inside fabric. Press it down with some pressure and hold for a minute or two, and that should be fine.

Now, I recommend not to touch this thing until at least 24 hours have past. If you don't you'll regret it because if you don't give it at least 24 hours for the glue to cure, it will probably fall apart a lot faster.

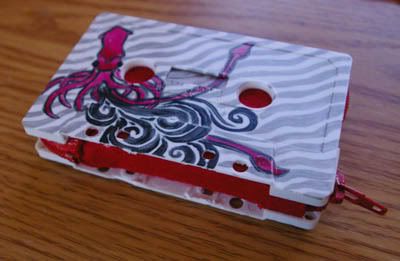
Here's the finished product. I painted it with enamel paints :)

I ended up giving this one to my little sister. She's had a good birthday weekend. If anyone has any questions about this tutorial, please feel free to ask!

Purse/Bag

Makeup bag tutorial

Sorry I haven't posted in a long time! It's been a busy few days. It's also been a while since I've said I was going to do the makeup bag tutorial, so I put it together today! For all of you who don't remember, or who haven't seen, my first post was about a travel set that included a makeup bag.  I kinda had to wing it on the bag because I knew the style I wanted it to be, but I couldn't remember where I had seen a tutorial for it a long time ago.  I promised I'd make a tutorial for the makeup bag according to how I made it, so here it is! :)

All the pieces.

You'll need to cut two pieces of fabric this way. An outside fabric and an inside fabric. This is my outside fabric on the wrong side.

For the lining:

Fold it up where both 10 inch sides are touching, and sew up the little tabs along the white line.

Fold the hole so it sits flat like so. See what my fingers are holding? That's the part I had just sewed up.

Should look something like this.

Sew along this line.

Take one of the top flaps, line it up and sew in 1 1/4 inches in. Repeat on the other side.

Repeat these steps on the other side, and then repeat everything again for the outside of the bag. The only difference is that for the first step you take your thin strip of fabric* for the strap part, fold it in half, and sew it into the tab, where the ends of the strap stick out. ( Sorry, it's hard to describe this stuff sometimes :( ) I had to draw this step because I forgot to take a picture of this.

*For the strap, take a piece of fabric measuring 6 inches by 2 inches. Fold it in half, the hot dog way so the wrong side is facing out, and sew along the open side. Flip it inside out.

Here's the diagram of how you put the strap part in. This is the only difference for the outside of the bag.. everything else is just like how you sewed the liner together.

You should have the outside and the inside all sewed up. Here's mine sitting next to each other. You'll need to flip the outside part so the right side is out, but keep the liner with the wrong side on the outside.

Stick the liner on the inside. Now on to the zipper!

The zipper I got is 9 inches long. You can get any size zipper but you'll have to adjust the size of the length of the bag so it's 1 inch longer than the zipper size. Example: If you made a smaller bag, with a 7 inch zipper, instead of making it 10 inches long, it'd be 8 inches.

You don't have to do these two steps to the zipper, it's just habit for me.. I think it makes them look more finished.

Take a small piece of fabric and sew it along the line. Make sure to put the right side of the zipper so it's touching the right side of the fabric.

Here's how it looks when it's sewed up. (on the left) For the little tab to the left, I took a piece of fabric that was 3 inches by 4 inches, fold it hamburger style, (right sides touching) and sew up the two sides. Turn right side out. Stick the zipper into it and sew it up. Like so. It doesn't matter which way you do these two pieces. On this bag I did it so the tab was on the side where the foot sits when it's closed, but with my original bag, it's the other way around.

Sorry.. it's another crappy drawing.

Pin the zipper in place. Generally I make it so that the little tab from the zipper is on the side opposite of where the strap is. Sew up carefully.

Here it is with the zipper all sewed in. You can see where my sewing machine didn't like me at the bottom. You can see where I still have a pin at the other side of the bag.. I had to hand sew the ends to finish this one off. You might not have to.. I didn't have to for my first one, but ended up having to for this one because the zipper was slightly off.

And you should be done!

I'm giving this one to my sister. She desperately needed a makeup bag, haha. I hope I wasn't too confusing with this tutorial.. if anyone has any questions, please feel free to ask!

Purse/Bag

Cassette tape wallet, then and now.

About 10 months ago I made a cassette tape wallet after I was inspired by some that I saw online. They were on sale for $43 and the first thought in my mind was, "I can make that for less!" So that's what I did. :) Here's some pictures of it when it was freshly made.

The point of this post wasn't just to show you all my wallet, but to show you guys this wallet after 10 months of use and abuse from me. I had my doubts whether it would stay together because all I did was glue everything.. the zipper, the fabric.. I figured the first thing to go would be the zipper, because of the constant zipping and unzipping that this thing would have to take. Fortunately, to my surprise, this thing has kept up pretty well. :) It's showing a little bit of ware because of some minor cracks at the bottom, and the text on the cassette tape has been rubbed off.

Here are some pictures of it now:

You can barely even tell text used to be there!

Another angle.

Unzipped, with all my goodies inside.

Showing the inside with my grubby, dirty art hands.

The ugly bottom of it. The glue shows, but that's just because I was impatient when I made it, and I didn't take the time to make it less noticeable. You can also see how some of the edges are cracking.

This one shows the cracks the best I think.

And thats it! For those of you who want a tutorial, I will be posting one soon (Posted!), after I post the tutorial for the travel set I made.
Oh! Don't forget to vote for my zombie protection kit on Craftster! Voting ends on the 12th this month so be sure to squeeze your vote in!

Purse/Bag, Tutorials

Oldie but goldie: Towel pool bag

Summer is approaching, so I thought I'd share a project I did a while back which would be used at the pool or beach. Basically it's a beach bag, but it's also a towel! It folds up into itself (much like a quillow) but it has handles that make it into a bag. You can throw in your sunscreen, flip flops and other goodies you'd bring to the beach and/or pool. Here's mine:

Like any cat owner knows, if you spread out something on the floor and then try to take pictures of it, they come and lay all over it. That's my cat, Ewok.

Here it is folded into itself.

Here's the other side.

Tutorial!!

You need a beach towel, and another towel. I don't think I had a regular towel.. I grabbed a towel that wasn't as large as a normal towel, but it was bigger than a washcloth. If anyone knows what it's called, please educate me! :)

Here's where you cut it up. I believe the strips 2 and three were about an inch and a half to two inches.

After everything is cut, stick the biggest piece, number 1 on top of the beach towel, with equal distances on each sides, and sew up the three sides that have the red zig zags on. Also, you may want to hem the two handle pieces at this point.

Attach the two handles wherever it's comfortable, and sew them up!

And your towel bag should be complete! to fold it into itself the "correct" way, flip it over so you can't see the other, smaller towel, fold up the two sides towards the center, and then fold up about the same size of the smaller towel from the bottom. When you get to the top, flip it inside out. (like a Popple, haha)

Sorry if my folding instructions aren't that great.. it's kind of hard to explain. You could just stuff it in without all the neat folding.. which is what I usually end up doing.

Now, you may say, "Hey, but after I get out of the water and towel myself off, my towel will be all wet! What about transporting my stuff back home?" Well, if you think about it, almost everything that you carry in your bag gets wet, from sunscreen to sunglasses, so as I see it, it doesn't matter if you throw those things into a wet bag. As long as you take everything out, unfold it and let it dry when you get home, it should be fine. :) For those of you who take magazines or anything else that would not fair well under moist circumstances, then I'm sorry, this craft may not be for you unfortunately :( But you can still make them for friends! :)