Misc-

Misc-, Tutorials

DIY Fake Lashes

IMGP9998.jpg

Need some gigantic eyelashes sometime soon, say, for Halloween, and don't want to pay almost $10 for them?  Well I got the tutorial for you!  I found a tutorial on youtube on how to make your own false lashes with just a few materials that most people have around and got to makin'. Materials:

  • Another fake eyelash (this is just to give you a guide at how long you need to make the lash.  You could also just take a small piece of paper and measure your eye that way)
  • Eyelash glue (Not everyone will have this item; I didn't, but it's fairly inexpensive for a bottle of some, especially considering just how many eyelashes you can make with one tube)
  • An old makeup brush (Mine had really stiff bristles so I would never use it because it poked my face all the time.  Be sure to wash it before using it!(Thanks MissVass on reddit.  I assumed this would be common knowledge but better to be safe than sorry!))
  • a plastic work surface (I used a tupperware lid)
  • Something to help you manage the bristles when you inevitably get glue on your fingers (I used a disposable eyeshadow swab thing.  In the video she uses a spatula.)
  • Black eyeshadow(not pictured)
  • Hair spray(not pictured)
  • A curling iron
  • Scissors
  • Any little things you want to add to it for  decoration (feathers, glitter, sequins, etc.)

Using the other eyelash as a guide, draw a line of eyelash glue.

Take a little bit of the makeup brush and snip it off at the base.

Spread it out carefully with your fingers and place the cut edge into the glue.  Use your "bristle managing" tool (in my case the eyeshadow swab thingie) to hold the bristles down so you can let go of them without taking too many back out.  I found that the bristles kept sticking to my fingers, so that tool was very important.  Repeat this a few times until you made them as thick as you want.

Use your tool to really press the bristles into the glue.  You'll want to wipe down the tool every once in a while because as it gets more glue stuck to it, the bristles may want to follow it.

Once it's dried for a few minutes, put a dab of glue on the end of your tool and carefully coat the top of the edge of glue.  Let dry.

Once dried, CAREFULLY lift the eyelash up, holding on to the edge of the glue strip.

Powder the front and back of the strip of glue with black eyeshadow.

Cut off excess glue strip.  Be careful not to cut of too much, you'll lose too many bristles!

Trim the lashes into the shape you want.  In my case it's shorter towards the inside of my eye, and thicker towards the outside.

Use a hot curling iron to shape the lashes.  BE CAREFUL!  I was using tweezers to do this at first to keep my fingers safely out of the heat, but I misplaced them as I was taking these pictures, so I'm using my fingers to show what to do.  Luckily my fingernails are long enough.  After they're curled as much as you want them, generously spray some hairspray all over them.  Of course by the time I was taking pictures I had run out of hairspray, so I have no pictures of this process, sorry.

And here are your lashes!  In this picture you can see the difference between the hairsprayed lash(left) and the un-hairsprayed lash(right).  They keep their shape much better when they have a good coat of hairspray on them.

This is also the point where you would add decorative features if you want.  Maybe some glitter along the glue line, feathers glued onto the bristles, the possibilities are endless!

Here are some action shots:

All in all, I really liked making these, and I plan on experimenting with more materials.  Definitely going to make some that fit the theme of my Poison Ivy Halloween costume!  The best thing is that you can trim them down a lot to make false eyelashes that you could potentially wear on less costumey occasions.

If any of you guys decide on trying these out, I'd love to see!

xoxo-chez

Misc-, Tutorials

How to Wind-up Key

UPDATE: I made an updated video version of this tutorial! Check it out! Hope this is helpful!

------------

So, it's been a while... stress filled senior year of college.  Anyway,  I've received a lot of comments asking for a tutorial on how to make this key for a Halloween costume I had made a while ago.  I had started to create a tutorial for this but I ended up moving and all that stuff got packed away, but I just so happened to find all my stuff the other day, so I figured I'd throw this post up before Halloween so hopefully you guys can make yours in time. :)

The parts:

All the parts

Here are the parts for the wind up key.

A few inches of dowel (really the length and size of the dowel are up to you.  I used what I had, which is a 1/4" dowel which I cut to be 2 1/2" long.  You'll need to drill a small hole into one side of the dowel in order to fit the metal rod of the wind up mechanism.  I used a small drill kit that I bought from the local hardware store that looked like a screwdriver but with interchangeable drill-bit head things.   Be slow with this part, or you may split the wood like I did.  Don't panic if you do though, it should be okay once we glue it all up.

The next thing you'll need is a piece of foam core board cut to resemble a wind up key.  Cut the little notch at the bottom to be the same width as your dowel.  In my case it's 1/4".  I imagine you can use something other than foam core board, but you just need to make sure it's lightweight, or else it will bog down the tiny wind up mechanism we're using.

Speaking of, the third thing you'll need is the wind up mechanism.  To get it, I took apart a dollar store wind up toy.  Usually there's a little piece of plastic at the end of the metal rod that makes it easier to turn with your fingers that you need to remove so you can stick it in the dowel.  I just used some pliers and squeezed it a bunch until it broke off.

The epoxy

I used some quick drying epoxy to glue everything together.  You need to make sure to use some heavy duty stuff because people will be cranking that thing all night and you don't want it to start falling apart on you.  If you choose to use epoxy, be sure to do so in a well ventilated area because this stuff reeks!

Epoxying in progress.

Here it is, now attached to the mechanism.  Be careful not to drop epoxy or glue down into the mechanism or else it may screw up the gears and whatnot inside and it won't work anymore.  As mentioned before, I had split the wood somewhat during the drilling progress, so here I also squished some epoxy down into the crack to make it stronger.

Finished!

And here it is painted.  I just used some craft paints on this one.  The very first one I did was spray painted, so really it's up to you on how you want to do it.  If you spray paint it though, be sure to tape up the mechanism really well beforehand.  Or you could just paint it before you attach the mechanism.

Now, when I used this in a costume I ended up carefully duct taping the mechanism onto a piece of cardboard(to help stabilize it) that was a little smaller than the width of my back and a few inches high, then I proceeded to duct tape the cardboard onto the tank top I was wearing.  I literally duct taped this thing onto me for the whole night(it was hidden under my corset thing), but that was the best I could come up with at the time.  If anyone else has any better ideas on how to wear this thing please let me know, it would be much appreciated! Thanks :)

Hope this helps you guys out!

Clothes, Misc-

New Suede Shoe-Slipper-things

I was lurking around on the internet the other day and came across these viking shoes.  As I scrolled through the post, I saw it was a tutorial on how to make them, so of course I had to make some myself.  I went out to my craft store and bought some leather remnants for less than$5 and hoped there would be enough to make a pair of shoes. Before I cut into the leather, I made a pattern out of felt and put it together.  I made some modifications to the original pattern to try to make them into flats instead of sandals and I wanted to make sure it would work.

Here's the pattern all put together

Drawing the pattern out on the leather.  I had JUST enough!

All cut out.

Rounding out the little tab things.

With a marker, I marked out where the holes should go.

Here I am, wishing my boyfriend still had his leather hole punch.

The exacto knife worked alright, here are the holes!

The leather cord was more expensive than the scraps of leather I bought!

Lacing up the back.  If you make these, make sure you pay attention to how you're supposed to thread it, I messed up a LOT on this step.

Lacing up the toe area.

Almost done!

All done and pretty comfy!

Back.

Front.

I think these things are pretty cute and they're quite comfortable.  It's just thin leather though, so these ones are more suitable to just be house slippers.  I'm thinking about ordering some thicker leather and maybe a shoe sole or something to see if I can make something that would be fit for wearing outside.

Misc-

Sailor's Knot Bracelet

In order to get myself back in the crafting groove I've been doing some quick and easy things like making simple jewelry and little amigurumi.  When I finish my crochet project I'll post it here, but for now I have an awesome bracelet to talk about.  Almost a month ago Etsy ran a "How-Tuesday" where Simone Tan (a.k.a Groundsel) explained how to make a sailor's knot bracelet.  I actually saw this post a few days ago and as soon as I finished reading it I grabbed the first skein of yarn closest to me and started to knot.  Here is the finished bracelet:

It's kind of small and skinny because I just used normal yarn.  I wanted to make something chunkier so I headed to my local craft store and bought some thicker silver rope stuff and some even thicker cording.  Here it is with the silver rope:

This one is my absolute favorite and I've been wearing it every day since I've made it.  The silver rope makes it look more "fancy" so I can wear it when I'm being more dressy as well as just wearing it casually.

Here they are next to each other on me.  I think this style of bracelet looks better larger.  This brings us to the cording.

This stuff is really thick, and unfortunately I didn't get enough of it to make a bracelet so that's going to have to come later whenever I find the time to go buy more of this stuff.  Luckily it's only like .29 cents a yard!  I think I'll probably make a fabric bowl with this cording I have now.  I've been itching to make one for a while.

Sailor's knot bracelet tutorial: Here!

Fabric bowl tutorial:  Here!

Misc-

Rwar, Dino-Necklace!

Okay, well this little guy is actually a dimetrodon which makes him a pelycosaur rather than a dinosaur, but we can just pretend.  I've seen this idea before, stringing up little trinkets and toys to create new jewelry, and for some reason I decided I needed a dinosaur necklace.  I was quite surprised at how hard it was to find small dino toys, but eventually I found a big pack of them for 3 bucks so I snatched it up.  Most of the dinos in the package are too large for what I wanted to do, so I need to figure out what to do with them.  There were, however, about 4 or 5 guys in the package that would work just fine.

toy dinosaur

Here's the little guy I picked.

I used Krylon Fusion spray paint because it's supposed to bond to plastic and I wanted the best possible chance of the paint staying on and not flaking off on me as I wore it.  I suppose I could have just used some cheaper stuff but I didn't want to risk it.

spray painted dinosaur

Here he is, lookin' all shiny and new.

I have a tiny drill that I used to drill into the plastic to make way for the jewelry findings.  I actually messed up because the plastic is very thin on this guys fin so I ended up drilling right through.  That was fixed by a very generous glob of glue.

dinosaur necklace

And finally strung up as a necklace.

This guy is pretty cute and I can't wait to wear it out!  Now I just have to figure out what to do with the remaining dinosaurs...

Misc-

Tweet?

I'm finally going to catch up with the times and get myself on Twitter.  Unfortunately I couldn't have my good old name "Chezlin" because I was too slow to jump on the bandwagon.  Boo, oh well.  So if you people want to, you can now follow me @ChezlinTM. Keep a lookout for a new post coming up on Friday! :)

Misc-

Busy bee!

I've been busting my butt lately with school work that I haven't had time to craft :( I thought I'd at least post something to let you all know that I'm still here! And to give a little peek at what I've been doing.. art wise.. for school. imgp3899 I had a semester long assignment where we had to do a color study of 30 colors for each week of class. Of course, I put it off and had to do almost all of them during the Thanksgiving break. Yay, 300+ colors!

imgp39031 Here's my final for painting... four paintings, inspired by different artists. I'm so glad to be almost done with this class!

On top of those, I have to print and bound a book and print around 10 more prints for my book arts class. There's also the color theory assignment I have where I have to re-do an old piece that I've done where I'm not happy with the colors... twice. Oh yeah, and studying for my two other classes. Woo, the end of the semester! Hopefully I'll be crafting and posting in a week or two, when classes are done!

Misc-

Coconuts: 101 different ways!

This post is all about coconuts.  A single coconut has multiple uses, and I'm going to show you just a few of them.  Okay, I lied.  I'm not going to talk about 101 different ways to use the same coconut.. I'm going to talk about four or five different ways.  That's still a lot! The first use! Coconut oil.  Here's a bunch of pictures of when my mom taught me how to make coconut oil.

I apologize in advance for the not so great pictures.

Blurry picture of her cracking that sucker open.  She was moving pretty fast.

Mmm, this is a good coconut. Lots of meat.

You use this contraption, my mom called it a kudkuran, to scrape the meat out.  You sit on it with the skarp part stickin out between your legs.

Super bad picture, but the only one I have of me scraping the meat out.

After a little bit of scraping, here's what it looks like.

Here's a before and after.  I went a little crazy on that half, you're not supposed to see that much brown.

All used up.

Time to start getting that milk out of this meat! Here we have a fine strainer, a bowl and the coconut meat.

Here she put in some water and started mushing it all around.

Take a handful and squeeze it over the bowl.

Here's some of the milk she squeezed out.  After you have it all squeezed out, you can repeat the process again to get a little bit more milk.  You'd have to be careful with the water though so it isn't watered down too much.

Strain the milk into a pan.

You can still squeeze a little bit of the milk out of this.

Crank that heat up!

Let it boil.  And constantly stir.

Eventually it'll start to separate.

More separation.  The clear liquid is the oil... but wait, we can get more out of it!

Almost done.  Let those little bits get all brown and toasted.

All done!

Strain it all!  Save those little bits.  You can use them as a topper for ice cream.. or cakes.. or something.  You might want to toss it with a little bit of sugar though.

Further straining with a coffee filter.

Here's the oil!  Yup.  A whole coconut made this tiny bit of oil.  You can use the oil for cooking or you can use it to make home made cosmetics.

Second use! As I mentioned in the pictures, you can save the little toasted bits and use them as a topping.

Third use! The meat that you extracted all that milk from is still useful.  If you like toasted coconut, you can probably spread out the meat in a thin layer and throw it in the oven for a while.. You'd probably have to toss it with sugar though.  (I haven't actually done this, but theoretically it should work, haha)

Fourth use! A Philippine snack: Budbud (the "o"s are long.  Like Boo!  and then a d at the end.... I dunno, it's hard to explain) also known as sweet rice.  Mm, a delicious dessert.

Here's a recipe for budbud: Budbud recipe.  You can use the original coconut milk you extracted to make this.. or, if you made coconut oil with the original milk, you can extract milk from the meat more than once. To eat, you unwrap the banana leaf, dip the rice in sugar, or, like in that picture, dip it in coffee and eat it that way.  Either way is awesome.

Fifth use! If you wanted to, with one of the shells, you could clean out the remaining meat and dremel a hole in the side and have a sweet hermit home.  Either that or dremel some small holes on either side of each shell half and make a islander bikini top!

Like this!

So those are just a few ways to put a coconut to use.  I'll admit, with the budbud recipe, it calls for more than one coconut, but hey, you can make more oil and toasted bits and whatnot!

Misc-, Tutorials

Paper making tutorial

Sorry for the lack of posts recently, school is wrapping up so I've been busy with random papers, projects, etc. Hopefully soon I can start to post on a regular schedule rather than so randomly. Anyway, I finally had a little time to craft, so I decided to make paper. Exciting! Here are some pictures of my journey:

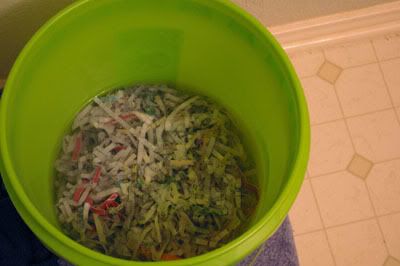
I took our paper scraps out of the shredder so I didn't have to rip up each piece of paper. I also soaked them for a few days... I meant to just soak them for 24 hours, but I got busy and I couldn't make paper for a while, so I had no choice but to let it sit there.

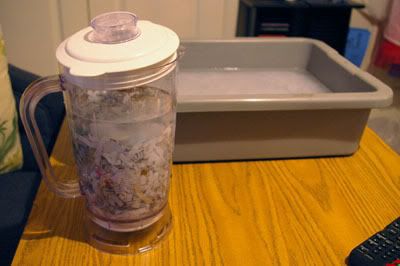
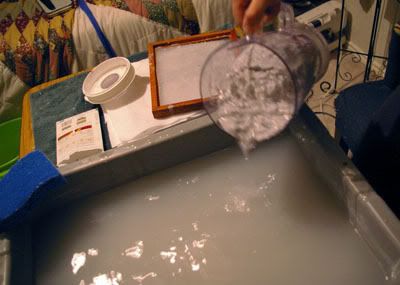
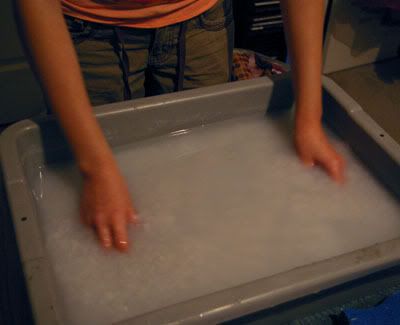
Fill the blender about halfway up with the paper mixture and then fill it up with warm water a little bit more than the paper. Blend. Pour into a tub that is already halfway filled with water.

Mmm, yummy!

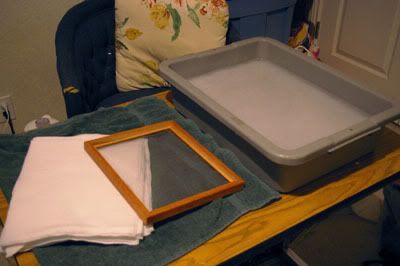
Here's what you need now.. your tub of paper-water, a few pieces of felt, a sponge, a screen and a piece of plastic that fits in the screen. I just made my screen with an old frame and metal window screen.

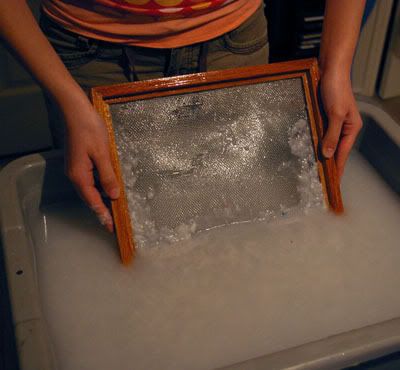
Put the screen in at an angle.. kind of like you're going to scoop up the paper-water mixture.

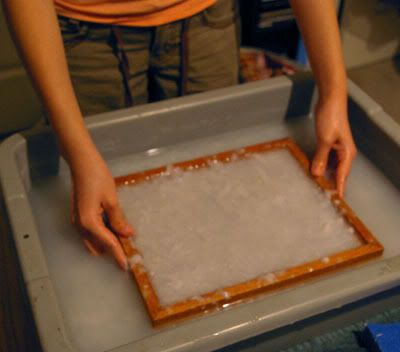
Straighten out.

Pull the frame up slowly and as even as possible. Let the excess water drip out and put your plastic on top of the screen.

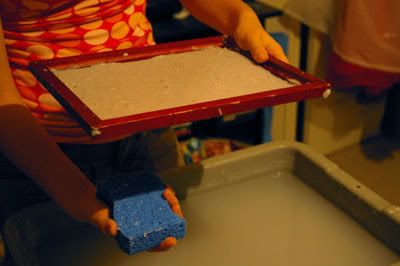
This part you would need two people.. You would really have someone holding the frame, and the second person putting one hand on top of the screen and pushing the sponge against it from the bottom to push the water out. Every few pushes you'll have to wring the sponge out.

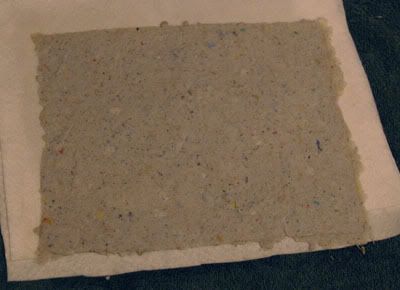
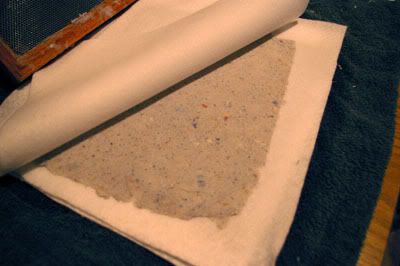
Peel the plastic away from the paper. If it sticks at all then the paper has too much water in it still and you'll need to keep pushing it out. If it doesn't stick, and you get the plastic off the paper, flip it out onto one of the pieces of felt.

Like so. Put another piece of felt over this one.

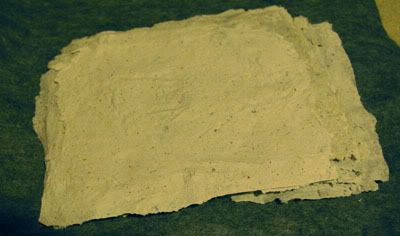
Repeat and repeat and repeat until you're all out of paper pulp! I believe I got about 20 sheets from this batch. I put pressure on the stack of paper to get the extra moisture out. A lot of places recommend hanging up each piece with clothes pins at this point.. but I didn't only because I don't have any clothes pins :(

A stack of paper! ..wow, this picture is kinda green.

I'm planning on making a book out of some of these pieces of paper.. They just take forever to dry if you can't hang them! Making paper is pretty fun, you can experiment with different colors of paper, different consistencies, etc. Mine has a few random flecks of color and text dispersed throughout the paper, but I didn't really mean for it to happen.. I figured that after soaking for forever the paper would be broken down enough that it would be mostly gray. I'm happy with the result though.. it was a happy accident. :)

Misc-

Oldie but goldie: Shift boot cover

I don't have time to craft today because I have class ALL day.. so I thought I'd share another old craft. My friend had asked me to make a new shift boot for his car, and when he found the fabric he wanted, he handed me the fabric, which happened to be a bandanna, and the old shift boot, and I got to crafting.

They're super simple to make.. it's basically just two triangles sewed together. I can't give a very specific tutorial unfortunately because not all shift boots are the same.

Here it is:

I hope to be able to make myself one for my new car... if I can get it! If I do, expect another shift boot post!