Clothes

It's time to dye some shoes.

A week or two ago, my little sister asked me if I could dye her shoes black because she didn't like the blue and red plaid.  I finally decided to do it and share the process with you guys.  This is my first time dying shoes, so I might have done some things strangely, so if there's any way I can improve, please let me know!

What I used:  shoes, dye, a container, gloves, cotton balls(not pictured)

You need rubber gloves unless you want colored hands for a while.. I got a dye concentrate, so I just poured a little into the container and got going.

Here I am, about to start the dying process.

Oh yeah, here we go.

Pretty much done!  And this is why you need gloves :)

Ta da!  A pair of black shoes.

Thanks go to my older sister who dyed the left shoe as I dyed the right.  :)

Again, I'd like to apologize for my absence lately.. End of school and whatnot has calmed down, so I should be able to start posting regularly again. :)

Clothes

A skirt!

I'm so sorry for my disappearance everyone!   I had to run away to work on school work and whatnot.. finals week called for many projects, papers, etc.  but now I'm all done!  Yay!  My older sister is done with college too.. cept not like me.. I still have a year to go.  No, she's done completely!  We're heading to her school to watch her graduation today, and I had a skirt I was going to wear but when I was looking at it last night and decided that it looked too much like a work skirt.. so I decided to make something to wear.  I combed through my fabric stash and picked these:

I've had these for so long!

So I got to sewing and cutting.  I had just vacuumed my floor and now I have to do it again because of all the seeds I had to cut off of this fabric so it wouldn't break the needle in my machine..

Here's the finished product!

Don't pay attention to the green shirt, it's just what I was wearing at the time haha.

Kinda blurry, sorry :(

Again, apologies for the lack of posting.. I have a lot of things lined up, I just never had time.  I do now though! :D

Art

Ceramics!

The semester is wrapping up so we finally were able to take our ceramic pieces home! Here are mine.

Stoneware. Pinch method. Raku. The assignment was to mix organic with something man-made. I did a water drop mixed with the grid pattern in the ceiling of our class.

Stoneware. Coil method. Low-fire. It's old Japan(Jomon) and new Japan mixed together.

Stoneware. Slab method. Low-fire. A family of abstract objects.

Stoneware. Thrown. Reduction fire.

Closeup. It's too dark in the two right cups unfortunately. The top one is a teal color and the bottom is bronze.

Stoneware. Thrown. Reduction fire.

A peek inside.

Stoneware. Thrown. Reduction fire.

Another closeup.

Porcelain. Thrown. Reduction fire.

Another angle.

Left: Stoneware. Thrown. Reduction. Right: Porcelain. Thrown. Reduction. My little sister threw these :)

A little blue inside!

Porcelain. Thrown. Reduction.

Bronze glaze on the outside and clear on the inside.

Stoneware. Thrown. Reduction.

Inside. This is one of the pieces in a three piece set I made for my final project.

Stoneware. Thrown. Reduction.

Inside. Another piece of the set.

And to the piece that pissed me off:

Stoneware. Thrown. Reduction.

Notice this mug in the middle of this bowl? Yeah, well whoever loaded the kiln stacked them like this, so now they're permanently fused together. Bitch. So now my last piece to the set is ruined. My professor said it won't effect my grade because it was out of my hands. It still makes me mad though.

Anyway, back to the ceramics.

Porcelain. Bisque-ware.

Porcelain. Bisque-ware. I can't glaze these ones yet, I have to wait until next semester to get these ones fired.

I ended up loving this class. I want to take more ceramic classes, but it doesn't really work with my major.. I kind of decided to major in painting. That means I need to take more painting classes rather than ceramics unfortunately.

I hope you guys like these!

Misc-, Tutorials

Paper making tutorial

Sorry for the lack of posts recently, school is wrapping up so I've been busy with random papers, projects, etc. Hopefully soon I can start to post on a regular schedule rather than so randomly. Anyway, I finally had a little time to craft, so I decided to make paper. Exciting! Here are some pictures of my journey:

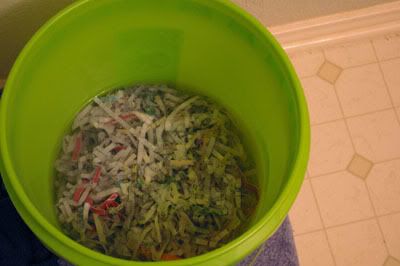
I took our paper scraps out of the shredder so I didn't have to rip up each piece of paper. I also soaked them for a few days... I meant to just soak them for 24 hours, but I got busy and I couldn't make paper for a while, so I had no choice but to let it sit there.

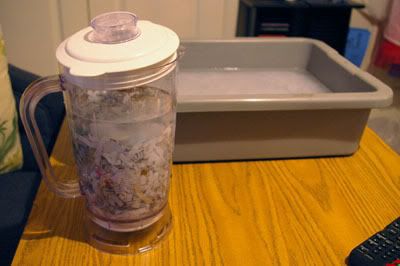
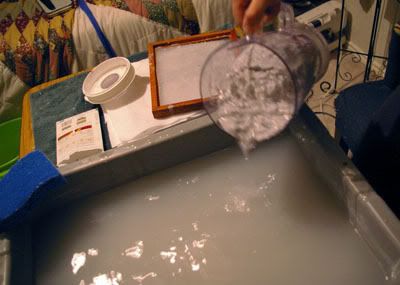
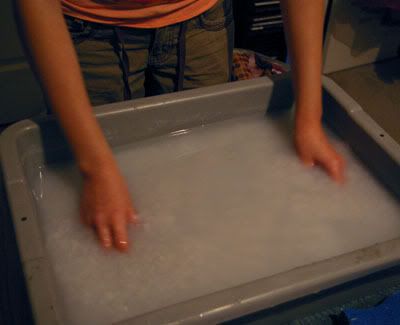
Fill the blender about halfway up with the paper mixture and then fill it up with warm water a little bit more than the paper. Blend. Pour into a tub that is already halfway filled with water.

Mmm, yummy!

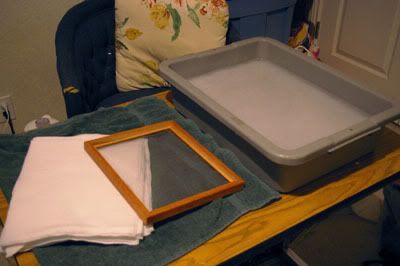
Here's what you need now.. your tub of paper-water, a few pieces of felt, a sponge, a screen and a piece of plastic that fits in the screen. I just made my screen with an old frame and metal window screen.

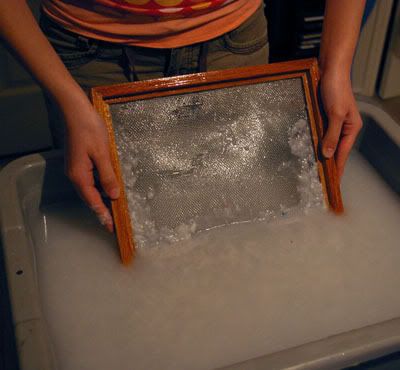
Put the screen in at an angle.. kind of like you're going to scoop up the paper-water mixture.

Straighten out.

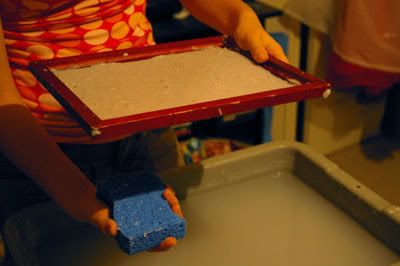
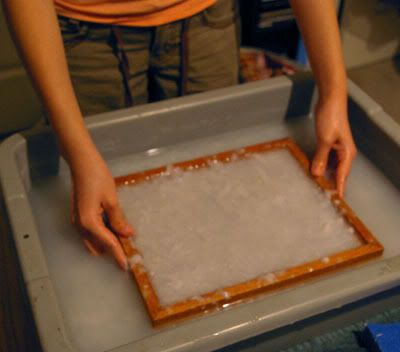
Pull the frame up slowly and as even as possible. Let the excess water drip out and put your plastic on top of the screen.

This part you would need two people.. You would really have someone holding the frame, and the second person putting one hand on top of the screen and pushing the sponge against it from the bottom to push the water out. Every few pushes you'll have to wring the sponge out.

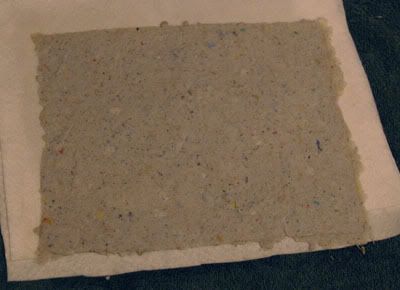
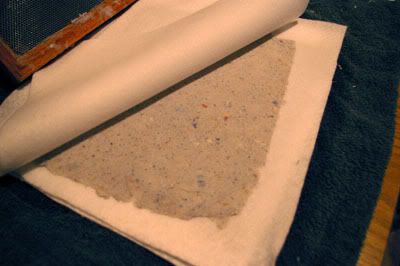
Peel the plastic away from the paper. If it sticks at all then the paper has too much water in it still and you'll need to keep pushing it out. If it doesn't stick, and you get the plastic off the paper, flip it out onto one of the pieces of felt.

Like so. Put another piece of felt over this one.

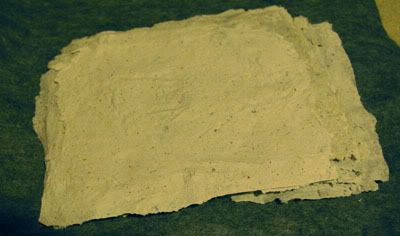
Repeat and repeat and repeat until you're all out of paper pulp! I believe I got about 20 sheets from this batch. I put pressure on the stack of paper to get the extra moisture out. A lot of places recommend hanging up each piece with clothes pins at this point.. but I didn't only because I don't have any clothes pins :(

A stack of paper! ..wow, this picture is kinda green.

I'm planning on making a book out of some of these pieces of paper.. They just take forever to dry if you can't hang them! Making paper is pretty fun, you can experiment with different colors of paper, different consistencies, etc. Mine has a few random flecks of color and text dispersed throughout the paper, but I didn't really mean for it to happen.. I figured that after soaking for forever the paper would be broken down enough that it would be mostly gray. I'm happy with the result though.. it was a happy accident. :)

For the Home, Other

Oldie but Goldie: Boo table

When I was a freshman in college, my mom bought me a table to somehow fit into my tiny dorm room.. It was ugly and white, and my roommate and I knew we had to do something to make it fit into our room better. See, we were both artsy people so a plain white table in our colorful room would not do. My roomate brought a carpet one day and after situating the table on top of it, we knew what we had to do to the table. Here's a blurry picture of what we did:

(Thats my messy ass side of the room) We used electrical tape around the side of the table so it'd be black instead of that weird brown.. it made it look more finished.

But it doesn't end there!

I went home for the summer and the table came with me. My roommate and I decided to room together again that next year, with the addition of our next door dorm neighbor, and the apartments we chose had outdoor patios so I got super excited and decided to convert the table into a nice patio table fit for college students.

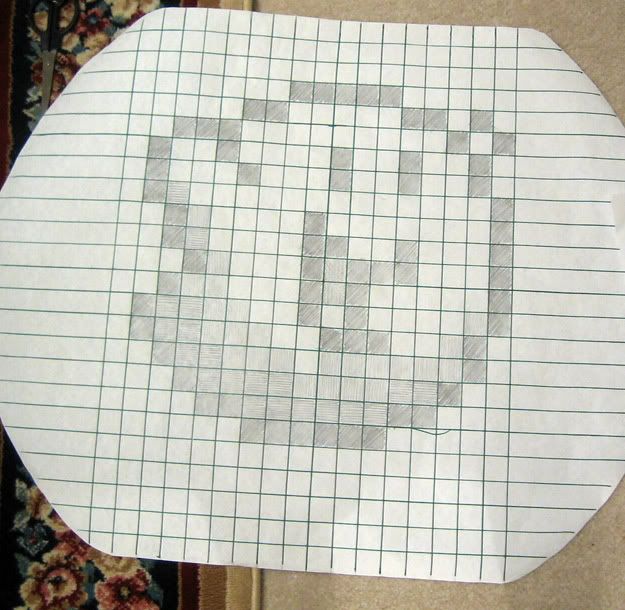
Here's my sketch:

It's Boo! I used precut glass tile things from Hobby Lobby for Boo, and I used broken mirror pieces for the area around him. (They from our dorm... they weren't originally in the room, we brought these mirrors... no destruction of their property, I promise!)

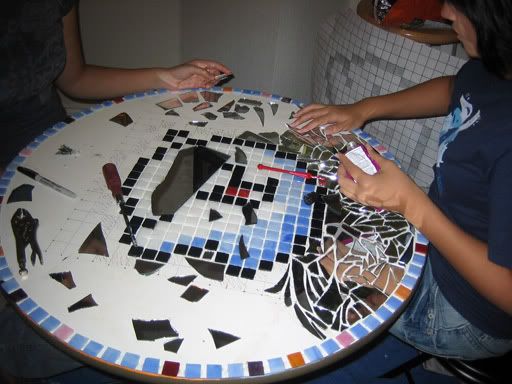
Here's an in progress shot:

My older sister and I working on the table.

Before grout and inside.

After grout and outside.

So, after I made this, we went up to Austin to get our keys for the apartment and discovered that our particular apartment didn't come with a closed off patio.. we just had a kind-of-big-but-not-really area at our front door.. which I didn't feel comfortable leaving my table out at. So the tables ultimate destination that year was my sisters boyfriends apartment in his nice closed off patio. And now the table is sitting outside of my room with a nice fake glass bonsai tree sitting on top of it. I can't wait for the day that I can actually use it as an outdoor table!

Bedroom, For the Home

Baby quilts galore!

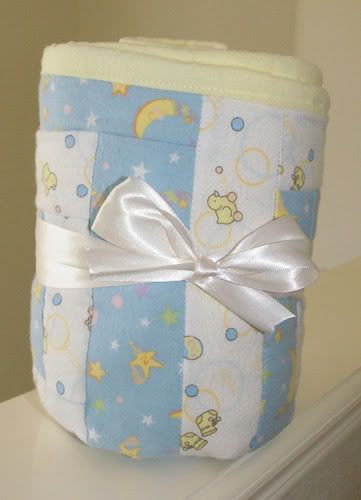
Well actually, not galore.. because there's only two, but you get the idea!  When two of my friends told me they were pregnant, after the initial shock wore away, I got excited to make them baby quilts.  I was hoping that at least one of them would have a girl, so I could make a cute girls quilt, but I had no such luck for they were both having boys.  That didn't stop me from making two cute quilts though!

Here's the first one:


My little sister is holding it up here.

All ready to give away!


Here's the second one:

The colors are a little off here.

Close up shot of it folded up.

All ready to go!  I think this one shows the true colors the best.


As you can see, they're not perfect, but they're good enough for me!  These were the first quilts I've ever done.. and although it's kind of frustrating and time consuming (even when I did these super easy ones!) I think I'm hooked.  I want to make a quilt for my bed but I'm kind of scared I'll never finish it, haha.


Purse/Bag, Tutorials

Cassette tape tutorial

A few days ago I posted about my cassette tape wallet and how it's held up over the past 10 months, and I promised a tutorial. Well here it is!

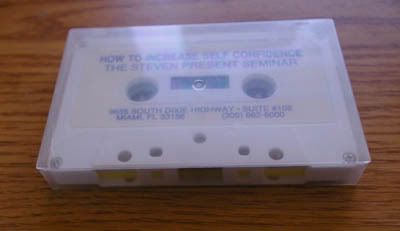
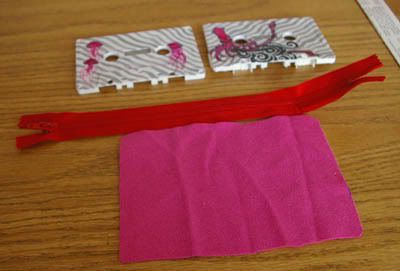
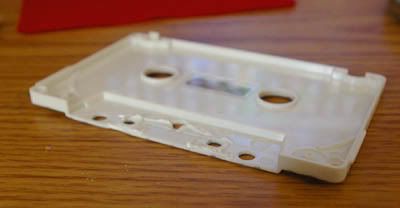
First you need to get your hands on a cassette tape. For my first wallet I already had those at my house, but for this one I ordered them from American Science and Surplus. These ones were screwed together, so it was super easy to take them apart. My first one was glued together, so I had to carefully pry the pieces apart with a flat head screw driver. If you have to separate your tape like this, be very careful. I cracked one in half because I was trying to rush it :( Some are glued up pretty good.

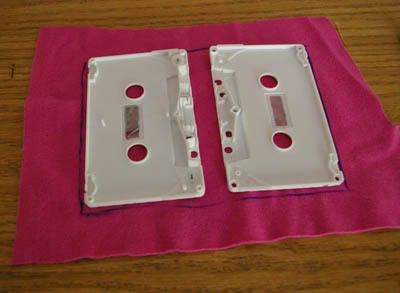
Here are the pieces together. The zipper is 9 inches and I just placed the two pieces of the tape over the inside fabric to see how big it had to be. Like so:

But you still might have to cut it down a little more than that, so it fits snug inside. I actually ended up using a piece of red felt for the inside rather than this hot pink jersey material. The felt was thicker and I like how the thicker fabric looked better than the thinner jersey.

Take some pliers and go to town on the little pieces that stick up on the inside. Be careful as you get to the pieces close to the edge, you might end up taking a whole chunk of the outside of the tape as well. I almost did a couple of times! You could use a Dremel tool to do this part.. It's what I used for my first cassette tape wallet, but I wouldn't recommend going that route, because it resulted in many tiny burns all over my arms and whatnot from molten globs of plastic that shot at me from the Dremel.

Now here's the fun part.

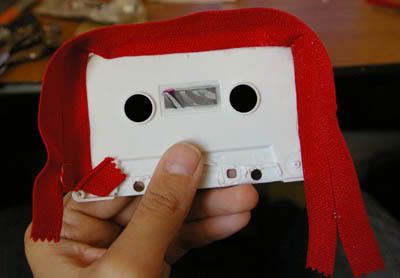
Take your zipper and slowly start to glue it to the inside of the tape. I use the glue E6000. I'm pretty much in love with that glue, it works so well. Some people have recommended using hot glue because it doesn't take as long, but I don't think it'd hold as long as the E6000 has.

Anyway, as you glue it in, only apply glue to about an inch and attach the zipper, and hold it for a few minutes. Make sure the zipper foot has enough room to easily zip and unzip. Rinse and repeat until you've made it all the way around. If you don't hold it down and wait for those few minutes, the zipper and tape will come apart and result in much frustration and glue-fingers. As you see here, I have quite a bit of zipper left over, so I just ended up making it go a little further onto the bottom of the tape. On my original tape the zipper ended up fitting perfectly, I don't know what the deal is with this one! You should do this step with the zipper unzipped or else you'll end up having to really carefully unzip the stupid thing when the glue hasn't cured all the way.

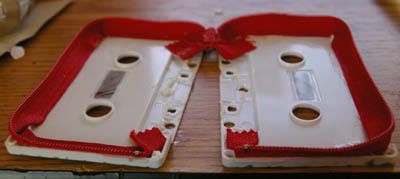
Here it is unzipped. Glue on the other side of the zipper to the other cassette tape half.

Here are the two sides all glued in.

Slather your glue of choice all over the inside of the tape and apply the inside fabric. Press it down with some pressure and hold for a minute or two, and that should be fine.

Now, I recommend not to touch this thing until at least 24 hours have past. If you don't you'll regret it because if you don't give it at least 24 hours for the glue to cure, it will probably fall apart a lot faster.

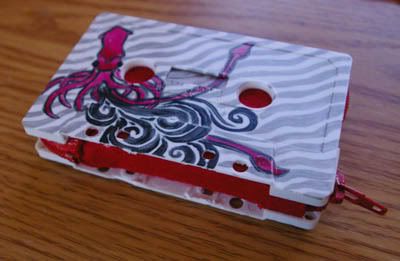
Here's the finished product. I painted it with enamel paints :)

I ended up giving this one to my little sister. She's had a good birthday weekend. If anyone has any questions about this tutorial, please feel free to ask!

Purse/Bag

Makeup bag tutorial

Sorry I haven't posted in a long time! It's been a busy few days. It's also been a while since I've said I was going to do the makeup bag tutorial, so I put it together today! For all of you who don't remember, or who haven't seen, my first post was about a travel set that included a makeup bag.  I kinda had to wing it on the bag because I knew the style I wanted it to be, but I couldn't remember where I had seen a tutorial for it a long time ago.  I promised I'd make a tutorial for the makeup bag according to how I made it, so here it is! :)

All the pieces.

You'll need to cut two pieces of fabric this way. An outside fabric and an inside fabric. This is my outside fabric on the wrong side.

For the lining:

Fold it up where both 10 inch sides are touching, and sew up the little tabs along the white line.

Fold the hole so it sits flat like so. See what my fingers are holding? That's the part I had just sewed up.

Should look something like this.

Sew along this line.

Take one of the top flaps, line it up and sew in 1 1/4 inches in. Repeat on the other side.

Repeat these steps on the other side, and then repeat everything again for the outside of the bag. The only difference is that for the first step you take your thin strip of fabric* for the strap part, fold it in half, and sew it into the tab, where the ends of the strap stick out. ( Sorry, it's hard to describe this stuff sometimes :( ) I had to draw this step because I forgot to take a picture of this.

*For the strap, take a piece of fabric measuring 6 inches by 2 inches. Fold it in half, the hot dog way so the wrong side is facing out, and sew along the open side. Flip it inside out.

Here's the diagram of how you put the strap part in. This is the only difference for the outside of the bag.. everything else is just like how you sewed the liner together.

You should have the outside and the inside all sewed up. Here's mine sitting next to each other. You'll need to flip the outside part so the right side is out, but keep the liner with the wrong side on the outside.

Stick the liner on the inside. Now on to the zipper!

The zipper I got is 9 inches long. You can get any size zipper but you'll have to adjust the size of the length of the bag so it's 1 inch longer than the zipper size. Example: If you made a smaller bag, with a 7 inch zipper, instead of making it 10 inches long, it'd be 8 inches.

You don't have to do these two steps to the zipper, it's just habit for me.. I think it makes them look more finished.

Take a small piece of fabric and sew it along the line. Make sure to put the right side of the zipper so it's touching the right side of the fabric.

Here's how it looks when it's sewed up. (on the left) For the little tab to the left, I took a piece of fabric that was 3 inches by 4 inches, fold it hamburger style, (right sides touching) and sew up the two sides. Turn right side out. Stick the zipper into it and sew it up. Like so. It doesn't matter which way you do these two pieces. On this bag I did it so the tab was on the side where the foot sits when it's closed, but with my original bag, it's the other way around.

Sorry.. it's another crappy drawing.

Pin the zipper in place. Generally I make it so that the little tab from the zipper is on the side opposite of where the strap is. Sew up carefully.

Here it is with the zipper all sewed in. You can see where my sewing machine didn't like me at the bottom. You can see where I still have a pin at the other side of the bag.. I had to hand sew the ends to finish this one off. You might not have to.. I didn't have to for my first one, but ended up having to for this one because the zipper was slightly off.

And you should be done!

I'm giving this one to my sister. She desperately needed a makeup bag, haha. I hope I wasn't too confusing with this tutorial.. if anyone has any questions, please feel free to ask!

Purse/Bag

Cassette tape wallet, then and now.

About 10 months ago I made a cassette tape wallet after I was inspired by some that I saw online. They were on sale for $43 and the first thought in my mind was, "I can make that for less!" So that's what I did. :) Here's some pictures of it when it was freshly made.

The point of this post wasn't just to show you all my wallet, but to show you guys this wallet after 10 months of use and abuse from me. I had my doubts whether it would stay together because all I did was glue everything.. the zipper, the fabric.. I figured the first thing to go would be the zipper, because of the constant zipping and unzipping that this thing would have to take. Fortunately, to my surprise, this thing has kept up pretty well. :) It's showing a little bit of ware because of some minor cracks at the bottom, and the text on the cassette tape has been rubbed off.

Here are some pictures of it now:

You can barely even tell text used to be there!
Another angle.

Unzipped, with all my goodies inside.

Showing the inside with my grubby, dirty art hands.

The ugly bottom of it. The glue shows, but that's just because I was impatient when I made it, and I didn't take the time to make it less noticeable. You can also see how some of the edges are cracking.

This one shows the cracks the best I think.

And thats it! For those of you who want a tutorial, I will be posting one soon (Posted!), after I post the tutorial for the travel set I made.

Oh! Don't forget to vote for my zombie protection kit on Craftster! Voting ends on the 12th this month so be sure to squeeze your vote in!

Purse/Bag, Tutorials

Oldie but goldie: Towel pool bag

Summer is approaching, so I thought I'd share a project I did a while back which would be used at the pool or beach. Basically it's a beach bag, but it's also a towel! It folds up into itself (much like a quillow) but it has handles that make it into a bag. You can throw in your sunscreen, flip flops and other goodies you'd bring to the beach and/or pool. Here's mine:

Like any cat owner knows, if you spread out something on the floor and then try to take pictures of it, they come and lay all over it. That's my cat, Ewok.

Here it is folded into itself.

Here's the other side.

Tutorial!!

You need a beach towel, and another towel. I don't think I had a regular towel.. I grabbed a towel that wasn't as large as a normal towel, but it was bigger than a washcloth. If anyone knows what it's called, please educate me! :)

Here's where you cut it up. I believe the strips 2 and three were about an inch and a half to two inches.

After everything is cut, stick the biggest piece, number 1 on top of the beach towel, with equal distances on each sides, and sew up the three sides that have the red zig zags on. Also, you may want to hem the two handle pieces at this point.

Attach the two handles wherever it's comfortable, and sew them up!

And your towel bag should be complete! to fold it into itself the "correct" way, flip it over so you can't see the other, smaller towel, fold up the two sides towards the center, and then fold up about the same size of the smaller towel from the bottom. When you get to the top, flip it inside out. (like a Popple, haha)

Sorry if my folding instructions aren't that great.. it's kind of hard to explain. You could just stuff it in without all the neat folding.. which is what I usually end up doing.

Now, you may say, "Hey, but after I get out of the water and towel myself off, my towel will be all wet! What about transporting my stuff back home?" Well, if you think about it, almost everything that you carry in your bag gets wet, from sunscreen to sunglasses, so as I see it, it doesn't matter if you throw those things into a wet bag. As long as you take everything out, unfold it and let it dry when you get home, it should be fine. :) For those of you who take magazines or anything else that would not fair well under moist circumstances, then I'm sorry, this craft may not be for you unfortunately :( But you can still make them for friends! :)

Clothes

Late night crafting: Part two!

Well, I showed my little sister my new billed beanie hat, and she fell in love with it. I found her wearing it a lot after I had made it, so I decided to make her one today! (It's her birthday)

Here are the pictures! I took shots on my progress, so this post will look strikingly similar to my other late night post.

Dammit, I hate flash. Here's the sweater I cut up to make this hat.

Here are the pieces. Freaking flash... the blue isn't this saturated in person, it's more of a midnight blue.

Here she is wearing it. I don't think any of the pictures show the true color of this hat.

As you can see, I added a little more to this hat, which I like a lot. The sweater was a military sweater, so it had those little flaps on the shoulder, which I cut off, sewed together and sewed along the brim. I think it turned out pretty nicely. :) She already pinned on a bunch of pins we grabbed from the Maker Faire last year, but when I tried to snap a photo, my camera decided it hated me and died. (After I had stuck brand new lithium batteries in)

Misc-

Oldie but goldie: Shift boot cover

I don't have time to craft today because I have class ALL day.. so I thought I'd share another old craft. My friend had asked me to make a new shift boot for his car, and when he found the fabric he wanted, he handed me the fabric, which happened to be a bandanna, and the old shift boot, and I got to crafting.

They're super simple to make.. it's basically just two triangles sewed together. I can't give a very specific tutorial unfortunately because not all shift boots are the same.

Here it is:

I hope to be able to make myself one for my new car... if I can get it! If I do, expect another shift boot post!

Clothes

An oldie but a goldie: Mohawk Beanie!

I don't have time to make anything today, so I figured I'd show you guys one of my older crafts that I'm pretty proud of. Since I made a beanie last night, I'll post another beanie today! I give you, the mohawk beanie. It's inspired by the book from knit-head, Pretty in Punk. They offer knitting patterns, but at that time, I wasn't confident with my knitting skills, so I decided to crochet it up! Here are the results:

Myspace angled shot.

Closeup of the 'hawk.

Detail of the string off of the ear warmers.

Here's a blue one!

Clothes

Late night crafting

This will probably be one of many late night craft sessions/blog posts. It's just a trend for me to start crafting in the evening.. Anywho, let's get to the meat of this post! After watching Threadbanger's latest video, I was inspired to make a billed beanie. Even though the video topic this week was male fashion, I liked the beanie too much to pass up.

I kind of threw together a half-assed tutorial... really it's just a few pictures of some of the steps to make the hat. If you want a really detailed explanation, please check out the video (the link above) because it will be a way better tutorial, haha.

Here's everything cut out.. Hehe, camo duct tape :)

Almost done! Just gotta sew the bill on!

And wa-la!

I love this hat.

So basically I'm going to make a lot more of these cuz I think they're just so darn cute ;) I already know a few people who I need to make some for!

For the Home, Other

ZOMBIES, WATCH OUT!

I made this for the contest over at Craftster for this month. Basically you buy anything at the dollar store, but it has to cost 10 bucks or less. There have been some amazing entries so far, so hopefully I do alright! Here's my entry:

For more pictures and a somewhat explanation/rambling, check out my post on Craftster, here. Make sure to check out the other entries as well, they're all great!

Purse/Bag, Tutorials

My first post and new travel set.

This is my first official post since this blog was created, and I'm oh so excited. I hope you guys like it! I decided to make a travel set the other day after being inspired to make a straightener cozy by gatheringtwigs over on Craftster.

Here's everything together:

Forgive me for the dirty mirror, I was too excited to take pictures that I didn't think to clean it up first!

Here's my straightener cozy, I made it with an oven mitt that should have been thrown away years ago:

Here's a progress shot that shows the poor worn out oven mitt.(I seam-ripped around it, it wasn't in that bad of shape, it was just burned a little.)

Here's the finished product with the straightener tucked inside.

After I made that I decided I needed a new makeup bag, and I had plenty of the outside fabric left over. I remember seeing a tutorial somewhere on Craftster about the same kind of style of makeup bag that I was going for, but I don't remember where it is so I had to kind of wing this one. I'll probably write up and post a small tutorial in a few days. For now, here's some pictures.

Here it is, all zipped up with stray threads hanging out everywhere. I promise I cut those off after I took these pictures! :)

Here it is, opened.

After I finished the bag, I decided I wanted to make one last thing to make it a complete set. I ended up using a cubicle mirror I had gotten from a mystery box I purchased at American Science and Surplus. (Great store, you should check them out) I cut a piece of fabric to size, sewed up the sides , fit the mirror in and glued it in place. I wish I had taken more pictures of the progress of the mirror, but I wasn't even sure if it was going to work at all! Perhaps I'll draw it out and post a tutorial for it along with the makeup bag.