Clothes

We Are Sex Bob-omb! And We're Here to Retry Making This Shirt and Stuff!

So yesterday I posted my huge failure in trying to bleach my Sex Bob-omb shirt and today I promised to show the spray painted one I ended up making and wearing instead.  Luckily I had another black shirt hiding in my closet, so I whipped up another stencil...

With this stencil I decided I'd try out bridges, because I saw someone use bridges to make sure everything was lined up correctly, and then carefully cut them out with an exacto knife.

Here I am, cutting them out.  If you do this, be VERY careful not to cut your shirt.

All cut out and ready to paint!  I stuck cardboard in this shirt just like last time to protect the back of the shirt.  I'm using some Krylon plastic fusion hammered metal spray paint because that's all I had on hand and I didn't feel like going out to buy a whole can of paint just for this shirt.

If you're spray painting, go outside.  I didn't feel like going into the back yard with the dogs so I hopped out the window onto the roof.

Spray spray spray!

Lookin' pretty done here.  I let it dry outside and closed the window so the fumes couldn't get inside.

After it dried I took it inside and carefully started peeling the freezer paper off.

No bleeding! :D

Woo hoo!  There's some slight over spray up by the collar but it's not nearly as bad as the bleached monstrosity that happened with the last shirt.  Since it's just a tiny bit of over spray I was able to get it all off.

My boyfriend actually taught me this trick, just use tape to pick up the over spray!  It worked like a charm.

Ta da! Here it is in action!

Since I used spray paint, I'm sure the logo will fade somewhat after washing it in the washing machine, but I kind of wanted that effect so I'm totally cool with that.  If you aren't cool with that, then you should look into getting some spray on fabric paints.  I've seen them at every craft store I've gone so so they shouldn't be too hard to find.

So Thursday was awesome, I wore the shirt!  It was at the Alamo Drafthouse in Austin, so they had Scott Pilgrim themed food and Universal Studios paid for each person to have one of the choices of foods and one drink, and Edgar Wright was there with 5 of the cast members!  When I heard he would be there with some of the cast I fully expected like 2 of the cast members to show up.  Michael Cera, Anna Kendrick, Mary Elizabeth Windstead, Brandon Routh and Jason Schwartzman were all there and after the movie they did a Q and A which was pretty awesome.  I ended up meeting Michael Cera and Jason Schwartzman, but everyone else slipped by really fast to get to the after party (that I sadly couldn't go to because I brought my 16 year old sister... the after party was 21 and up).    It was still awesome!!

Clothes

We are Sex Bob-omb!

I'm a pretty big fan of the Scott Pilgrim comics and I was super excited about the movie, nevermind the fact that I love Edgar Wright movies.  So when I got the chance to enter a contest (hosted by Ain't It Cool News) to win two tickets to an advanced screening last Thursday I knew I had to at least try.  All you had to do was enter a picture of yourself rocking out and you could enhance it in Photoshop if you so desired.  So I made my little sister (who was the one who would go with me if we won) put on her Gideon shirt that we made the other day and jump around with her ukulele while I took pictures.  After I picked out the best picture I added in some effects that fit in to the movies style.  And guess what?  We won!! :D  Here's the winning picture:

Immediately after hearing that we won I knew it was time to make my Sex Bob-omb shirt.  I wanted it to be a black shirt with the logo bleached on, so after scouring the internet for tutorials on how to do such a thing, I ended up with a roll of freezer paper, a black shirt and some diluted bleach.

Using freezer paper as a stencil is a pretty cool trick that I've only used once, and never with bleach, so this was a very new experience for me.  Here is everything in preparation of the stencil.  Freezer paper, a printout of the logo (I found it by doing a google image search), an exacto knife, the shirt, and (not pictured) an iron.

Rip off a sheet of freezer paper and put over the printed logo.  The freezer paper is pretty thin so you should be able to see the printed image clearly enough to trace it out.

Next, use your exacto knife to cut the image out.  I didn't cut bridges for the inside details of the face because I figured I could just cut them out, place them in the right spot and just iron them down.

I live in a house full of animals so I have to de-hair anything I want to stencil on.  I'm sure if I skipped this step, the freezer paper wouldn't have stuck very well.

Iron that sucker down!  I put it on the cotton setting (because my shirt was 100% cotton) but I didn't let the iron sit on the stencil for too long.  Just enough to get it to stick down.

Here's the stencil, ready to go!  I ended up using more freezer paper around the edges to protect it from over spray from the bleach.

Find a piece of cardboard that is about the same size as the shirt and carefully put it inside, to protect the back of the shirt from the bleach.

I put my shirt in the bathtub and sprayed it with a mixture of about half water and half bleach.  Everything I read about this process said that the bleaching happens fairly quickly, so don't leave your shirt unattended.  For me, it felt like the color change took ages, but eventually it did start changing.  I was worried that I wasn't using the amount of bleach or something so I kept spraying the shirt, thinking that eventually it'd help.

Here you can see it finally changing to that reddish color that black shirts end up bleaching to.  While this was happening, all I could think was "Hmm, this freezer paper doesn't seem like it'd be that great of a barrier for the bleach, what if it just soaks up all the bleach and bleaches even where the paper is..."

So after it got to the red bleachy color I desired, I rinsed it with cold water and started excitedly peeling the freezer paper off and...

...

...well...

...Shit.  Well it seems like I was a little heavy handed with spraying the bleach... and looking back, I should have found a spray bottle that sprayed a finer mist, and I should have barely spritzed it.    So I thought, maybe I could salvage this mess.... perhaps drawing the black back in with a Sharpie marker?

Okay, that didn't work.  Well damn, what a waste of a black shirt :(

I think I'll have to revisit this freezer paper stencil with bleach again.  But for my Sex Bob-omb shirt I ended up doing what I know... and that's stenciling it on with spray paint.  Tune in tomorrow for that post!

jewelry

Braided chain bracelet

I was browsing through Craftster a few days ago and saw a super cute bracelet made by fellow poster milesapart714 that she made based off a $300+ designer bracelet.  Her version was $3 and, in my opinion, much cuter.  I just knew I had to make one.  The next day I drove off to my nearest craft store and headed straight to the jewelry section.  Everyone that lives around me must have had the same idea because all of the short chains suitable for this bracelet were sold out, so I had to settle on buying a 60" chain which was thankfully on sale!  After gathering all the materials; chain, jewelry findings, a charm and embroidery thread my total came to $7 bucks.  A little bit more expensive than milesapart714, but I now have enough materials to make a few of those bracelets and more if I really wanted to. Here are some pictures of the making of the bracelet:

All my materials gathered up.  I used a darker silvery chain because it matches more of my stuff.

I taped the ends of the thread so it would be easier to thread through the chain

Here it is, finished!

Some close ups:

All in all, I wish I got a bigger chain but I do like how mine turned out.

I had some of the embroidery thread left over that was already bunched up and ready for more braiding, but not enough for another bracelet, so I tried my hand at doing something small... a ring! Here's a picture of it:

I hadn't sealed the knots yet with glue or clear nail polish because the bracelet didn't seem like it needed any, but the ring is already starting to unravel so I decided to be safe and seal them.

Big props to milesapart714 and her awesome tutorial!  Check it out here: http://www.craftster.org/forum/index.php?topic=356098.0 and while you're at it, swing by their blog: http://www.studs-and-pearls.com/

Misc-

Sailor's Knot Bracelet

In order to get myself back in the crafting groove I've been doing some quick and easy things like making simple jewelry and little amigurumi.  When I finish my crochet project I'll post it here, but for now I have an awesome bracelet to talk about.  Almost a month ago Etsy ran a "How-Tuesday" where Simone Tan (a.k.a Groundsel) explained how to make a sailor's knot bracelet.  I actually saw this post a few days ago and as soon as I finished reading it I grabbed the first skein of yarn closest to me and started to knot.  Here is the finished bracelet:

It's kind of small and skinny because I just used normal yarn.  I wanted to make something chunkier so I headed to my local craft store and bought some thicker silver rope stuff and some even thicker cording.  Here it is with the silver rope:

This one is my absolute favorite and I've been wearing it every day since I've made it.  The silver rope makes it look more "fancy" so I can wear it when I'm being more dressy as well as just wearing it casually.

Here they are next to each other on me.  I think this style of bracelet looks better larger.  This brings us to the cording.

This stuff is really thick, and unfortunately I didn't get enough of it to make a bracelet so that's going to have to come later whenever I find the time to go buy more of this stuff.  Luckily it's only like .29 cents a yard!  I think I'll probably make a fabric bowl with this cording I have now.  I've been itching to make one for a while.

Sailor's knot bracelet tutorial: Here!

Fabric bowl tutorial:  Here!

Art

Pinhole cameras

I have been a photography nut for a long time, and I knew it was just a matter of time before my crafty side collided with my photographer side.  Well this just so happened to take place just a few days ago when I found a website with instructions on how to make your own pinhole cameras.  I was so excited that I ended up making three of their pinhole camera designs; two for me and one for my little sister.  Unfortunately the first roll of film from their "Photos of Your Mother" camera was kind of a bust because I punched the shutter hole way too big.  They say to use a needle to poke a small hole, but I shoved the needle through, causing the hole to be gigantic... for a pinhole camera.  If the hole is too big the pictures will turn out blurry.  You really want to just barely poke through with the tip of the needle.  For shits and giggles, here are some of the photographs that came from that camera:

As you can see, the images are quite blurry and the spacing is way off, but with some tweaking I started getting those problems hammered out.  The next camera I tackled was the "World Pinhole Camera Day Camera." Lucky for you, I documented myself making this one!

And thats it!  I actually haven't finished the roll of film in this camera, but I did whip out a little matchbox pinhole camera and blew through that film really fast!  I actually like the design of that camera more because the guy adds a little "clicker" that helps out with the spacing of the pictures.  I don't have pictures of that camera, but I do have the pictures from it:

In these ones, the quality is better, but the vignette is pretty extreme because matchbox pinhole cameras have a pretty shallow body.

If you want to make your own pinhole cameras then you can visit Corbis Readymech Cameras for the quirky cameras or matchboxpinhole.com for a more simplistic camera.  So far the matchbox camera was my favorite, probably because it was smaller and easier to just throw in my purse and because of the clicker mechanism that helps with the spacing of the photographs.

Clothes

Hey man, nice shirt.

I just made this shirt yesterday and I couldn't help but post it up here right away! My older sister is always getting me in to comics and graphic novels, and most recently she got me on Scott Pilgrim.  If you haven't noticed, they've made a movie based on this series - Scott Pilgrim vs. The World.  Because of my excitement for this movie, I decided to make a shirt from Vol. 6, Scott Pilgrim's Finest Hour.  I had been wanting to make it after I finished reading that volume, but the other day I saw some footage of Comic Con where they were screen printing a whole slew of shirts, the one I had been thinking of making being one of them.  So obviously that made me get off my butt and make one for myself!

Scott Pilgrim inspired shirt

Ta da!

I'm in the process of making one for my younger sister.  I also want to make a Sex Bob-omb shirt as well.

Check out my other tutorial on how to make stencils for your own shirts!

Misc-

Rwar, Dino-Necklace!

Okay, well this little guy is actually a dimetrodon which makes him a pelycosaur rather than a dinosaur, but we can just pretend.  I've seen this idea before, stringing up little trinkets and toys to create new jewelry, and for some reason I decided I needed a dinosaur necklace.  I was quite surprised at how hard it was to find small dino toys, but eventually I found a big pack of them for 3 bucks so I snatched it up.  Most of the dinos in the package are too large for what I wanted to do, so I need to figure out what to do with them.  There were, however, about 4 or 5 guys in the package that would work just fine.

toy dinosaur

Here's the little guy I picked.

I used Krylon Fusion spray paint because it's supposed to bond to plastic and I wanted the best possible chance of the paint staying on and not flaking off on me as I wore it.  I suppose I could have just used some cheaper stuff but I didn't want to risk it.

spray painted dinosaur

Here he is, lookin' all shiny and new.

I have a tiny drill that I used to drill into the plastic to make way for the jewelry findings.  I actually messed up because the plastic is very thin on this guys fin so I ended up drilling right through.  That was fixed by a very generous glob of glue.

dinosaur necklace

And finally strung up as a necklace.

This guy is pretty cute and I can't wait to wear it out!  Now I just have to figure out what to do with the remaining dinosaurs...

Misc-

Tweet?

I'm finally going to catch up with the times and get myself on Twitter.  Unfortunately I couldn't have my good old name "Chezlin" because I was too slow to jump on the bandwagon.  Boo, oh well.  So if you people want to, you can now follow me @ChezlinTM. Keep a lookout for a new post coming up on Friday! :)

Clothes

Ay Sus!

I'm Filipino-American so I know a few silly Tagalog words here and there that my mom says now and then.  My little sister and I like to combine some of these words to make completely nonsensical phrases.  One of these gems is "Ay sus ginoo, sapatos puwet kugmo!"  Any Tagalog speaker now should see that this doesn't really make any sense, but that's the point!  "Ay sus ginoo" is an expression.. kind of like saying "oh my god."  I'm often greeted with that expression from my mom when I'm just goofing around the house.  The rest of it is literally, sapatos= shoes, puwet= butt and kugmo= booger.  So yeah, as you can see, it makes no sense.  Spanish speakers may notice the influence their language has had on Tagalog. Anyway, the point of this post is that my sister and I wanted to make shirts with this phrase on them.  We would always talk about it, but never really do anything, so randomly I decided I was going to make mine at least... I didn't know what shirt she wanted to use, and I didn't know if she approved on the final layout of the letters.

imgp4646

Here's the printout.

imgp4648

Here it is after I got to exacto-knifing.

imgp4650

I spray-adhesived that sucker down.

imgp4651

Then I sprayed black spray paint everywhere.  Notice that I had to do some more masking off with tape to avoid overspray.

imgp4653

The finished product.  There's a little overspray on the neck, but I can live with it.  I loved how it turned out anyway.

So that concludes my experiment with stencils and spray adhesive.  I've done stencils before, but I'd always just kind of hoped they'd stay in place... I finally got my hands on some spray adhesive and used it!  Since making the shirt, I've kind of abused it.  I just threw it into the wash and dryer without setting the ink or anything, and it bled and smudged a little, but whatever, I'll still wear it.

Bedroom, For the Home, Kitchen

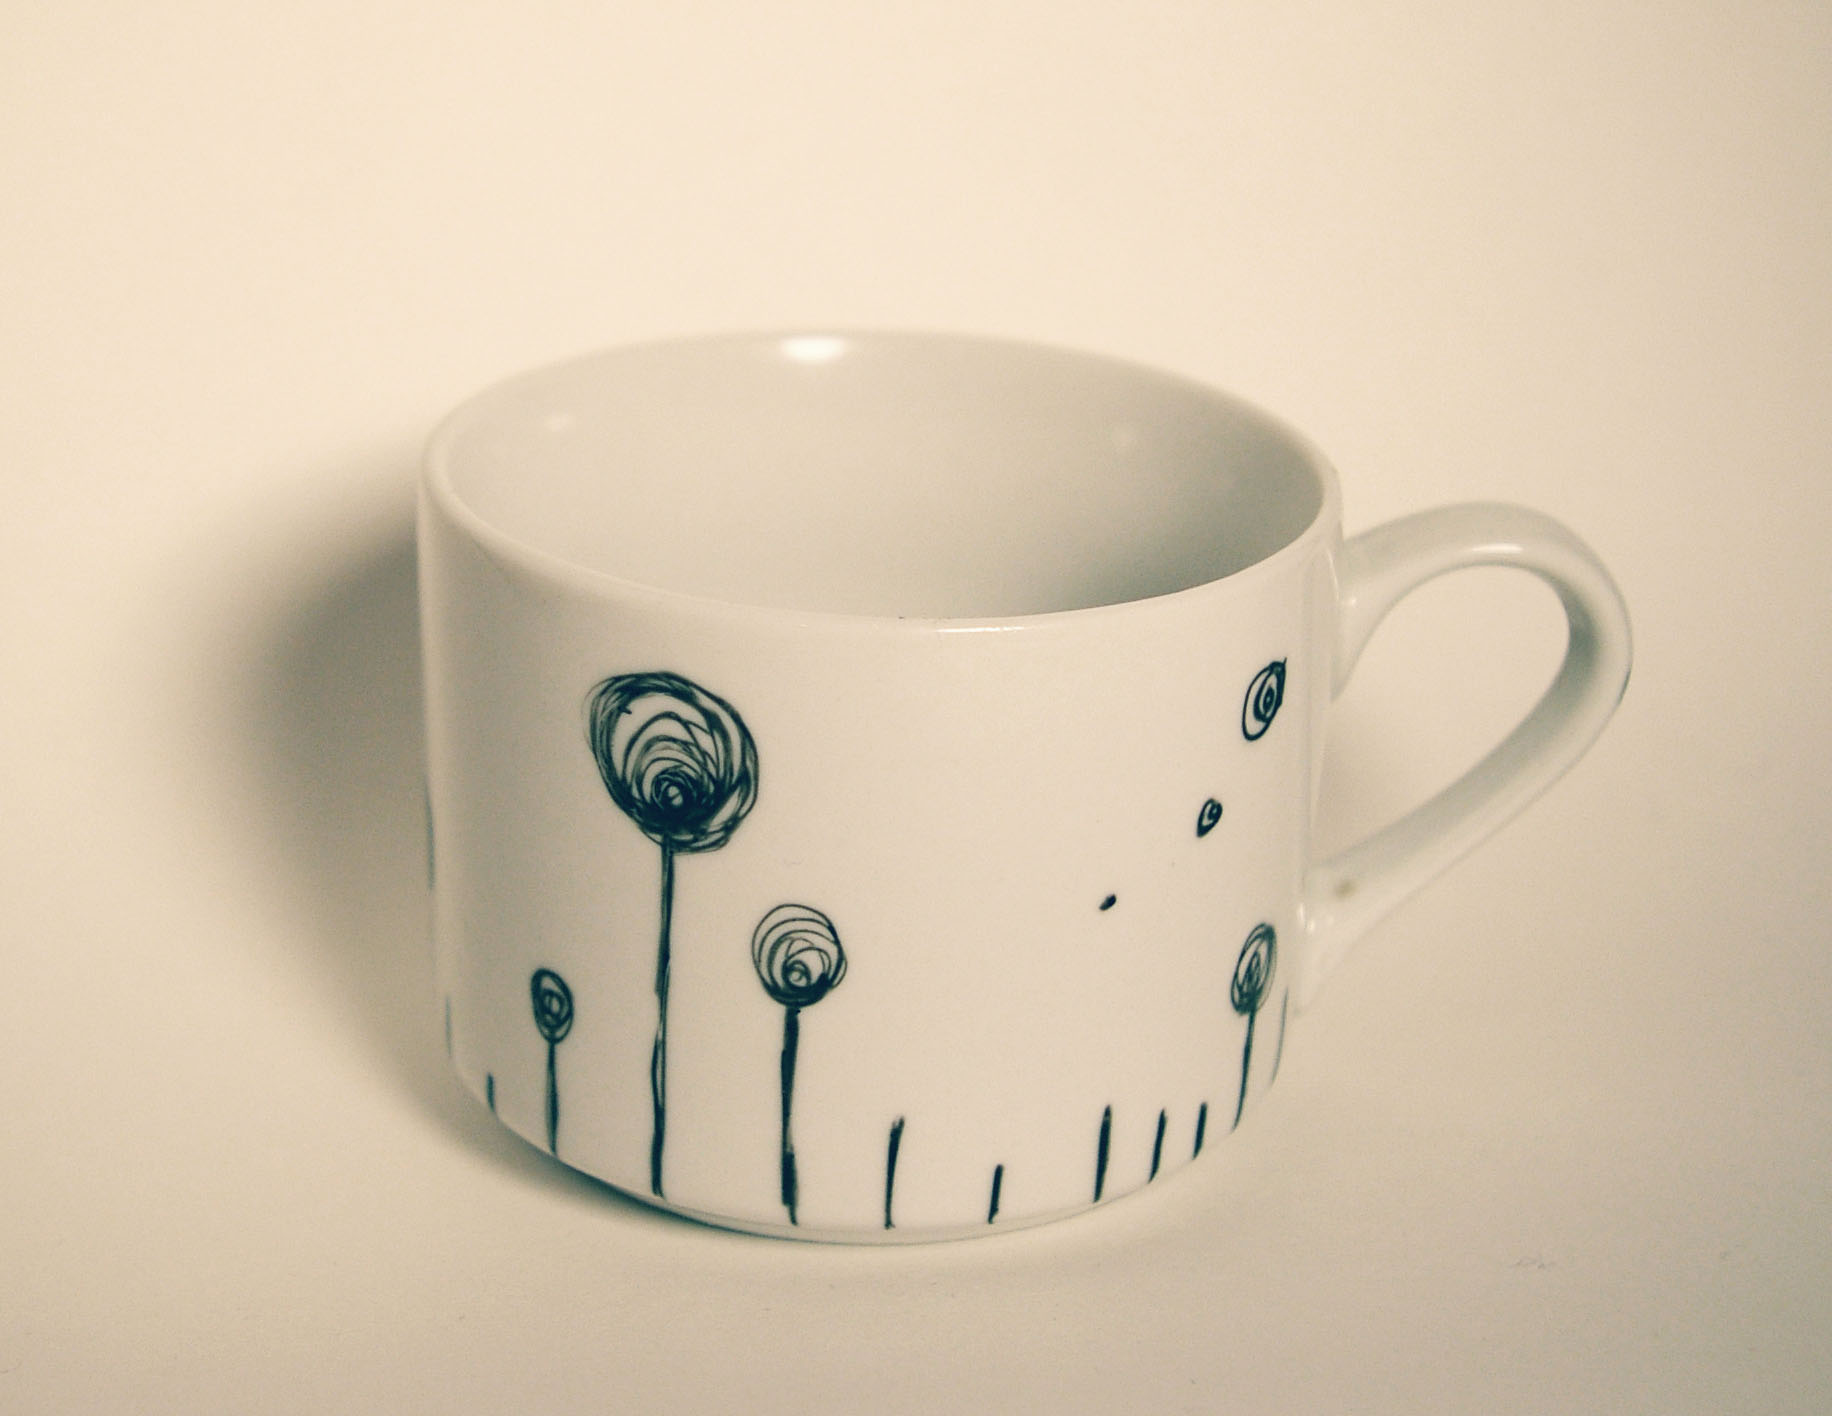
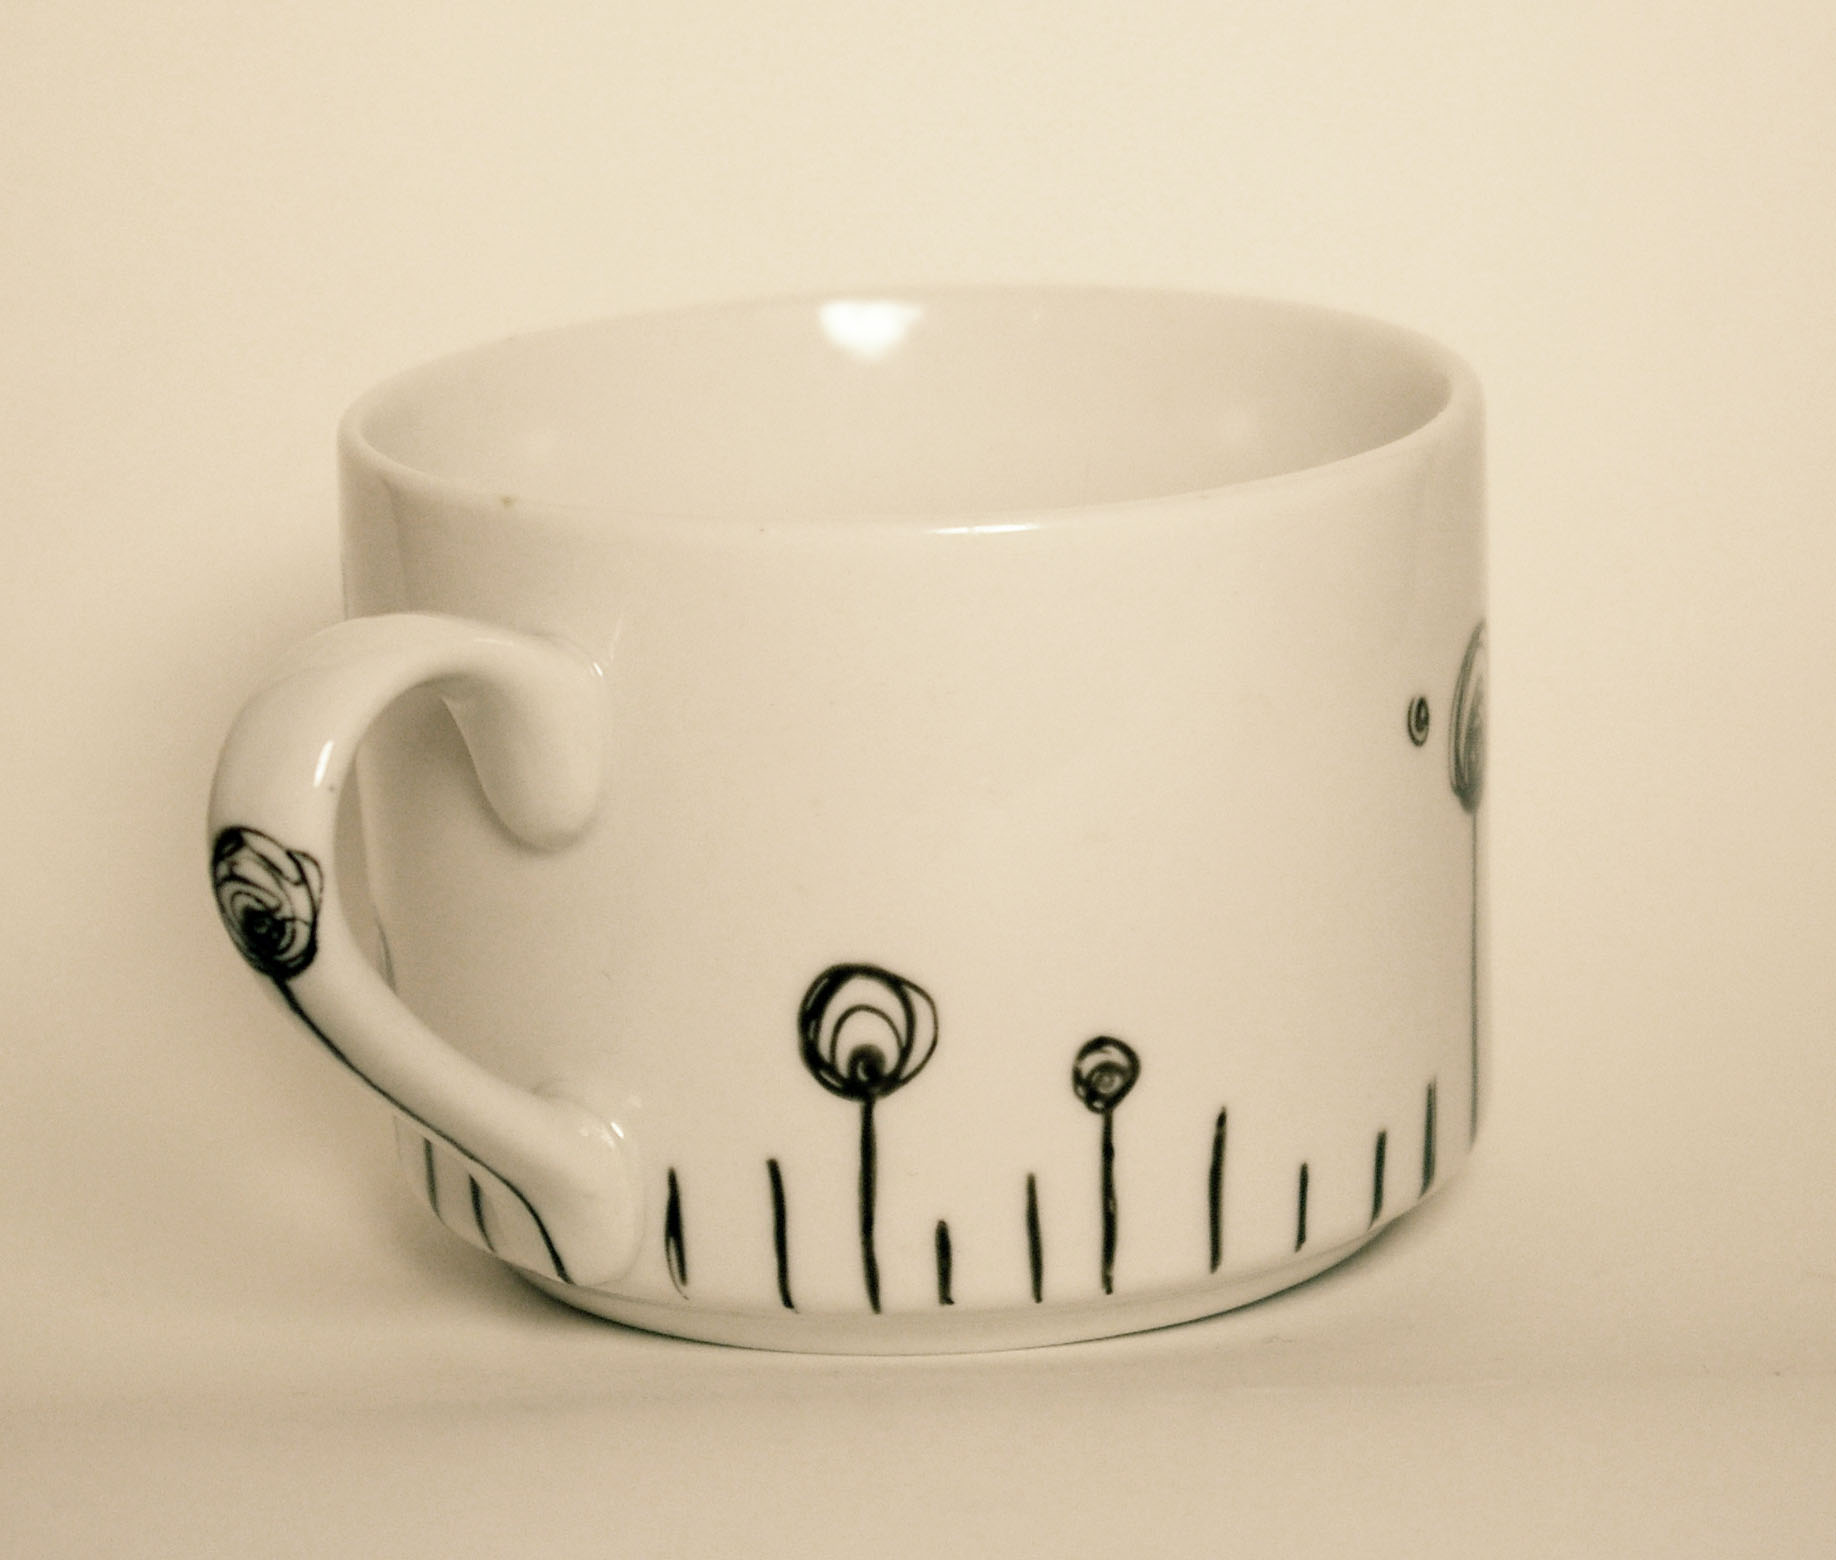
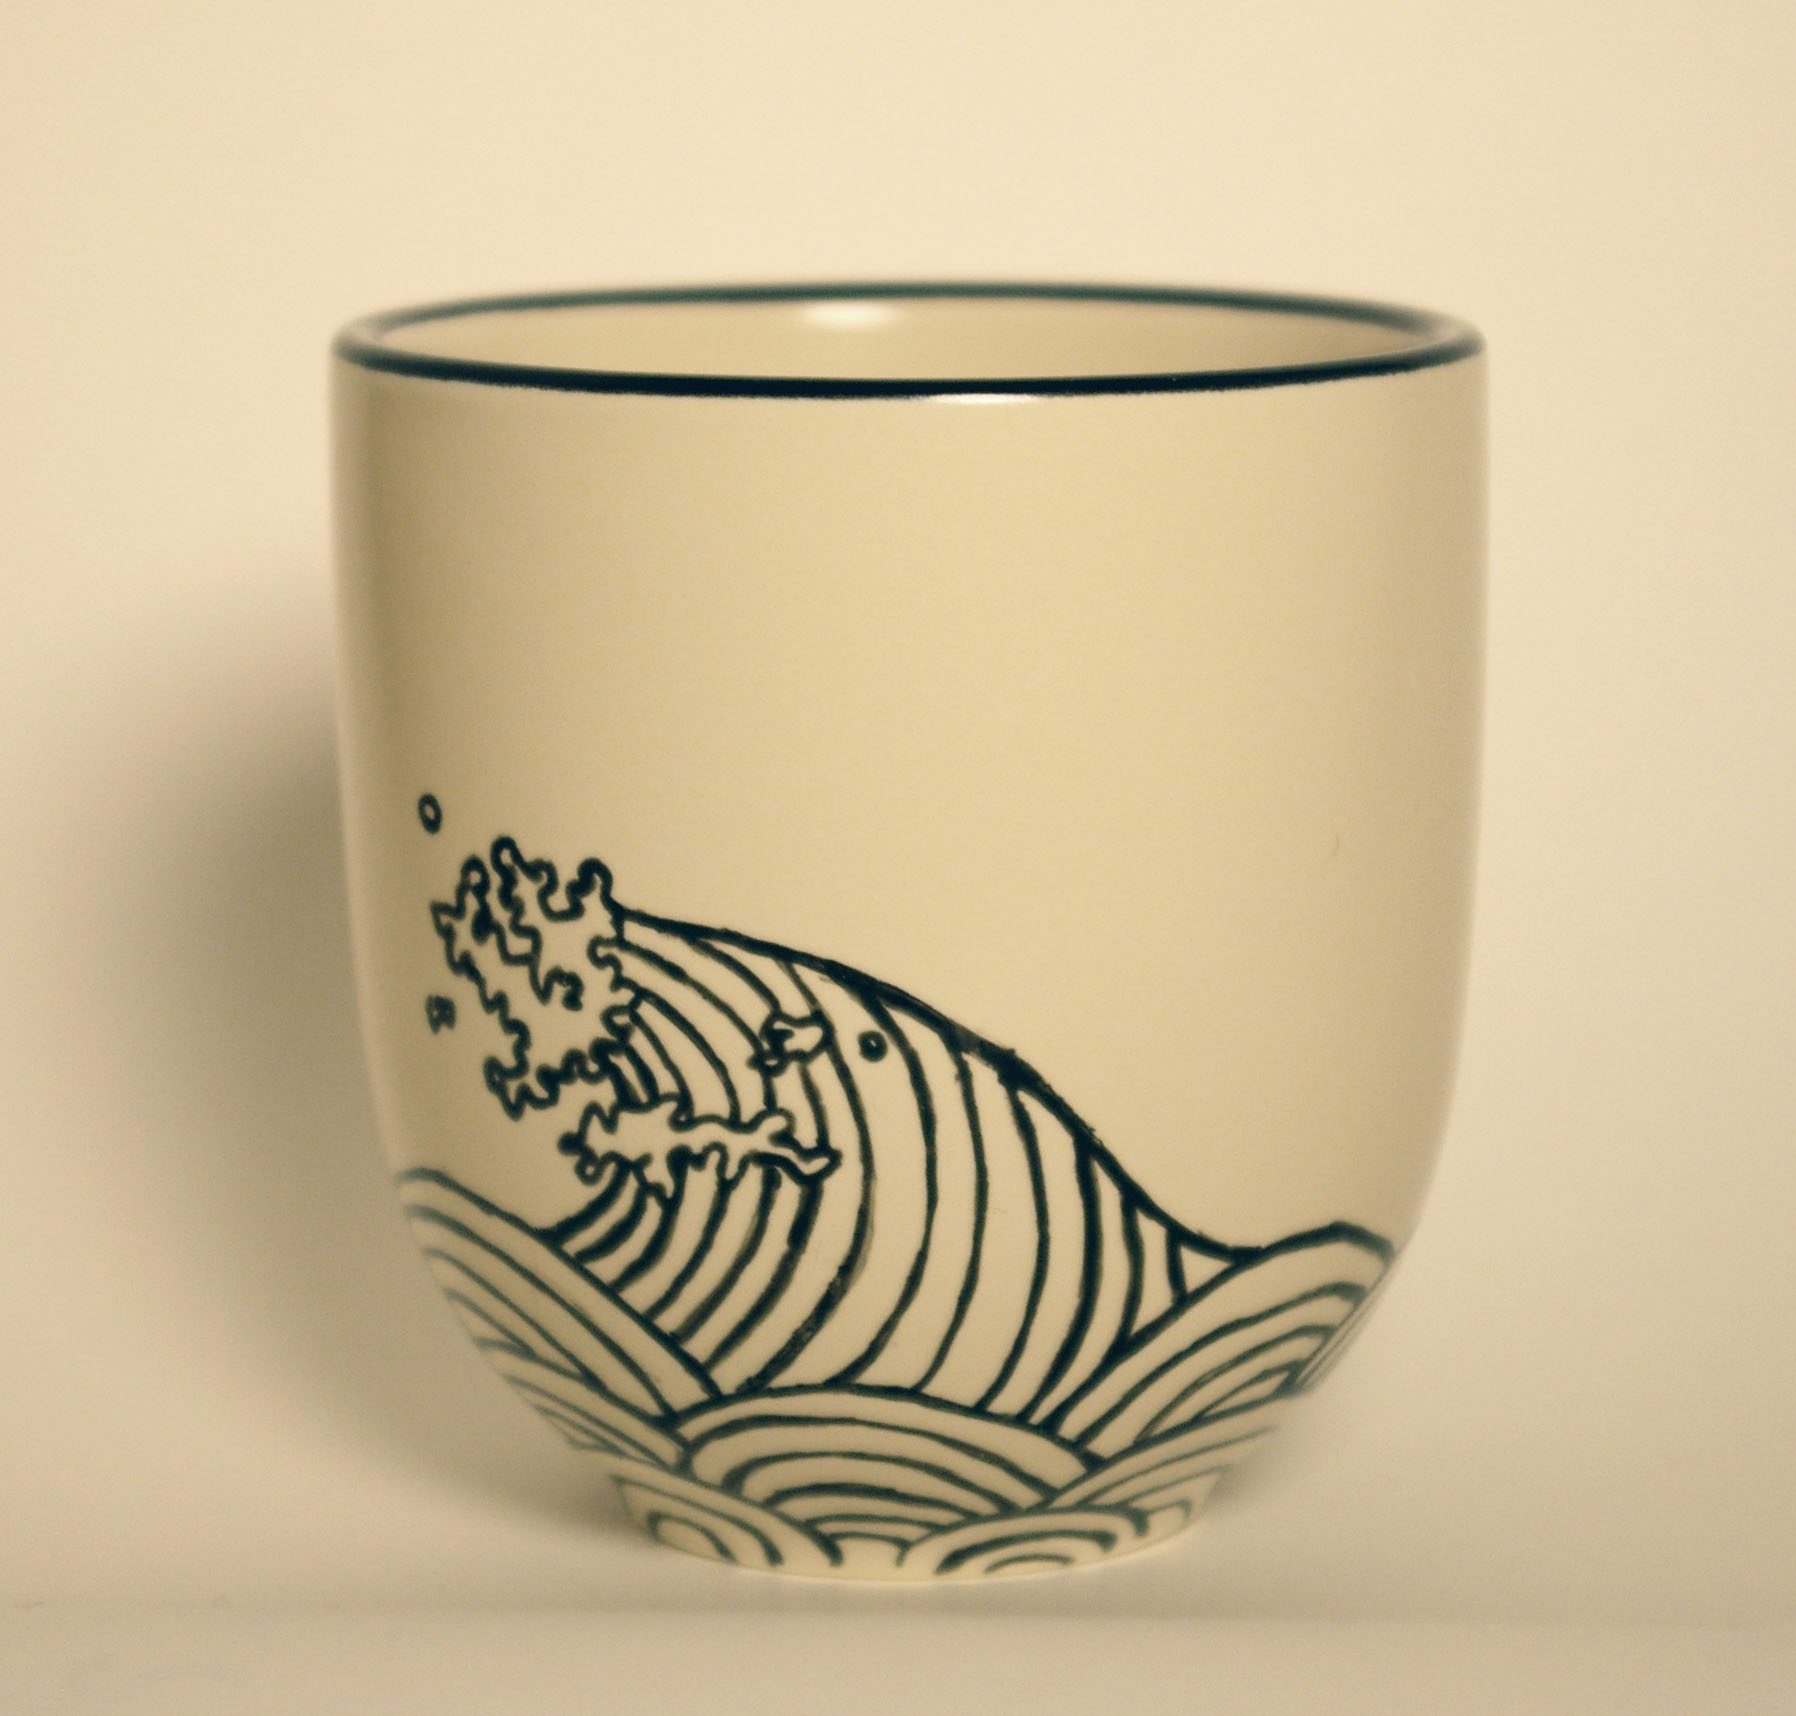
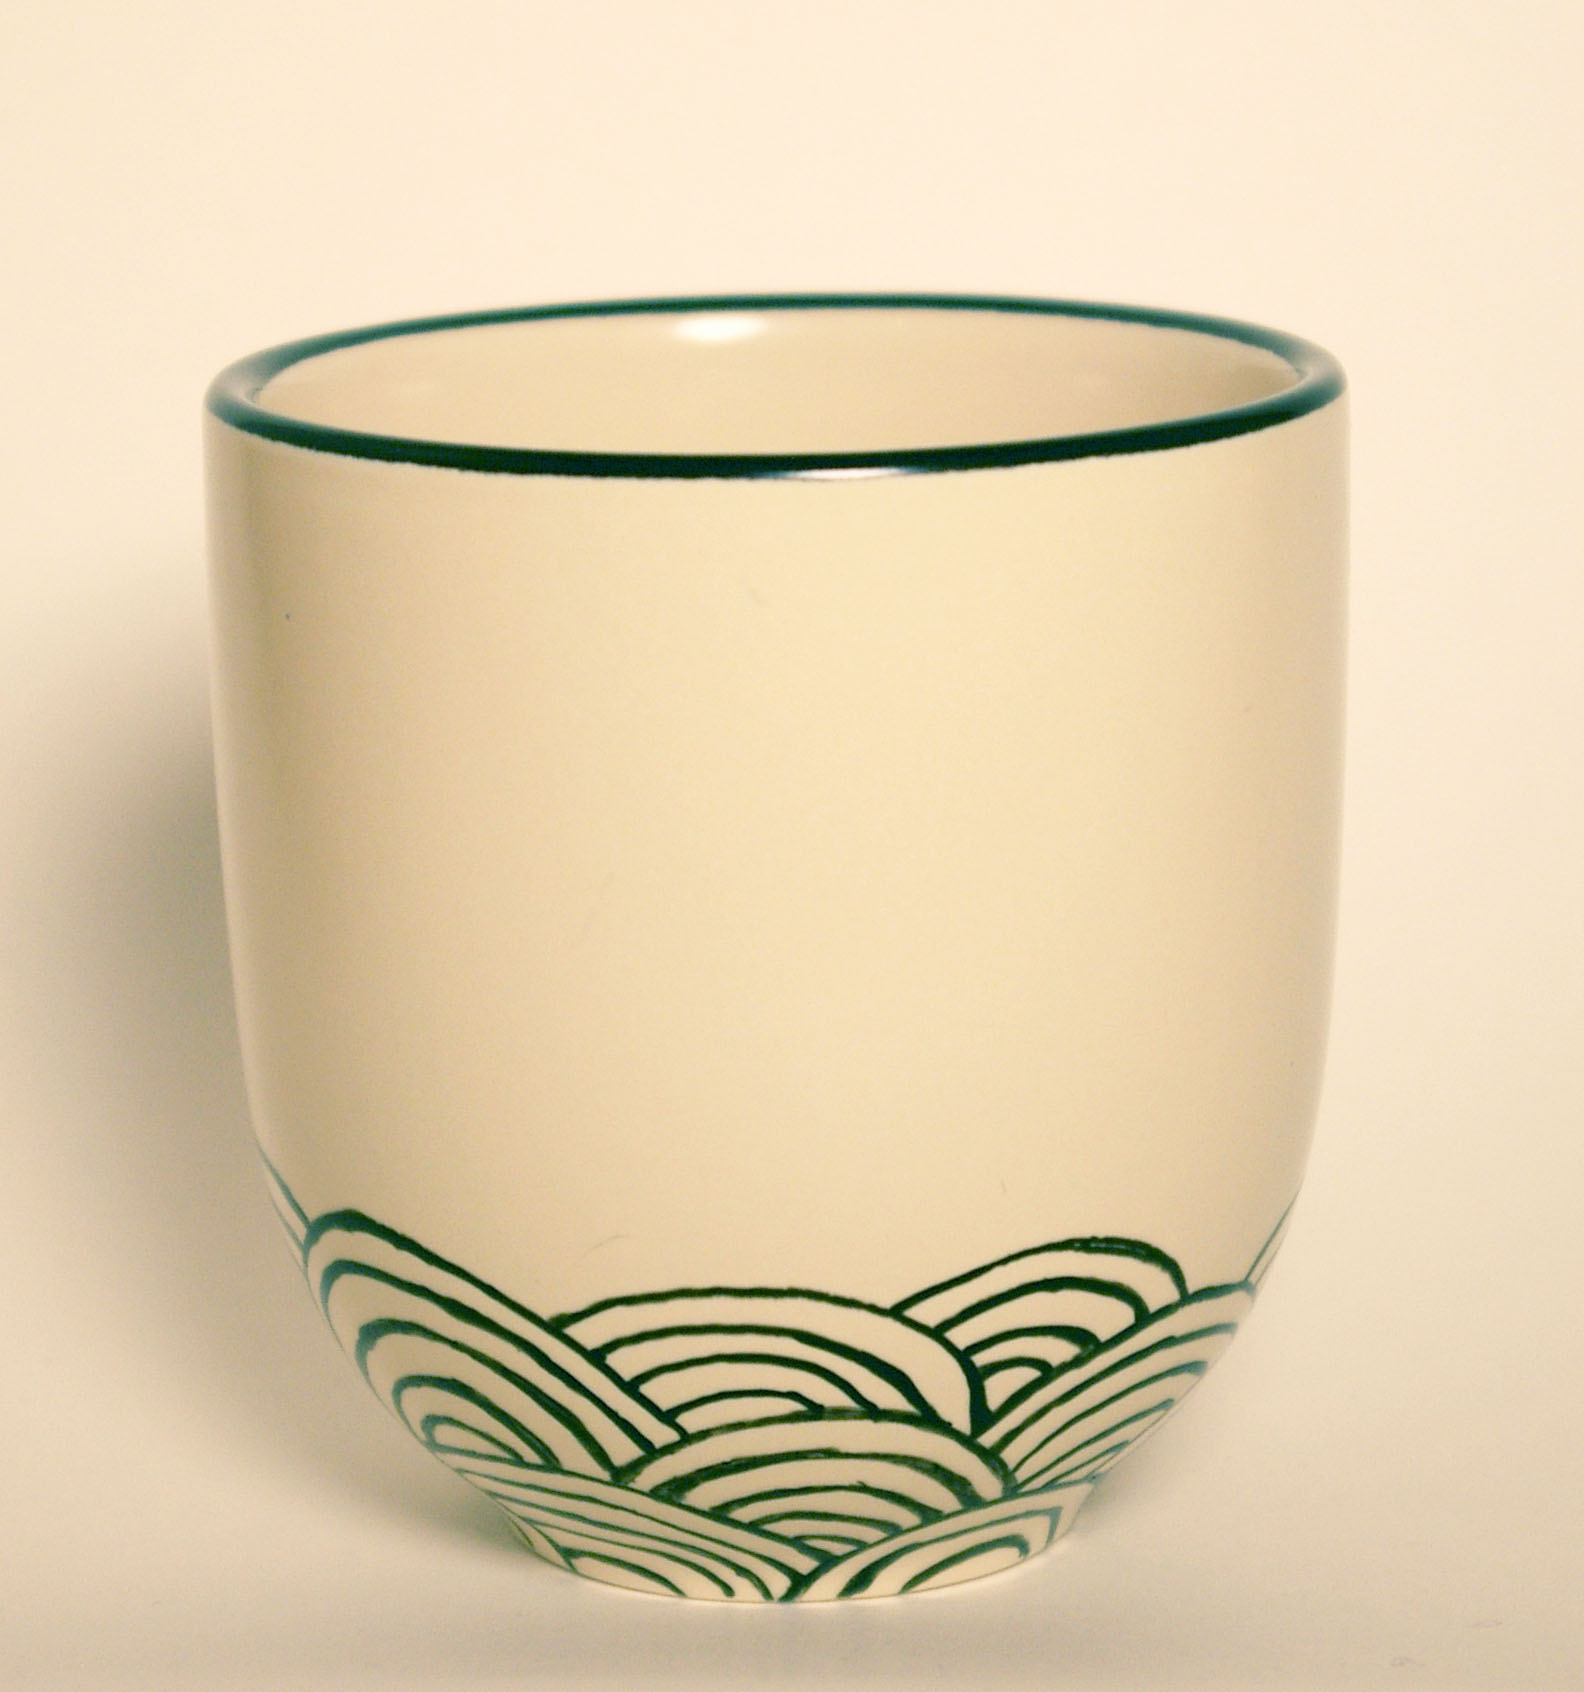
Drawing on mugs is fun!

So this post today is for two reasons.  First and foremost, I made some kickin' rad one of a kind mugs.  I got this idea thanks to craftster, roboarsonist.  She used a ceramic paint pen by Pebeo called Porcelaine 150 and used it to draw some designs on a few mugs.  Once I saw that I knew I had to try it.  I went to Michaels and grabbed myself one pen and then to Goodwill to grab up some mugs and then went to town on them.  Well, actually only two of them so far... and here they are!

I really like doing this, although I think next time I'll get the actual paint instead of the paint pen.. The pen kept getting clogged and it was harder to get a nice consistent line with it.  I'll post more about the paint after I get myself some.

So the second thing this post is about is that I finally started an Etsy store.  It's kind of baren right now because I've been busy with school and stuff, but stuff will slowly trickle in as I have spare time to make stuff.  I'm going to add these two mugs on it as well. :)

Here's a link to my little store:

chezlin.etsy.com

UPDATE: I moved my store from Etsy over to Storenvy! The new store is located at: http://chezlin.storenvy.com/

I still have a lot of work to do on it, but I thought it was time to show you all!

Clothes

The poor mans dress form

Soooo, not everyone has enough money to buy a dress form.. especially nowadays.  Luckily for those of us who would like one, it's not too hard to whip up a cheap one if you have the right stuff.  There are a zillion tutorials on how to make one for cheap.. whether it be with paper-tape, paper mache or duct tape.

My little sister wanted me to make a dress form of her, and I chose to use duct tape because the last time I had worked with paper-tape was pretty frustrating, and I didn't want to have to deal with it.  Plus we already had some duct tape anyway.  So, here are the photos that follow our dress form making journey.

The shirt wasn't long enough, so we used scrap fabric and just taped it onto the shirt so we could extend the dress form further down.  Also, on her neck we used toilet paper.

Overall we were pretty happy with the results.  Neither of us have yet to use it that much though.  Honestly, I'm considering doing a paper mache dress form just so I don't have to deal with sticky pins from the residue from the tape.

Misc-

Busy bee!

I've been busting my butt lately with school work that I haven't had time to craft :( I thought I'd at least post something to let you all know that I'm still here! And to give a little peek at what I've been doing.. art wise.. for school. imgp3899 I had a semester long assignment where we had to do a color study of 30 colors for each week of class. Of course, I put it off and had to do almost all of them during the Thanksgiving break. Yay, 300+ colors!

imgp39031 Here's my final for painting... four paintings, inspired by different artists. I'm so glad to be almost done with this class!

On top of those, I have to print and bound a book and print around 10 more prints for my book arts class. There's also the color theory assignment I have where I have to re-do an old piece that I've done where I'm not happy with the colors... twice. Oh yeah, and studying for my two other classes. Woo, the end of the semester! Hopefully I'll be crafting and posting in a week or two, when classes are done!

Clothes

Wind me up!

Phew, it's been a while!  If you guys hadn't noticed, this blogging thing is pretty difficult for me to stay on top of.  Hopefully soon I'll be able to post somewhat regularly, haha. :) I've done a few things between now and my last post.. one of the biggest things being attending the Austin Maker Faire.. and I know I'm going to be a few weeks late, but I'll eventually post a few of my pictures from there.  I also made a duct tape dressform for my little sister and I've started a jacket.. which has been sitting in my room half finished for about a week.  Oh yeah, I just made these awesome earrings, but you'll just have to wait for those pictures because this post is really for my... halloween costume!

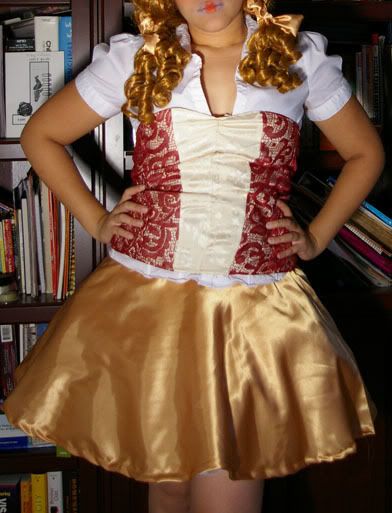
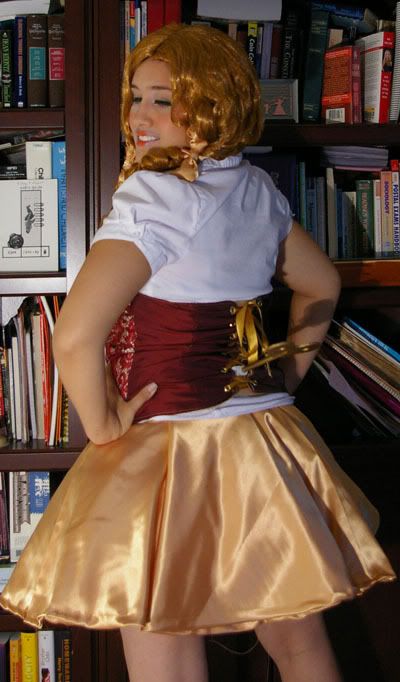
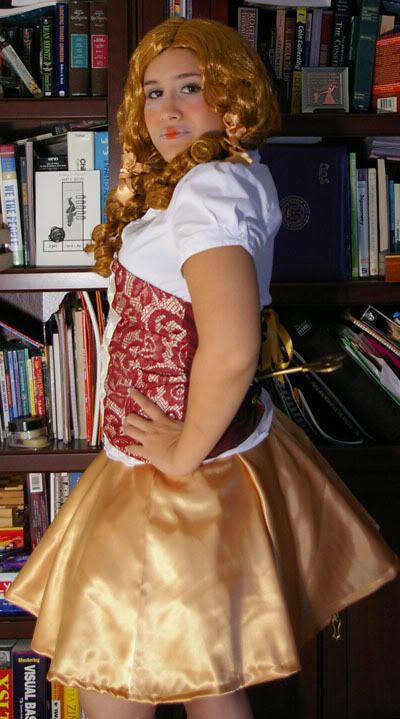
I decided to be a wind up doll and I really wanted to put moving parts on it.. of course that would be the little key part on the back.  All in all, I made a corset-ish type top, a simple circle skirt and an awesome petticoat that I love.. and will definately use again.. but I don't have any pictures of it because it's pretty see through.  Last year I made a last minute petticoat with tulle and I just took a piece and gathered it so it was kind of like a tutu, but I really hated it.. it was uncomfortable and I didn't like the way it looked, so this year I decided to put more time and money into one so hopefully I could reuse it time and time again.  I used this tutorial by sugardale but I shortened the length to fit the skirt.  It was somewhat time consuming, took up a lot of thread, but overall I'm super happy with the result and I know I'll be saving it to use again and again!

For the skirt I also used a tutorial, but I cannot find the exact one I used right now, but there are pages and pages of circle skirt patterns when I searched google, so if you need one that's a good resource.

I'm not too happy with how the top came out.. I really wanted it to be a corset, but I just wasn't confident enough with myself and I just ended up sewing panels together and lacing up the back.. so it was somewhat like a corset.  I refused to buy a pattern and tried to make one myself, which I regret doing, but it was too late to go out and buy one by the time I was making the top, so I guess I just lived and learned :)

So, I've been building up the anticipation to see this costume I've been rambling on about, so I present now, the pictures!

The makeup:

And finally, the part I'm most proud of with this costume... the wind-able key! httpv://www.youtube.com/watch?v=7alUNLzpOyo Testing it out.

httpv://www.youtube.com/watch?v=DdozzPiu9iU Actually on the costume.

So there's that.  I hope you guys enjoyed it, unfortunately I'm the only one who enjoyed this costume haha, for the party I was going to attend didn't happen, so I spent all night on Halloween playing Little Big Planet. :)

Clothes, Tutorials

Oh my god, shoes.

I'm not even going to try to come up with excuses as to why I haven't posted in forever... I'll just get to the good stuff. My little sister had some shoes she didn't really care for anymore, and asked if I could re-cover them for her.  I had seen an article in Craft Magazine where they had done this so I knew it could be done.

Here are the shoes in question:

So following the instructions in that magazine, I whip out my exacto knife and start cutting.

Basically you cut all of the fabric off.. All of it!  Also, not pictured is me ripping out the inside of the shoe.  The bottom cushioned part.. thing.  Be careful when you do this though, because you'll need them later.

The remains of the shoes.  As you can see, I kind of rushed ripping out the bottom parts.

Next, I took the fabric she chose and used the old shoe fabric to make a pattern.  You might not want to use markers here to draw it out... I just usually end up grabbing the closest thing to me when I'm doing this sort of thing.

I also drew out and cut the pattern out with the inside fabric, shown here.  These are the tongues of the shoes. (I also cut them with the houndstooth fabric as well)

Sew those puppies up.  I used the old fabric from the shoe as a guide for the decorative sewing.

Sorry, bad picture.. Me grommeting the holes for the laces.

A crappy, blurry picture of the new pieces with the old pieces.  As you can see, I added a little more on the bottom of the tongue because I wanted to make sure I had enough.  I ended up cutting off some when I put it in, but I figured that was better then not having enough!

More unpictured steps are where I glued in the fabric.  I glued in at least 1/4 inch of the fabric all around the bottom edge of the shoes, glued the tongue in and finally the bottom cushioned part back in place.  If done right, the fabric for the main part of the shoe should be sandwiched between the sole of the shoe and the cushioned part that was glued in last.

I waited for the glue to cure and whatnot before I laced them up because I didn't want to accidentally rip out the fabric.

What I did though, was put the shoes on (unlaced) to put some weight on the shoes so it would be stuck real good!

Ta da!  All laced up and ready to go!

I'm hoping to take some better pictures of the shoes soon.  When I do I'll make sure to post them up!

Misc-

Coconuts: 101 different ways!

This post is all about coconuts.  A single coconut has multiple uses, and I'm going to show you just a few of them.  Okay, I lied.  I'm not going to talk about 101 different ways to use the same coconut.. I'm going to talk about four or five different ways.  That's still a lot! The first use! Coconut oil.  Here's a bunch of pictures of when my mom taught me how to make coconut oil.

I apologize in advance for the not so great pictures.

Blurry picture of her cracking that sucker open.  She was moving pretty fast.

Mmm, this is a good coconut. Lots of meat.

You use this contraption, my mom called it a kudkuran, to scrape the meat out.  You sit on it with the skarp part stickin out between your legs.

Super bad picture, but the only one I have of me scraping the meat out.

After a little bit of scraping, here's what it looks like.

Here's a before and after.  I went a little crazy on that half, you're not supposed to see that much brown.

All used up.

Time to start getting that milk out of this meat! Here we have a fine strainer, a bowl and the coconut meat.

Here she put in some water and started mushing it all around.

Take a handful and squeeze it over the bowl.

Here's some of the milk she squeezed out.  After you have it all squeezed out, you can repeat the process again to get a little bit more milk.  You'd have to be careful with the water though so it isn't watered down too much.

Strain the milk into a pan.

You can still squeeze a little bit of the milk out of this.

Crank that heat up!

Let it boil.  And constantly stir.

Eventually it'll start to separate.

More separation.  The clear liquid is the oil... but wait, we can get more out of it!

Almost done.  Let those little bits get all brown and toasted.

All done!

Strain it all!  Save those little bits.  You can use them as a topper for ice cream.. or cakes.. or something.  You might want to toss it with a little bit of sugar though.

Further straining with a coffee filter.

Here's the oil!  Yup.  A whole coconut made this tiny bit of oil.  You can use the oil for cooking or you can use it to make home made cosmetics.

Second use! As I mentioned in the pictures, you can save the little toasted bits and use them as a topping.

Third use! The meat that you extracted all that milk from is still useful.  If you like toasted coconut, you can probably spread out the meat in a thin layer and throw it in the oven for a while.. You'd probably have to toss it with sugar though.  (I haven't actually done this, but theoretically it should work, haha)

Fourth use! A Philippine snack: Budbud (the "o"s are long.  Like Boo!  and then a d at the end.... I dunno, it's hard to explain) also known as sweet rice.  Mm, a delicious dessert.

Here's a recipe for budbud: Budbud recipe.  You can use the original coconut milk you extracted to make this.. or, if you made coconut oil with the original milk, you can extract milk from the meat more than once. To eat, you unwrap the banana leaf, dip the rice in sugar, or, like in that picture, dip it in coffee and eat it that way.  Either way is awesome.

Fifth use! If you wanted to, with one of the shells, you could clean out the remaining meat and dremel a hole in the side and have a sweet hermit home.  Either that or dremel some small holes on either side of each shell half and make a islander bikini top!

Like this!

So those are just a few ways to put a coconut to use.  I'll admit, with the budbud recipe, it calls for more than one coconut, but hey, you can make more oil and toasted bits and whatnot!

Purse/Bag

That's hot. Seriously. Hot, fused plastic. Tote.

Man, I haven't posted in a loooong long time.. I had to brush the dust off of this thing before I started this post! Haha.  I apologize, I don't even have a real good reason, but I'll try to make it up to you with this post. I was trying to get myself out of this no crafting deal I had been having for a while by flipping through some of my old magazines for inspiration.. when I found just what I needed.

I saw this bag on the right, and I knew I had to make one.  That bag, from Keen Footwear is actually made from woven rice paper, but I decided to do mine with fused plastic.  I used a tutorial from the Etsy Labs on how to fuse the plastic bags.  After that I just made a basic tote.. with some woven details.  Here's what was created:

I apologize for the kind of crappy pictures, my nice camera is out of commision for the time being.  Anywho, that's the bag.

Here's the back of it.

Here's some detailing..

Some more details.

The insides.

The zipper..

I usually just kinda put in the zipper without thinking about it too much.. which resulted in some not-so-pretty zippers.. but I found this wonderful tutorial on how to install zippers so they look oh so pretty, so now I use it all the time!

And that's it!  I will probably be making more of these, it's a great way to recycle plastic bags.. You could also make some reuseable grocery totes with this technique.. I saw some that they were selling at target... way over-priced for me though, considering I can make some myself!

Food, Tutorials

Adventures in Bread Making.

I love to bake and cook, but I've never tried to make bread before.. that is, until a few days ago.  Unfortunately my first loaf turned out wierd and half unbaked, but I've since then redeemed myself.  The kind of bread I chose for my first ever to bake is challah.  When it came to the egg wash and the topping I changed the recipe slightly.  I'll elaborate on that when I get there though.. for now, I'll talk you through the journey!


Ingredients:

2 teaspoons yeast

1/4 warm water

3 1/2 cups flour sifted

4 eggs (only three go in to the dough, the last is for the egg wash)

1/4 honey

1/4 oil

1 1/2 teaspoons salt


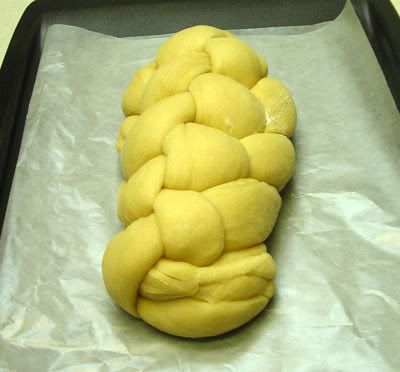
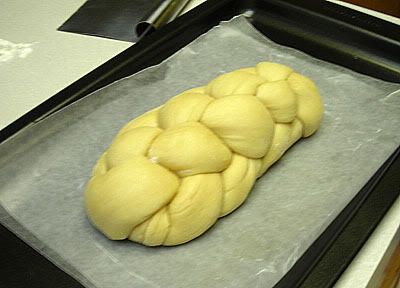
Mix the yeast with 1/4 cup of the flour and the warm water and let it sit for at least 20 minutes.  While you're waiting, mix together the three eggs, honey, oil and salt.  When the yeast mixture is all good and bubbly mix your honey mixture into that.  Then dump in the rest of the flour (3 1/4 cups should be left) and mix it all up by hand.  When it starts to come together, dump it out onto a floured surface and knead it.  The recipe I used said to need for 5 minutes maximum.  I averaged about 3 minutes.  After you're done kneading take your little dough ball and put it in a bowl, cover it with a damp cloth and put it somewhere warm.  When I do this, I usually set the oven at a low temp. while I'm making the dough, and then when I put it in I turn it off.  Anyway, after that is the fun part!  The braiding.  I searched around youtube for a good instructional video on how to braid challah, and I chose to do the 6 strand braid.  Here's how it looked after braiding:

Pretty nice... except for that little area at the bottom, but whatever.  I figured I'd eat that end first.  So after you braid it all up, you get to have more fun waiting.  Another two hours.  Oh yes.  Cover it with a towel or plastic wrap and stick it back in that warm spot.  After two hours it should have doubled in size... but for me on my first attempt this did not happen.  It didn't even double in size after the first two hour wait.  Stupid yeast ended up being too old.  Oh well.  I'll show what it looked like when it didn't work and when it did, so you guys can kind of tell if you decide to try to make this.  Here's the stupid after the second two hour wait.. and how barely grew:

Stupid thing...


Anyway, I still tried to bake this thing.  Set your oven to 325 and get out that egg to prepare the egg wash.  Crack it in a bowl and mix it up and you've got your egg wash.  Brush it on carefully.. you don't want to push out any precious air.  Some places I've read that you're not supposed to put that much, but some places say to use a lot, so I'd just say go with what looks good to you!  That's what I do.  After the egg wash you top it.  Traditionally it's topped with sesame seeds, and sometimes raisins... but I wanted mine to be sweeter, so I topped it with cinnamon sugar... yeah, I cheated.. but it's delicious.   


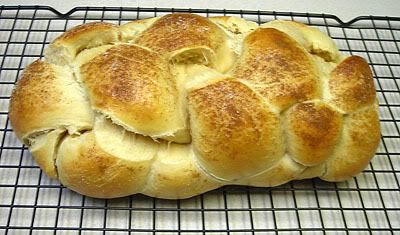
Now throw it into the oven!!  Bake at 325 degrees for 35 to 40 minutes.  The recipe I used said to stick a pie pan full of ice cubes in there with the bread to keep the conditions humid inside the oven, but to take it out for the last 5 minutes of baking, to let the crust really get brown and harden.  Here's what I pulled out of the oven after 35 minutes...

Eww.  It looks wierd.  It ended up being so dense because it didn't rise.. that the inside was still dough.  It was pretty gross.  I still ate the butt ends though.  Yum.


On to the second try!


I got newer yeast and tried again the next day.  I meant to take a picture right after I braided it and before I let it rise for a good comparison shot, but unfortunately I forgot... I have a good shot of it after rising though!

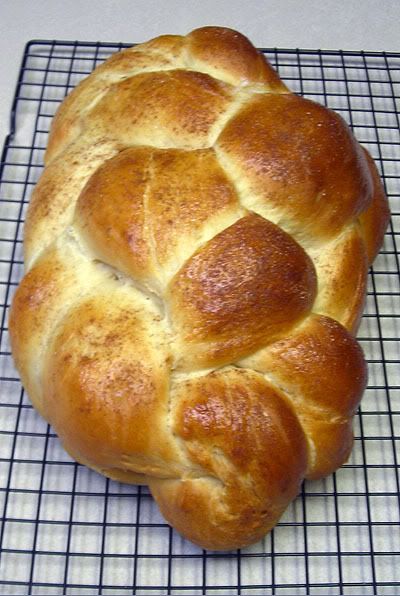
This is with the egg wash and the cinnamon sugar.  My mom said it reminded her of chicken.  My braiding is pretty shotty for this loaf... this is a picture of the pretty side.. the other side is wierd and uneven.  I was preoccupied with the season finale of Lost.  You can compare the last loaf with this one... I used the exact same sheet pan to cook the bread, and you can see just how much bigger this one got.


But of course, something had to go wrong(actually, it's not too bad, it just makes it not as pretty as I hoped it'd turn out).. the oven decided to bake unevenly so the pretty side of the challah is a lot lighter than the ugly side.  The ugly side got as dark as challah's supposed to, so I didn't want to keep it in longer.  Well, that and because I'm impatient and I wanted to eat some.  Here it is:

There we go.. Looks MUCH better! 

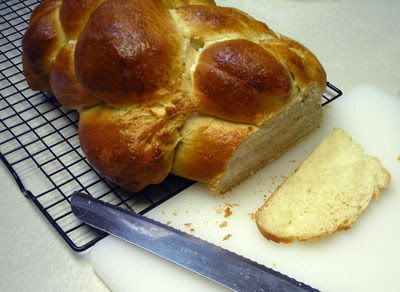
Here is a picture of its insides:

Mm, so yummy.


I've heard that this bread is great for making french toast with because it's already sort of sweet because of the honey.  I'm totally going to make some sometime.  It's also good just by itself. Mmmmm.

Art

My adventures in printmaking

This semester I took printmaking where we did some intaglio(pronounced intalio... I seemed like an idiot because when I signed up I went around telling everyone how I was taking intaglio and I emphasized the g.. anyway) We also did some lino cuts and a colograph, but I'll post all of my other prints on another day. Today I've decided to do a kind of step by step of intaglio. Not a tutorial, because there are a lot of little things that you just learn from watching someone or from learning from them in person. Anyway, on to the pictures!

My sketch on the right, with my two plates covered with asphaltum and etched in to. You'll see why I did two plates in the next few pictures.

Dun dun dun! The acid room!

Here's the acid, you dunk your plates into it and it eats away where there is no asphaltum.

After 30 minutes to an hour, they're ready!  There are a few steps I skipped here.. it gets repetitive.  According to how you want your plate to be, you stick it into the acid until it gets to how you want.  You take them out and clean all the gunk off, and then you're ready to print!

I'm using the knife to spread out the ink so I can pick out any dried pieces.

Smear it on!  Make sure to get it into all of the etching!

All smeared in.

Here, you take a tarlatin(basically cheesecloth that has starch on it) and use that to wipe up the excess ink.

There should only be ink in the etching when you're done.

Here I'm smearing ink into the main plate.

All wiped up and ready to ink!  I didn't wipe the first plate too well, you can still see some teal around the etching.  Oh well, this was just a test print to get the registration right!

The printing press!  For intaglio you have to use damp paper, so what's not seen here is that I had to soak the paper for at least 20 minutes.  I taped it to the press to get the registration correct.

After it's been run through.  You can see the additional tape I put down to help me place the plates.

Replace the plate with the other one, put the paper down and run through again!

Here I'm pulling the paper away... hopefully the registration is good!

And... it's not.  It's off a lot :(

Here's another.  I just ran another piece of paper without inking up the plates again.  You can see just how much ink the paper soaks up in the first run.  I didn't bother to ink up the plates again because I was just trying to get the registration right.. It wouldn't make sense to waste ink.

Here's another shot to show how bad the registration is.

Thankfully I finally got it sorted out when I actually went to print the final edition.  I used pink instead of teal as well.  I'll post all of my prints on another day! :)