Tutorials

Paper Mache Halloween Decor

Hey guys! Today I'm going to show you how make some nice Halloween decorations with paper mache. I found some small paper mache skulls at my local craft store, and yeah, they're not too pricey, but once I saw them I knew I wanted to make some on my own. I figured I could put a bit more personality into them, and I think I succeeded. I made two types of skulls; one that's a bit cartoony looking and the other a tad more realistic. I also made a little jack-o-lantern as well. This tutorial is best viewed in video format, however I'll provide some video stills with captions after the video!

01Le supplies

02Blow up your balloons; you'll want to fill them up only halfway. For the cartoony type of skull, tape around the bottom third of the balloon. Don't worry about being precise. Once you tape it up  you can squish the balloon around a bit to alter the shape of the balloon until it's just right.

03For the realistic type of skull, take some cardstock and tape it to the balloon like so. This is only going to be temporary so we can draw the face on with the correct proportions.

04Roughly sketch a skull face onto the cardstock. Carefully remove the tape and cut the shape out.

05Tape it back on. Yeah,  you could probably just draw the skull face without taping it onto the balloon, but where's the fun in that? The best part is riding that fine line between almost popping the balloon and not.

06For the jack-o-lantern, wrap a balloon with three rubber bands equally spaced apart, like so.

07Draw on the face of the cartoony skull. Sure it's about to get completely covered with paper mache, but you need to sketch the whole face to see where the jawline will be. That's where we're going to stop layering on the paper  mache.

08So much paper. You can use newsprint or any similarly weighted paper. I'm using brown packing paper. Tear the strips rather than cutting them, as a torn edge blends more easily.

09Glue mixture. Two parts glue, one part water.

10If so inclined, don your gloves.

11Dip a strip into the glue, wipe off the excess glue and place on balloon. Repeat x1000. But really, do about 2  or 3 layers of paper, let dry, and repeat until it feels thick enough. Mine ended up being about 7 or 8 layers I believe. Although, I wish I had done more layers on the jack-o-lantern, because, as you will soon see, after I cut the face out it wasn't very strong and it started drooping.

Anyway, once you layer enough, let it dry overnight.

12Before you pop the balloon, gently squish it down around the edge of the hardened paper shell. This should help prevent any distortions on the edge that may arise after popping the balloon.

13Snip a small hole in the balloon and let it deflate.

You re-drew the face back onto the skull right? Oh, well if not, do so now.

14Cut out the eyes, nose and mouth with the help of an xacto knife and scissors. And here he is!

15Here's a realistic-y skull. I decided to do an opened mouth one by cutting the bottom jaw and taping it on separately.

16And here's the little jack-o-lantern dude and his droopy face! When I paper mache-d him, I covered the whole thing except for about 1/8in around the knot of the balloon. That's where I popped the balloon. After I popped it, I rolled up some glue saturated paper and stuck it in the hole to create a little stem for the pumpkin. I pulled out the balloon and rubber bands after I cut the face out.

lantern2

And here they are! All done!-- Well, almost anyway. I'll be posting the fully decorated pieces on Saturday the 25th, so stay tuned!

For the Home, Other

First Real Reupholster Project

I've always kind of toyed with faux-upholstery because I've been too intimidated to try a real project.

I was always scared that I would end up taking the fabric off of the chair or couch and then immediately become overwhelmed and then push the torn apart furniture to the corner of the room and avoid it for weeks or months while I try to regain enough courage to attempt it again.

I ended up finding this awesome tufted wing back recliner chair at my local thrift store, and before I even had figured out a way to get it home (no way it would fit in my little sedan) I had already bought it. I mean, I couldn't pass it up. A recliner chair that didn't look like and ugly lump? Of course I wasn't going to let it go! If I had to carry it back home I would have. Thankfully I was able to have a friend to come with a truck. Which is great because I also nabbed a great credenza that was half off... but I digress. When I bought it I knew I was going to have to reupholster it. It was covered in a blue pleather/vinyl type fabric that had a strange/gross thin film of... something over all of the chair. It was pretty bad. Since I wasn't going to be able to re-cover it right away, I ended up just scrubbing at it with a bunch of cleaners to get as much of the film off as I could.

399299_10103433185306000_1860770004_nI tried to find a picture of it before I started the project, but this is the only one I could find. This is it in my living room.

SAMSUNG CSC

Here I'm about to start disassembling the chair. Nerve racking!

SAMSUNG CSCHere I was thinking, "Ok, this isn't too bad..."

SAMSUNG CSCSome of the scrap from the chair. I should mention that this process was disgusting. the film that covered the whole chair had accumulated in each fold and crevice of this thing. My husband and I came to the conclusion that perhaps this chair was in a smokers home or something.

SAMSUNG CSCI carefully took each piece off. I wanted to make sure I could lay them out onto the new fabric to use them as patterns. At this point, even though it as pretty gross dealing with the nasty existing fabric, it was extremely satisfying to take the chair apart. I was having a lot more fun than I thought I would.

SAMSUNG CSCAnd then suddenly there was no more fabric for me to rip off anymore. And the reality that I was going to have to cut new pieces and stretch, tuft, sew, etc. them onto this naked chair started to sink in. And then the urge to slowly push it into the corner to let "future Rachel" deal with it started to bubble up. Thankfully, I was able to push that feeling back down and soldier on.

SAMSUNG CSCThere we go! Looking better already! Almost done! Not. At this point I was really panicking--was I really going to be able to do this? Sure I tufted that headboard before, but this felt very different for some reason.

SAMSUNG CSCOk, first tuft... not that bad. For the buttons I bought some button making kits and made a few with the new fabric.

SAMSUNG CSCOkay, okay, this is looking so much better. I was feeling better at this point.

SAMSUNG CSCAnd here I was thinking, "Oh my gosh, I'm doing it. I'm really doing it! And it's actually looking decent! This is actually pretty fun!" And then I remembered I had to sew up some arms lined with piping.

SAMSUNG CSCWith the previous pattern pieces I knew that I had some leeway as long as I cut more fabric than the previous pieces. Since most of this project involved stretching a bit of fabric on the chair and stapling it down, as long as I had enough fabric to staple I was fine. I could then just trim off any excess. I didn't have that luxury with the arms. Since I had to sew them to match the wing back shape I had to be very precise when transferring the pattern. It took a few fittings and adjustments, but I finally ended up getting them to work!

SAMSUNG CSCOh man, and here it is, all finished(well almost)! This fabric is so much nicer than that crappy sticky gross vinyl that was on it originally. It's so soft and it makes the chair so comfortable.

SAMSUNG CSC

Here it is reclined.

SAMSUNG CSC

And here's some fancy close up shots.

SAMSUNG CSCThe arm. Technically this chair is unfinished because I haven't put in the upholstery tacks yet. I have them and they're ready to be hammered in place, but I'm just being lazy about it.

1467401_10103862891261820_1812994132_n

And here it is in the room after re-covering it. As of right now, it's my favorite chair. It's so comfortable even in its normal state, it's a huge plus that it also reclines as well.


I hope you all enjoyed seeing me struggle through my first real reupholstery project. I didn't really know what I was doing, I was winging it a lot and probably did a lot of stuff wrong, but it looks good so that's all I can ask for!


For the Home, Kitchen, Tutorials

Hanging Plate Wall Decor

On my last trip to the thrift store, I found a great set of plates with botanical drawings of spices and herbs on them and I instantly knew I had to hang them up in my house. I love cooking and food  and, even though I'm not great at it, I love gardening and plants, so these plates are kind of  a nice mixture of the two. Like last week, I decided to make a video of this tutorial as well. Photo recap of the video will follow!

Supplies:01Note: paperclips and safety pins are listed as items you can use as the hanger for the plate, however I made my own out of wire, so that's why there are also pliers, wire cutters and wire pictured in the photo.

02 Shape the wire into the hanger. Basically making it into a curly, pretty upside-down letter V. That's all. Nothing more.

03Since my plates had a design that required them to be situated a certain way, I eyeballed it and marked on the back where I wanted to put the hangers.

04 Mix epoxy into disposable container. I used an old medicine measuring cup. If you're doing more than a few plates, like me,  you'll have to make a few small batches of the epoxy because it sets very fast.

05 Place hangers where you marked earlier and apply epoxy to the curled ends. Let cure for 24 hours(or per instructions).

plates Hang them up and enjoy!

Misc-, Tutorials

Redo Wind-up Key

Six years ago I posted a Halloween costume I made that featured a working wind up key. Four years ago I posted a tutorial on how to make said key and around Halloween it's almost always my top visited post. My husband has been wanting me to make some tutorials in video format, so I thought what better tutorial than this! So lo and behold, here's the video!

Here's a quick little photo recap of the video:

01Supplies. Not pictured are some pliers and a screwdriver that I used to take the toy apart.

02The sacrifice. Poor guy didn't see it coming.

03This toy was nice because it was held together by just two screws. After unscrewing I just pulled the mechanism out. This is all we need from him!

In the original tutorial I used pliers to break off the wind up toy grip but this time my dowel(aka the piece of bamboo I had lying around) already had a hole in it and it was the perfect size with the grip still attached, so I just kept it on.

04Mark the center point of the belt, cut a teeny tiny hole and stick the wind up mechanism through. You want to tack it down with a small dab of hot glue, taking care not to glue the moving parts.

Oh yes, the belt. That's how we will be securing the key to our bodies! I had this black elastic belt that I never wore anymore so I just used that.

05To hide the white boxy mechanism cut a piece of matching fabric (I used fleece) and attach it on the belt. You can either sew it on or hot glue it.

06Making the key pattern out of form core board. I traced a glass and then free handed the rest of it.

08So in the previous tutorial I said to use a strong glue, namely a two part epoxy, since people will be cranking that thing all night. However, I have since tested it out and using a high temperature hot glue gun works just as well. You can still use a stronger glue of course, but hot glue does work.

09For painting I did two coats of black as a base and then finished with a single coat of an antique copper.

Do not use spray paint! If you've made your key out of foam core board the chemicals in spray paint will react with the foam and eat it away. Craft paint is the way to go here.

10Almost done!

11You'll just want to put a bit of hot glue into the hole of the dowel. I had a pre-existing hole, but normally you would have had to CAREFULLY drill a small hole on the end of the key.

12And here it is on the back of my costume!

hobbeswindupAnd in motion!

So I hope you guys enjoyed the video. Is that something I should do more often? Let me know! It's pretty weird to sit there and talk to the camera, but it turned out alright I think.

Purse/Bag

Upcycled Leather Jacket Backpack

I'm going to start this post off with an apology. Half of the pictures I took were taken with my phone's camera and they're not the best quality, so I'm sorry for that. Pretty much all of the "making of" shots were taken with my phone and then I went back afterwards with my nicer camera and got some better shots of the finished product. I'm planning on making another one of these for my little sister so I'll take some better pictures of that one. I've been seeing some really cute backpacks lately and I got bit with the bug to create. Most of the backpacks I saw that I liked were made of leather so I decided to take a page from my own book and use an old leather jacket from the thrift store. After searching far and wide for the perfect jacket, I finally snagged one from my local thrift store, along with two belts that I planned to use as the backpacks closures. I believe the cost for these three things was about $15 or $16.

IMG_20140819_133613

I dug through my existing fabric and whatnot and was able to find fabric for the lining, some batting, some vinyl and a zipper for the inside pocket. Then I got to sketching what I wanted my bag to look like and after finalizing it I wrote myself a little shopping list, taped in some swatches of the leather jacket and liner fabric and went off to the store. I ended up just buying thread and grommets and just cannibalized some old unfinished purses for the swivel lobster clasps and D rings.

IMG_20140916_204125


I don't have any pictures of the deconstruction of the jacket, but basically I seam ripped the inner seam of the sleeves, down the side of the jacket and cut the sleeves free of the body of the jacket. Sleeves are deceiving, they always have way more fabric than you would think. I ended up using both sleeves to construct the body of the backpack. For the front pocket I decided to utilize the already existing snap buttons from the front of the jacket. I cut out a section that had both sides of the buttons and sewed them onto the front of the bag. It ended up working out perfectly. When working with leather you can't just stick pins everywhere because the holes won't go away so my trick to keep things in the right spot when sewing was to tape it down with masking tape.

IMG_20140818_142441

More unpictured steps: I wanted a special pocket for my laptop that would be easily accessible if I had the backpack closed all the way so I made a padded pocket with the liner fabric and some batting and used the jacket zipper as the closure. I reinforced the piece of leather I cut for the bottom with two layers of thick vinyl fabric I found stashed away in my fabric box. I then sewed up the body of the back and then sewed on the bottom, making sure to sew in the bottom of the straps as well. I cut, lined and sewed together the flap but didn't attach it to the bag just yet. I placed the flap over the bag to approximately where it would sit once sewed in and then started placing the cut belts onto the bag to see how the placement would go. I wanted to secure the belts onto the flap by sewing them on, however the leather of the belts was super thick and I didn't even want to attempt that with my poor sewing machine, so I grabbed one of my sharpest knives and began to skive the belts in the spots where I wanted to sew it. I thought this process was going to be quite hard and tedious, but it actually was really easy and kind of addictive.

IMG_20140819_002335

To hide the stitches and the areas I had to skive, I cut small strips of leather, placed them over those areas and tacked them down on each side with some stitches. As you can see in the picture, I totally skived the leather in the wrong spot on each belt so one was sewed onto the flap higher than the other. That kind of sucks, but hey, it's handmade right? That proves it!

IMG_20140819_020904

I didn't get any shots of constructing the inside, but I essentially just used the measurements of the outside of the bag and threw together a liner with that. Of course, I had to stick a zippered pocket in there as well. And a little leather "tag" with my logo on it, which probably could have been executed better, but this is what happens when you're impatient, you go with the first try and tell yourself. 'Eh, that's good enough.' And then you look back on it and wish you had tried more.

On the top of my liner I also sewed a strip of leather around the top because I wanted the main bag closure to be a drawstring with grommets and I thought having it go through leather rather than fabric would look and function better. There will be better pictures of this later on in this post.

IMG_20140819_020831

I stuffed the inner fabric into the backpack and sandwiched the top flap and the upper strap loop between the outside leather and the inner leather and sewed it up nice and clean around the edge. From there I poked 8 holes around the top of the bag and hammered the grommets in place. I sewed up a thin piece of leather, threaded it through and sewed on a piece of leather to act as the stopper part of the drawstring.

I made the straps adjustable like normal backpack straps are but at the end I attached the swivel lobster clasps. Those then could be connected to the upper strap loop. Thinking about it afterwards, it doesn't really serve that much of a purpose, to be able to unclasp the straps from the backpack; I just thought it was a neat idea.

Anyway, from there I tried the thing on and realized the straps were kind of thin. They're maybe about an inch wide and I thought that with a full backpack they would totally cut into my shoulders and be uncomfortable, so I made little strap pads and slid them in place. Worked like a charm and then my bag was complete!

IMG_20140819_221259

So from now on these will be the better quality pictures.

And here's the finished backpack! I love how the belt closure turned out. The little metal embellishment on the belt on the left is pretty cool too!

SAMSUNG CSC

Here's the back, and in this photo you can more clearly see how the back straps connect to the top and you can also see how the strap pads look on each side.

SAMSUNG CSC

Another feature on the back is the padded laptop pocket.

SAMSUNG CSC

And here's an action shot with my laptop halfway in the bag. Ooo, exciting!

SAMSUNG CSC

Here's a shot looking into the bag. If you look closely on the left next to my finger there is a tiny loop with another tiny swivel lobster clasp which I put in for one purpose, and that is to simply hold my headphones if I'm taking them with me.

SAMSUNG CSC

Like so.

SAMSUNG CSC

Here's another photo of the bag opened, but it's laying flat and there's no headphones in the shot so it's different enough.

SAMSUNG CSC

Here you can see the lining fabric for the flap. I ended up reinforcing it with one layer of vinyl because I thought if I didn't then it would be weirdly floppy, so to keep that in place I quilted it together with the liner fabric. I used this opportunity to make a nice chevron type of pattern.

SAMSUNG CSC

I used some of the leftover leather to make a big tassel because, why not? And I attached it to another swivel lobster clasp (man I just have those things everywhere) so that I could stick it wherever on the bag I want to. Unfortunately it's a silver clasp, not gold like everything else on the bag, but oh well. I was working with what I had at that point.

Here are some cool angled shots of the front and back of the backpack.

SAMSUNG CSC SAMSUNG CSC And to end this I shall throw in this photo of my dog, Hobbes, enjoying the backpack as much as I do! (Lookie there behind the pup! Yup, I still own those letter pillows I made a few years ago!)

SAMSUNG CSC

And that's all folks! I hope you all like this backpack as much as I do. I plan on making another one of these backpacks and will be taking better pictures of the progress of it, so please stay tuned for that!

Misc-

Oh, hi there!

*dusts off this ol' blog again* Hey guys, it's been quite a while since my last post and a lot has happened since then. For those of you who would check up on my blog to see if I have been posting, thank you for checking in and I'm sorry I abandoned this thing for so long. I have quite a few projects to post and many ideas churning in my head, so I should be back to posting normally soon, so please stay tuned!

Gardening

My Misadventures in Gardening: (Almost) Everything Update No. 2

feature02.jpg

It's been a while since we've gotten any interesting fruits, so I don't have a cool new post about harvesting seeds and planting them. I do, however, have a bunch of plants that are growing that could do with another update! Here we go~

Here are a few mango seedlings I have going: SAMSUNG CSC

This is the youngest. It's just now starting to unfold its little leaves, how cute!SAMSUNG CSC

Here's the middle one. It's leaves are growing at such an uneven pace, it's so weird. That huge one is so long its touching the dirt under it, and the tiniest leaf on the plant is on the level right below it.

SAMSUNG CSC

And here's the oldest one, the big one! It kind of stalled out for a little bit, but recently it started to show new leaf growth.SAMSUNG CSC

You can see the teeny tiny new leaves on the top here.

Here are my many pomegranates:

SAMSUNG CSC

I feel like they've kind of stalled out. I'm telling myself they're just putting all their energy into growing roots, but we'll see. There are two or three of these guys that are doing really well.

SAMSUNG CSC

This is the best looking one. Besides the cotyledon leaves, it currently has three levels of leaves.

The tiny kiwis:

SAMSUNG CSC

I ended up transplanting them from the egg crate soon after they started sprouting because mold was developing. I tried to clean off as much as the moldy dirt as I could, stuck them in new dirt and hoped for the best. They seemed to have taken it well!

My teeny forest of dragonfruits:SAMSUNG CSC

These things are growing so fast. I noticed many of the seedlings were starting to touch the plastic wrap that I put on them initially to create a greenhouse effect, so I had to improvise to come up with something that would still create that effect but would also let the light in and let them grow taller.SAMSUNG CSC

This is what I came up with. I grabbed some glass cups and they ended up fitting inside the plastic cups perfectly.

SAMSUNG CSC

Here are the zip locked little guys. Man, the other ones are doing so well I'll probably have to just throw these ones away. Ugh, I'll feel so bad!

And here's the one I'm the most excited about - the mamey sapote!

SAMSUNG CSCYay, it's finally shown some growth! It has split open more and you can see the gigantic fuzzy stem in the middle!

SAMSUNG CSCSeriously, look at that thing. It's like the width of a pencil already. It's like a small creature is inside of it, hah.

It's funny, I look at my plants and get frustrated that barely anything has happened and then I come on here and look at my last post and realize there was actually quite a bit of growth happening!


Gardening

My Misadventures in Gardening: Dragonfruit with a bit of Kiwi

feature.jpg

Oh look, yet another interesting fruit that I'm going to try to grow! My fiance and I had decided a while back to periodically buy fruit that we've never had before in order to expand our fruity horizons. Not long after that I got bit by the gardening bug and I decided to attempt to sprout and grow each fruit that came through our house. This was limited to the fruit I managed to find at our local grocery store, but last weekend I discovered our local Asian supermarket and, oh man, I was in exotic fruit heaven. They had jackfruit (yes, whole ones), mangosteen, rambutan, lychee, the terrifying yet intriguing durian and many, many others. We ended up just buying one type of fruit that day - the dragonfruit. SAMSUNG CSC

Aw yeah, look at that. So beautiful. I did some research and apparently these guys come from a cacti! And not just any old cactus, but a tropical one. What. How weird.

SAMSUNG CSC Here it is cut in half. Man, it's so striking! I always assumed every picture I've seen of a dragonfruit was edited to make the colors brighter, but it actually is that vivid in person. So pretty. To harvest some of the seeds I just scraped my knife across the flesh a few times and it ended up removing quite a few seeds.

SAMSUNG CSC

I spread them out onto a paper towel and used another paper towel to scrub the seeds to clean them.

SAMSUNG CSC

I ended up with over 100 seeds. Yeah, I actually counted (up to 100). I prepared two cups with soil and sprinkled 50 seeds in each cup. Since I couldn't bring myself to throw the rest away I decided to do the tried and true ziplock bag method to germinate the rest. SAMSUNG CSC

For the cups, I used a rubber band to attach some plastic wrap to help with a greenhouse effect. I figured I may as well try to grow all of them because whenever a fruit comes with a lot of seeds I assume most of the seeds won't sprout so there's no harm in trying to grow as many as I can. Well after I did all of this I looked up the germination rate and apparently it's pretty high. And fast. Oh boy are they fast. Before I went to bed that night I looked at the zip lock seeds and there was ALREADY signs of growth. About half of the seeds were already split with a small white root just starting to poke through. And just one day later the cup seeds started poking through the soil. Amazing. It was very satisfying to watch these things grow over the week. And that brings us to now. Here's one of the cups as of today:

SAMSUNG CSC

So cute! And the zip lock ones:SAMSUNG CSC

They've grown so much! I'm probably going to have to just toss these guys out though since the seeds that I threw in the soil are doing so well. Sad, but it was still fun to watch them grow in the bag!

These guys were the perfect fruit to try to grow for me. I'm so impatient so germinating slow seeds is like torture (I'm looking at you, avocado and mamey sapote). But these guys sprouted so fast, it was fun to wake up and see how much growth had occurred overnight. Now I'm hoping that they don't stall out like my pomegranates did.

And before I finish up this post I wanted to include a photo of my kiwi seeds I briefly mentioned a few weeks ago.SAMSUNG CSCI planted at least one seed in each section of the egg carton. I was surprised I got that many seeds to sprout (as of today the count is 10). These guys took about 3 weeks to start sprouting. Quite a difference compared to the dragonfruit.


Gardening

My Misadventures in Gardening: Everything Update

feature012.jpg

I haven't planted anything new so today's post will be a updates on all my plants! So far I've been very lucky with my little growing experiments and have had a pretty good germination rate. So in no particular order, I shall show off my plants! Here are some of my pomegranates:SAMSUNG CSC

They're so cute!

SAMSUNG CSC

So a few days before I planted the seeds in the egg carton, I threw a few seeds into a zip lock bag with a damp paper towel just to see if they would germinate like that. I ended up loosing hope because some of the seeds molded up, but rather than throwing the bag away, I left it pinned to my cork board because I'm lazy. One day, however, a few days after I had transplanted the egg carton seedlings I realized some of the zip locked seeds had sprouted! I'll have to plant them in soil soon.

My wedding flowers:

SAMSUNG CSCHere are some of the ranunculus. They're getting so big! They're still new sprouts emerging from the soil every once in a while. SAMSUNG CSC Here are the freesia. These things took forever to start coming up, but now there are quite a few poking through.SAMSUNG CSC

Oh yeah, here's my first mango tree! It's about 5 inches tall right now. It was growing really fast for a few days and then it stopped growing tall and started putting it's energy into the leaves. They went from somewhat transparent greenish/reddish/brown to an opaque vibrant green.

I actually ended up planting a couple more mango seeds. Here's how one of them looks as of right now:SAMSUNG CSC Cute.

And last but not least, the mamey sapote:SAMSUNG CSCNothing to see here so far. I'm not sure if you can tell but the seed has cracked a bit more than before... Hopefully it'll start showing some more visible growth.


Gardening

My Misadventures in Gardening: Pomegranate Update

feature4.jpg

Here's a little update of my pomegranate seeds that I posted about a few days ago! I actually started these seeds about 10 days ago. If you read my mango posts you'd know that I'm extremely impatient with growing things, so I'd check up on it every day, which is probably not the best for the poor seed. With the pomegranate seeds I was actually able to keep them out of my mind for the 10 or so days it took for these guys to sprout and grow a bit. When I finally did check on them, I was excited to see a few had sprouted and one or two were actually touching the plastic already! I decided to transplant all of them at this time. SAMSUNG CSC Here's the carton before I removed the plastic. Can you see the little sprouts?SAMSUNG CSC So cute! It doesn't seem that the scarification technique I did to half of the seeds really did anything. There seemed to be about the same amount sprouted on each side.SAMSUNG CSCI ended up transplanting the seedlings into plastic cups. I poked some drainage holes into the bottom of a cup and then stuck that one inside of another cup, filled it with soil and popped the seedling right in! I simply just tore apart the carton by each section and stuck it straight in. SAMSUNG CSC Like so. And then I added a bit more soil on top.SAMSUNG CSCHere they are all planted! Ultimately 8 of the 12 sprouted. I think the other seeds would have also sprouted if I gave them more time, but I decided 8 was enough. I still might end up with more seedlings anyway because I used the soil from the four that hadn't sprouted to top off some of the cups.

I'm kind of considering taking one of these seedlings and going down the bonsai path with it. Assuming I'll be able to keep them alive long enough to do that, fingers crossed!


Gardening

My Misadventures in Gardening: Pomegranate

feature23.jpg

Here's another grocery store fruit growing experiment! I love pomegranate and usually end up buying some when I can find them at the grocery store. I recently bought one, and after eating some of it, I decided I should try to grow some of the seeds. Pomegranates have a lot of seeds so unlike the mango and sapote I could plant quite a few of them and if some don't grow or some die off it won't be such a big deal. So here we go! First, obviously I cut up my pomegranate. I highly suggest watching this video to see how to cut up a pomegranate correctly. No water necessary and it doesn't make your kitchen counter look like the scene of a crime afterwards.SAMSUNG CSC SAMSUNG CSC SAMSUNG CSC

Look, no mess and all the seeds are in tact!

So to germinate them I actually tried two methods, the zip lock method and the egg carton method. I actually started the zip lock ones a week earlier than the carton seeds, but nothing happened and then they got moldy. So, here, I'm showing the more successful endeavor.

SAMSUNG CSC

Here are the seeds I harvested and dried overnight along with the recycled-cardboard-paper-pulpy egg carton. I cut the top and the little flap on the other side off of the part that holds the eggs. I just threw away the little strip but I stuck the egg holder part into the top to help strengthen it, because after you water everything, the water will soak into the cardboard and it'll all get soggy. You could use styrofoam egg cartons if you don't want to deal with the sogginess, but it's kind of nice after you've got seedlings going because you can just rip the carton apart and plant it straight into the new pot.

SAMSUNG CSC I threw in a little soil into each section, poked a small hole with my finger, dropped in one seed and covered it with soil. Obviously I had way more seeds than I actually planted. I just threw those extra seeds into a bag so I had a backup plan if these seeds didn't work out.SAMSUNG CSC Here they are all planted! I saw that some people did seed scarification to their pomegranate seeds so I thought I'd try that out with half of these guys. I just used a file and filed them lightly. I'm not sure if you can see it well or not but I marked off half of the carton with a pink sharpie to show where the scarred seeds were planted.SAMSUNG CSC Watered them pretty good.SAMSUNG CSC And I wrapped them loosely with saran wrap in order to create a green house effect.SAMSUNG CSC Here I put it in the windowsill next to my awesome Aquafarm, which is the only thing I've been able to grow herbs in, hah.

I actually started these guys a while ago so within the next few days I'll post an update where I transplant the ones that ended up growing. I should also mention that I started a few kiwi seeds in the same manner as these pomegranate seeds a couple days ago so hopefully within the next week or so I'll have something to show for those guys!

Gardening, Misc-

My Misadventures in Gardening: Mamey Sapote

feature1.jpg

When I was at the grocery store the other day I noticed some huge rocks among the mangoes and pineapples in the fruit section. These things were actually a fruit called mamey sapote. My fiance and I like to try weird new fruit, so I grabbed one and continued on with my shopping. When I got home I researched a bit about this weird fruit and found out it's supposed to taste like a mix between a sweet potato and pumpkin. Interesting. I also found out that you're supposed to let it sit on the counter for a week or so to let it get good and ripe before you eat it. I'm impatient so right when the week mark hit I cut this guy open. I probably should have waited longer. SAMSUNG CSC SAMSUNG CSCSupposedly when the fruit is good at the store, the flesh inside should be bright pinkish red when you scratch off some of the skin. If the flesh is yellow or green don't buy that one; it was picked too early. After that you wait for the fruit to get good and ripe before you cut into it. Apparently you're supposed to wait until the skin holds an indent when you poke it. Of course I didn't wait that long.

SAMSUNG CSCAt this point I realized I really should have waited longer. In videos I watched I people easily cut into the fruit but for me it was very hard. SAMSUNG CSC

Cracking this thing open.

SAMSUNG CSC

And here's the inside! With the huge seed inside! When the flesh is really ripe you're supposed to be able to just scoop it out with a spoon, but since mine wasn't ripe the texture was more like a sweet potato. There was a tiny area where it was soft like that so we got to taste test it a tiny bit. It was... interesting. It was pumpkin-sweet potato-melon all at the same time. Very strange. All in all, if I found one of these at the store again I'll buy another one just to try one more time since I really know now the importance of letting it get really ripe before you try to eat it.SAMSUNG CSCBack to the seed: oh yeah, look at this guy! It was already cracking open (you can't tell in the photo. It's cracked on the dark brown part of the seed). You know I'm going to attempt to grow it. I did the zip lock method, the same method as the mango.

Speaking of my mango plant, here's a little update:

A few days after I planted the seed, a little sprout started to emerge!

mango1

And only three days later it's already this big!

mango2This thing is really taking off. Super exciting!


Gardening

My Misadventures in Gardening: Wedding Edition

feature022.jpg

Oh gosh, this is going to be a good one. So I'm currently planning my wedding, which will be at the end of March. I've been trying to figure out ways to help keep the cost down, and being an avid crafter I'm planning on doing a lot of diy (but hopefully still nice-looking) stuff. Surprisingly (to me anyway) a big expense would be flowers. In true fashion, I thought, "Psh, I could do that." And a little while later, I was anxiously awaiting my package of assorted flower bulbs from easytogrowbulbs.com that I was totally going to grow.

If you read my first gardening post, you learned that I'm absolutely horrible at growing things. So why did I think I could do this? I have this weird cycle where somehow I start believing that I have a green thumb. I go and try to grow plants and then inevitably I end up killing the poor things. It happens every time.

I just so happened to be researching the cost of flowers while I was in the beginning of this cycle and everything came together to form the perfect storm. I'm trying to be optimistic about my chances this time and I made sure to so a lot of research for these flowers so hopefully I'll finally break the cycle if not just for the wedding, for the rest of my life! Also, I totally sent a few backup bulbs to my mom and future mother-in-law because they're much better at this whole plant growing thing then I am. So if I fail, it all falls on their shoulders! All joking aside, if this does fail spectacularly, best case scenario, I'll have enough flowers to arrange a bouquet for myself and I'll just have to diy some different center pieces for the tables. At the moment I'm thinking paper flowers (if done right they can be quite beautiful). Worst case scenario I'll just have to buy some flowers and arrange my bouquet the day/night before.

But enough of all this silly back story, you've come for the good stuff, and here it is! My first, and main flower, the ranunculus:

SAMSUNG CSC

These things are so weird looking. SAMSUNG CSCI was scared of root rot while trying to germinate these suckers, and I read that you could soak them for 24 hours before planting, then after you plant them you begin to water after they start showing signs of growth.

SAMSUNG CSC

Oh my, they got quite big.SAMSUNG CSC Time to plant! But one problem. I had forgotten to pick up some rocks and from my basic research, I figured out you need to provide drainage in the bottom of the pot. I didn't feel like going back out during rush hour to get rocks so I did the next best thing; I turned to the internet. "I don't have rocks for the bottom of my pot! What do I do?!" I was surprised to learn that some people suggest using packing peanuts to help with the drainage in the bottom of their pots. Interesting! And guess who had recently received a package filled to the brim with those things?SAMSUNG CSCLooks like packing peanuts it is! SAMSUNG CSC

Oh god, I hope those sites I was looking at weren't joke sites and this is actually a thing that people actually do. SAMSUNG CSC Whelp, it's too late now anyway. Let's plant! So you're supposed to plant these with the tubers pointing down.SAMSUNG CSC I spaced them out evenly and covered with about an inch of soil.SAMSUNG CSCHere are my next flowers: watsonia- snow queen. SAMSUNG CSCThese required about four inches of soil on top. Fingers crossed!SAMSUNG CSC And the next flowers are: freesia- double white. Not pictured, me covering these with about an inch of soil.SAMSUNG CSC

For buying the amount of bulbs I did, they threw in a free pack of "adventure bulbs" to help encourage people to find our about/grow new flowers. These tiny onion looking bulbs I ended up getting are allium drumstick. We'll see how they go! SAMSUNG CSCHere are but a few of the freshly planted bulbs up on my credenza while they germinate. The plan is to eventually move them outside once they're growing well. (One side note; this is another post that was delayed a bit. I planted everything on the 2nd, so my next update for these guys will seem like they grew super fast when in reality they're normal bulbs with normal growing rates. Nothing super here!)

I sure hope this works out, how great would it be if my first real gardening success was growing flowers for my own wedding!


Gardening

My Misadventures in Gardening: Planting the Mango

feature2.jpg

Yesterday I posted about the mango I decided to try to grow. There was about a weeks delay from when I took the pictures and when I made the post, so now it's already time for a weekly update!SAMSUNG CSC Let's open this guy up and see what's happening.

SAMSUNG CSC

I see a root! This is very exciting for me. I'm a very impatient person when it comes to plants (which is probably why I suck so much at growing them) so being able to see progress already is pretty awesome. SAMSUNG CSCI'll be honest though, I didn't wait a whole week before opening it up to see what it was doing... I opened it almost every day to check out the roots progress. It's probably not good to be disturbing the seed that much so I made the decision to plant it already so I'll be less tempted to mess with it. Most people that I've seen do the zip lock method usually wait about two weeks before planting.  SAMSUNG CSCHopefully I don't mess this up! SAMSUNG CSC

I took a pot of soil and dug out a shallow hole for the seed.SAMSUNG CSCI planted the seed root side down, obviously. The tree will sprout from the same spot as the root, so I just laid the seed on it's side. SAMSUNG CSCI placed the seed slightly off center because I want the tree to grow from the middle of the pot and as I said earlier, it will sprout from the same end as the root grew from.SAMSUNG CSC See? The little root is poking out from right here.SAMSUNG CSC Then I covered it with a little bit of soilSAMSUNG CSC And now it's labeled and ready to grow! I planted it already to make it less tempting for me to mess with it and see how it's doing, but I don't know how well that's working. Every time I pass by the pot now my finance laughs at me because I just stare at it like I have x-ray vision and I'm trying to see how the seed is progressing. Don't worry, I haven't dug it up to check on it...

...yet.


SAMSUNG CSC

And to end on a not-so-good note, and to show how bad I am at this stuff, here's another mango seed I tried starting with the zip lock method. I actually had two of them like this (one started 9/25 and the other 9/28) and unfortunately they both got really moldy. The seeds came from a different type of mango but I don't think that's why they molded over. I probably wet the paper towels too much or something. Well, at least I had one of the seeds make it through this stage!

Stay tuned for more mango growing updates!

Gardening

My Misadventures in Gardening: Mango Beginnings

feature021.jpg

I am terrible at growing things. I often reminisce about how, when I was growing up, we'd always have houseplants inside and I remember having to go around and water them for my mom and it was just nice to have some living, green plants in the house. It's a regular occurrence where I'll remember those times and I'll go and try to have a green thumb, only to fail horribly and kill the poor plant. I'm pretty sure the cycle is starting again, and I figured I could record me failing (or hopefully NOT failing!) Maybe this time will be different. 100th times a charm!

I've always seen instances where people plant the seeds from the fruit they bought at the grocery store and they grow houseplants from them. I thought that was a fun, good idea to try. You're already buying the fruit to eat it, so now instead of just throwing the seed away, I started keeping select ones to attempt to grow! This leads to my first "experiment": the mango.

SAMSUNG CSC

I'm not the biggest fan of mangoes but my fiance LOVES them, and if you're a mango fan like him, you'd know that a rather large, flat seed is housed in the center of the fruit. But how do you get it completely out? Let's find out!

SAMSUNG CSCCut down each side of the mango. Be careful not to cut into the seed.

SAMSUNG CSC

Cut out the seeds husk from the rest of the fruit. I have no idea if I was doing this right, but my fiance, the mango aficionado didn't correct me, so I'm assuming this is okay. SAMSUNG CSC

Now that you have most of the flesh removed, take a butter knife and scrape off what is left on the husk. At this point some people let this dry out for a few days so it's easier to handle. This thing is slippery. I just attempted to dry it off some with a paper towel. It was still slippery, but I managed.SAMSUNG CSCAlong the edge of the husk there's a portion that feels a bit thicker then the rest. I used my knife to scrape it down more to reveal where I could split it apart.

SAMSUNG CSC

Then I used the tip of the knife to start opening it. You know, like shucking an oyster. Everyone has done that, right? Again, be careful not to nick the seed.SAMSUNG CSC

When there was enough room for my fingers, I just pried it open the rest of the way with my hands.

mango2

Come out!mango3

Ta...SAMSUNG CSC

... da!SAMSUNG CSC The aftermath.SAMSUNG CSC So to germinate the seed I opted for the "wrapped in a wet paper towel and placed in a zip lock bag for a week or two" method.SAMSUNG CSC SAMSUNG CSC

Labeled and dated.

SAMSUNG CSCAnd put in a sunny window. Obviously I did this like a week ago so within the next day or two I'll check on this guy and see if he's ready to be planted! Fingers crossed that this will work!


jewelry

New Etsy Store Additions

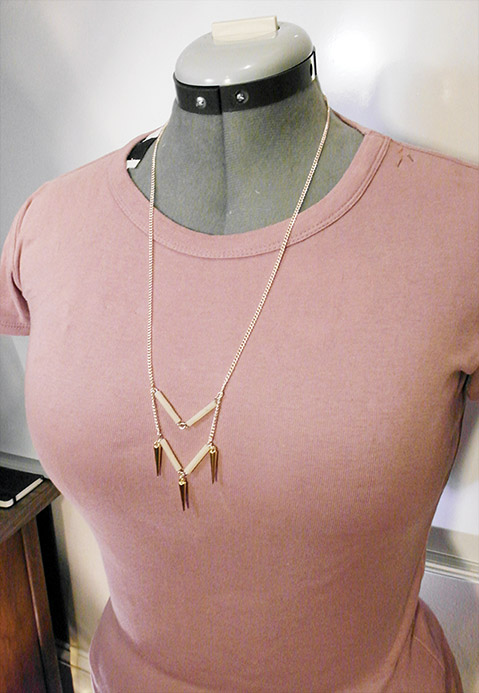
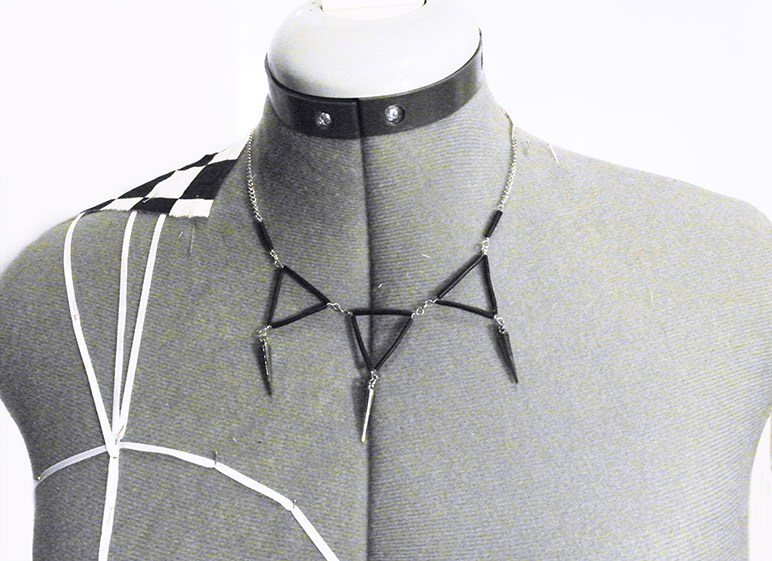
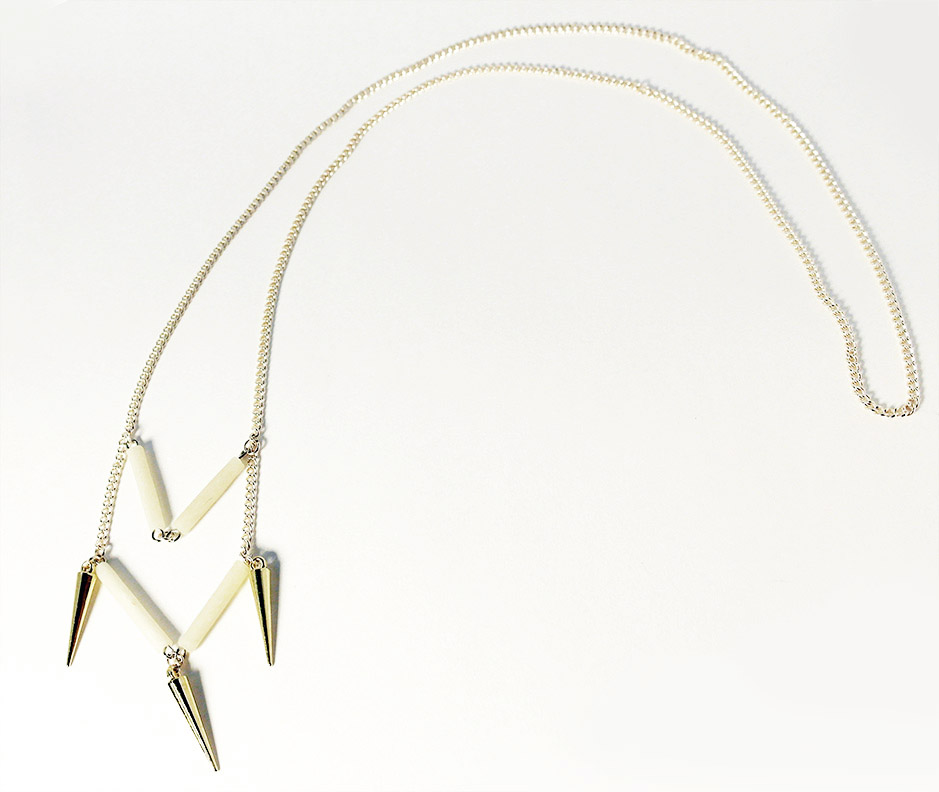
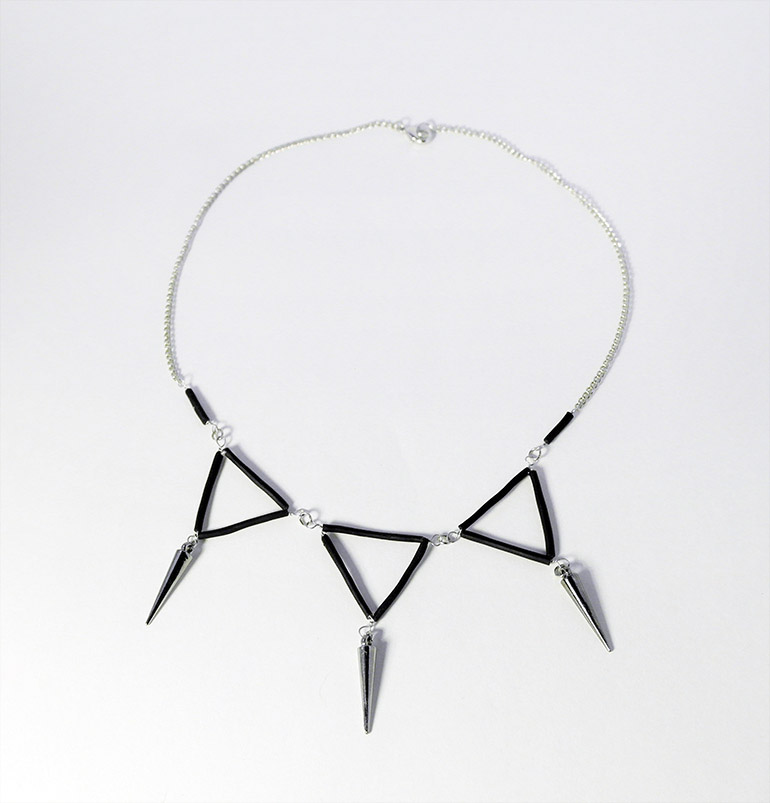
I just wanted to make a quick update letting you all know that I'm actually stocking my store again. I was inspired by animals with these new pieces I started making. I started calling it my Fauna Collection and I'll be adding more soon!

For the Home, Other

Homemade Cat Tree

feature21.jpg

Oh hey, it's been a while. I made this a while ago, but surprise surprise, I'm just now getting around to posting it. :) I've been wanting to make a cat tree for a while but I had been very wishy washy about actually getting off my butt and doing it. However, after I saw a picture of one made with tree branches that looked super cool, I finally got the fire under my butt to go and make one(and to force the fiance to help!)

SAMSUNG CSC

Gremlin is spoiled.

CTH0007 Deluxe Seedling small

This one is the tree that inspired me. I loved that it was made to look like an actual tree. However, it cost like $700. So of course immediately i thought, "Psh, I can make that." And you get to see just how I did.

IMG_20130717_125119

I was lucky enough to get inspired right after they cleared the empty lot next to my house, so there were plenty of decent sized tree branches for me to sort through. Here are the winners.

IMG_20130719_132305

Then I had to trim the branches to size. I love my pull saw!

IMG_20130720_154727

Here are all the pieces ready to be put together. Unfortunately I didn't get any pictures of me making the carpeted components. Basically I made a base and a platform out of plywood and covered it with carpet. (Remnant carpet, ftw!) For the half cylinder platform I took a concrete tube mold, cut it to size and then in half. I hot glued the halves together to help make it stronger and then glued the carpet on.

IMG_20130720_155714

Here's where my fiance had to step in to help. After eyeballing where I wanted the main branch to be, I carefully tipped the branch and base over so he could drill through the base and into the branch from the bottom. We ended up screwing in a pretty decently sized screw to hold it in place and then reinforced it with smaller (but still pretty substantial) screws. My cat is a big boy.IMG_20130720_165030

And just a few screws later!

But really, we didn't get any pictures of us assembling the rest of it sadly. This part was all pretty much just trial and error. We'd place something and see how the other components would fit in and we adjusted the pieces until it was to our liking. Basically we just attached the shorter stumpy branch onto the base just like the first one and then screwed the platform onto it and into the tall branch. The carpet hides the copious amounts of screws we used to keep that thing in place.

I positioned the thin branch on the platform so that it helped support the top platform and we screwed all those in too. I then took the drill and drilled a few random holes into the branches and stuck some fake leaf branches in them. Initially I was going to hot glue them in place, but the drill bit I used made a hole that they fit so snugly into that I didn't feel the need for the glue. If Gremlin ends up pulling any of them out then I can just glue them back in later.

IMG_20130720_165431

I wrapped the short stubby branch with sisal for a nice scratching area. Which he has yet to touch even still. IMG_20130720_170656

So since my cat is a big burly man-cat, I decided to make his tree pretty with flowers. I hot glued those suckers on and prayed he wouldn't see them as toys and rip them off. (Which is totally what happened. Oh cats.)

IMG_20130720_171531And here it is finished! Complete with the I'm-too-excited-about-how-this-turned-out-and-I'm-going-to-take-a-picture-before-I-even-clean-up mess everywhere.

IMG_20130720_172750

The tree fit perfectly nestled into the corner of our bedroom. Later, I ended up fluffing out the leaves so they didn't look so... flat. IMG_20130720_173425

Gremlin is unimpressed.

IMG_20130720_180128

And then a short while later I passed by and saw this! I think he likes it!IMG_20130720_210914He enjoys the top too :)

It took about 2 to 3 days of working on it off and on, it's about 5 feet tall and it cost under $100 to make. I love it!


Bedroom, For the Home

Tufted Headboard from an Ugly Couch

So you probably remember my post about painting my loveseat and I mentioned how my plan was to reupholster the bigger couch. Well, I sort of halfway did that. While I was trying to decide what kind of fabric to cover it with, we were storing it in the bedroom because we didn't have any other space for it. I started to think about how even after I did that project, where would I put the finished piece? The apartment could really only comfortably have one six foot couch in it and I didn't feel like getting rid of the couch I so painstakingly recovered a few months ago. That's when this new idea popped in my head. This whole time we've been in this apartment I knew I wanted to make myself a tufted headboard and after having the couch in our bedroom lined up perfectly with our bed for a while it finally clicked in my head to covert the couch into a headboard. Here's a photo of the couches I found at Goodwill. The one on the right is the one I used for this project. I hated that fabric, so it had to go.

I slowly started taking the fabric off the couch, with help from my cat Gremlin.

I only really bothered to remove the fabric on the backrest and arms of the couch. Why bother removing the fabric from the bottom when it was just going to end up in the dumpster?  I also saved the buttons to reuse them for this project.

After exposing the wood, I roughly marked where I wanted to cut the couch.

Action shot with my new favorite tool, a Japanese style pull saw.

Here's the couch, now officially in two pieces. I ended up salvaging the three front legs, some of the foam and some straight pieces of wood from the bottom part of the couch. You never know when you'll need random scrap pieces of wood.

Here are the buttons I salvaged. I just painted them with two coats of acrylic gold paint.

I used some of the extra foam from the other side of the couch to fill in some of the spaces and to cover the exposed wood.

The fabric I used ended up being some fabric I got at a thrift store market thing down the road from me. I forget the exact price I paid for it, but it was obscenely cheap. Like about $5 for a bolt that had a little more than 8 yards of upholstery fabric on it kind of cheap.

My first tufting project. It started off kind of difficult, but I got the hang of it after a while.

Done with the tufting and the fabric is all stapled down. Now it's time for the side pieces.

I used the old fabric side pieces to create a pattern, but since halfway down the sides there would normally be arms of the couch, there was no more of the old fabric to make a pattern from so I had to do some drapery work to figure out how exactly to cover the rest of the sides. I also recovered the old piping from the side pieces with the fabric I was using. Conveniently for me, whoever made the couch used way more piping than they needed originally for the side pieces and it actually ended up being the perfect amount of piping for the new size of the sides.

And here it is finished in my messy living room!

Here it is in the room! Now I definitely need to buy some new sheets. I'm extremely happy with how it turned out and even though this isn't technically a tutorial post, I hope it was educational for you guys! :)


Art

Daily Self Portraits Update #7

Here are my portraits for this week. #55 is my favorite one.

#53 Photoshop CS6

#54 watercolor, India ink and acrylic

#55 Photoshop CS6

#56 watercolor and India ink

#57 India ink

#58 Photoshop CS6

#59 watercolor and acrylic


Misc-

Daily Self Portraits Update #6

#46 watercolor and gouache

#47 acrylic

#48 acrylic

#49 watercolor and gouache

#50 watercolor, gouache and acrylic

#51 India ink, acrylic and metallic craft paint

#52 watercolor, India ink and acrylic

The last image is how #49 and #50 should be viewed with proper lighting.